Composing

Welcome to the information page about Composing Music.
Composing Music is a first on the list of things to do, or learn. Although modern music allows crossing the borders between Composing, Recording, Mixing and Mastering. Composing is a good starting point when you newly play an instrument or you are just starting to get interested in music making. On the upside there is a lot information around and known about chords, notes, scales and structure. The downside is that this information is almost all reading and understanding, it can be experienced as uplifting or some find it very boring. Sometimes it will be difficult to understand when you read about technical things about music. Just because music is worldwide played and enjoyed, you can find information on the internet about ways to learn music, lessons and opinions. Maybe you will be overblown by all this info. On this page we try to give you an overview what is available and what is important to know when composing a song or track, or learning to play an instrument. On the other hand this SINED site is off course only one of the many sites about music.
Improvisation
Improvisation is the practice of acting and reacting, of making and creating, in the moment and in response to the stimulus of one's immediate environment. This can result in the invention of new thought patterns, new practices, new structures or symbols, and/or new ways to act. This invention cycle occurs most effectively when the practitioner has a thorough intuitive and/or technical understanding of the necessary skills and concerns within the improvised domain. To me, it is important to stay with an improvising mind. Whenever you’re playing an instrument of any kind, you can always relax and enjoy your instrument. So a lot of people starting will be advised to read notes and scores, learn to play them and learning a lot of technical stuff about music. That will be helping making you understand music more, it is not the only way to do so. Keep in mind that just playing your instrument out of your head exploring the possibilities, relaxing, improvising and goofing around is just as supported and commonly accepted as a part of music making. Some people do not want to learn all this technical stuff, some do. It is all up to you if you do everything by the book or not. And now days there are a lot of artists and recordings around that were made by people who never even could read a single note out of a score. They are just bashing tunes out of their instrument or equipment and are having a blast doing it. They are successful with their way of doing things, their style of making music. Experienced players who are theoretical and well educated, who know to read and play all sorts of scores, scales, chords, etc, maybe good at reproducing music that has already been made. Maybe they will not be as good in composing music or playing their instrument in an improvised session. Maybe someone will tell you that you are playing wrong chords or notes, because technically it is done in a structured way. Maybe someone will tell you that reading scores and knowing chords, scales is the most important thing to learn playing an instrument, well then it is good to know you are never doing anything wrong or right. Music is an open format; you can do anything you like. If you will be successful or not, it depends what you are looking for in Music Making. This will be you deciding what is important for you to learn or not. Investing in time and relaxing with the whole subject is a good thing to do. Watch and learn from other people, never be afraid that they might be better and more educated. If music becomes a fight to be the best and making you win the game, this will not help when you are not relaxed playing music. Just understand that everything you learn takes time to be processed by your brains, playing and repeating learn, investing time and patience is best. Playing an instrument means practicing a lot, knowing your instrument. Also teaching yourself that improvisation is just as important. Just remember not to get hasty and relax, take your time to explore what you’re doing. To me there are two kinds of players, some can improvise and some just play what has been given to them. Ok you can learn notes, chords, scales and every score you can find, you will get better playing your instrument and you will get better at learning overall music. But this will only go for music that has already been made and written, it’s good to learn from others. But it does not really help you improvising and inventing new. Mainly for composing or making music, improvisation is a key element. In a beginning rock band you might find 4 or 5 players. Most likely not all players are in the process of composing the music for the band. Most members of the band will be only playing what has been given to them by the other band members who compose or write the music. It is likely because of communication and band structure that only 1 or 2 players actually are getting involved with the composition of songs, they write almost all music for the other band members. The other players never get so much involved in composing the material they play, because this might be lack of improvisation on their part or just band structure agreement, who is running the show. Some players are just happy to just play that has already been written. Some players have learned so much about what has already been written, they know their chords and progressions, because they have learned them by the book. It’s ok, but it might keep them from inspiration, improvising and invention.

Improvising, Inspiration and invention are needed to create!
The creative side of music is the most comprehensive and rewarding thing once you get the hang of it. Learn yourself that although doing things by the book, does not mean that you will be best off. It means you are educated, it is proven ground. You can learn from what other people do and have done in the past. Remember that people are creative by themselves. You can create new melodies and chord progressions, you can learn by improvising and you will re-invent yourself while doing it, exploring the unproven ground. Composing and Making Music is getting inspiration, improvising and invention from others or you reach into yourself to get it out. So if you are playing or making music, just understand that time is the main factor. Dividing time into learning and goofing around (improvising) is important. Once you have invested time playing and improvising your way, you will be more educated by yourself and how you like to play your instrument or equipment. Learning is time consuming, take your time and do not get frustrated by overdoing the practice. Your mind most be settled down and you most understand what you’re doing, this might take more time then you think it will be. Rushing things is never good. It is good to know there are always people better (or worse) then you make up your own mind in these situations. Learn from it, instead of competing. Players who compete with other players is a good thing, but over competing is not. Music is a set of instruments that each play their part of the whole. This means that competition is not a factor in written music, getting the best out of it is the way to go. If this means sacrificing yourself to have more room for inspiration and improvising, that will be a good thing. Making and creating music is by itself easy. Sit down and play. But for newcomers the vast available information might get them off-track, they are egar to grab hold of any information or learning process. There is a good chance you will be advised to learn all kinds of stuff and you will be over educated. There is a chance that by learning by the book, you will only play by the book. The more time you spend on playing by the book, the more chance there is you will get stuck by being thought structured and you might be hanging onto what other people have done before. Remember music is more free then that and there is more success to be made with the basics, making things complicated is most likely not the way to do music. Once your improvisation has resulted in new music or compositions, you will get inspired even more with the results.
Step 1: Writing a Song
Without a song, how could one possibly begin to record. Typically, writing a song starts with an idea or an inspiration. It may begin with lyric and a melody, a chord progression, a unique sound/loop or an improvisation that takes on a life of its own. Once this idea has developed enough to stand on its own merits, the music production process can then begin. A music production must support, in every way possible, the message or prevailing emotion of the song. The most common mistake I see today with young producers and songwriters is that they focus on the sounds or production elements before the song is finished being written. For certain styles of music this can work if the production invokes a feeling or emotion that inspires the lyric and melody. In many cases though, the production sounds disjointed because the lyric and melody end up being limited to the production style or arrangement. What happens next is that the arrangement must be adapted to the lyric and melody and the production can easily lose the coherency necessary for the song to carry its message.
Traditional Songwriting
Traditionally, writing a song is done with a singular instrument, a lyric and a melody. That's why so many songs start out as a piano and vocal or acoustic guitar and vocal. If you were writing a song with a group of musicians, they would likely become bored or disinterested if you spend too much time experimenting with melodies or new lyrics. When writing a song, it is typically best to work through these issues alone or with a writing partner that will help you quickly dismiss ideas that just don't work. Once you have flushed out all of these issues the music production process can really begin in earnest. When carefully crafted, a song will hold the interest of the listener. A song tells a story that conveys ideas and emotions. If the story is something the listener can relate to then they will listen as long as it is told in a compelling way. Great storytellers are very dynamic and interesting people as are great recording artists. They convey the emotions and events in a song with vivid imagery that takes you on a journey. Although the recording artist and the songwriter are not always the same person, the pairing of artist and songwriter is critical to the success of a song. Sometimes they work together in the process of writing a song so that the artist can add their input and perspective of what the song is about. If the artist cannot relate to the song from their own personal experience, then it will typically sound hollow. The passion must be there for the song to be taken in by the listener.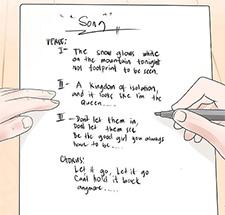
Modern Songwriting
The blessing of the process for writing a song today is that there are so many resources available, you don't need a band to make a music production. You can create a template production that allows you to work on your ideas without wearing other people out by making them play the same parts over and over again. The use of music loops and samples is an exceptional way of getting the creative juices flowing and setting the stage for writing a song that's inspired. This process can also have pitfalls. One of the most common is that the songwriter may fall into the trap of focusing on the production elements instead of just writing a song. Without a good sense of judgment, the songwriter may ignore the real problems which may be that the lyric or the melody just isn't very good. By focusing on the production elements they may waste hours, days weeks or months trying to salvage a song that is not really ready for the music production process. It is for this reason that I believe most of these tools are best used in the demo stage of the music production process. I've seen too many songwriters lose their flow while writing a song because they spend hours trying to work out technical issues instead of just writing. Keep the songwriting process simple. Always have a recording device with you to capture an inspired idea. If you have a smart phone, your one app away from having a portable recording device with you at all times. For those that struggle with writing a song, good lyrics and melodies or finding good subject matter to write about, there are many websites and forums on songwriting to hone those skills. Writing a song is an art form in itself. However, to start the music production process, the quality of the song cannot be ignored. If you want to become a music producer, you cannot ignore good songwriting skills as a necessary part of your repertoire. The ability to assess issues and make necessary corrections will go a long way to helping you be successful. It is the song, after all, that the listener will relate to most, not the production. To be very clear, the process I have been talking about here is all about songs that are meant to be the center of one’s attention. Although many of the ideas presented here will also work for other forms of music, the focus here is on lyric driven music. Since all music carries some story or emotionally driven feeling, the concepts here can be adapted to the production style to achieve similar results. A jazz or classical record, for example, also convey emotions that tell a story. Even though the story may not be as explicit as a lyric driven song, the same process can be used to aid the listener into the interpretation of that story. The second is the way RNB or Rap music is made, that can be done with 12 bit samples or with a sequencer set on quantisize 1/16. But this might be for composing. Anyway the less is more. Sometimes people dont't need the full content of the song tekst you have written, keep in mind that suggestions in the text or song, leaving things out, might be better and more enjoyable for the listener.
Basic Principles of Writing a Song
To help lend a broader understanding of writing a song, let's go over some of the key elements of good songwriting and how they affect the music production decisions you make. These four basic points of focus must be addressed before the song enters the recording phase of the music production process. What the hell is your song about? What feeling are you attempting to convey? Love, jealousy, hate, anger, fun, etc… These decisions lay the groundwork for EVERY other decision that is made including what sounds and instruments are selected in the production process. Writing a song about heroin addiction, for example, is not going to have bright tinkling bells as part of the music production. In this example, the musical elements of the song will need to be dark and oppressive sounding so that they support the prevailing message of the song which is most likely about depression and helplessness. Conversely, writing a song that's meant to make people party and dance is not going to be filled with dark heavy depressing sounds. The elements used here will be brighter, punchy and focussed. They will need to pump and breathe at the pace a person would dance to. While this may seem obvious on the surface, the real artistry of writing this type of music is doing something unique while remaining within these parameters.
Telling the Story
How do you plan to convey this message? These decisions all start with the prevailing message or feeling from the song. This can be as simple and using a minor key for a sad song versus a major key when the message is more positive. The blend of melody and lyric must support each other in every way. If the prevailing message is one of irony or sarcasm, writing depressing lyrics in a major key could convey a sense of humor or show a person trying to cover up their true feelings about the subject matter. There is no way to underestimate the importance of this relationship. The human brain is wired to receive and process information in a very particular way, if you go too far outside of these parameters, the message will be lost on most that care to listen. When presented well, you open a doorway to the listener's consciousness. From there it is up to you to keep the door open by continuing to hold the interest of the listener. Of all the topics surrounding the music production process, this is the one with the least number of technical solutions. No plugin, compressor or effect will cover up a bad song for very long. No processor will change the attitude or feeling of a song. These tools can only enhance an energy that must already be present. In the example above, heavily compressing the recording may help to convey the feeling of being trapped. This approach may work against you, however, if the song focusses on the feeling of freedom while on the high. This is the reason that the songwriting process is so critical to get right before even attempting to start to make a music production out of it. If a song can't hold the interest of a listener when presented in its most simple form, then it likely can't withstand the music production process without becoming and endless parade of band aids.
Holding the Attention of the Listener
How would you like to present the song? How will the dynamic energy of the song flow? Do you want it to start out simple and end big? Do you want it to start out big, drop down in energy and then explode in the end? Do you want it to maintain an even energy level throughout? Any one of these methods can work if the selected method supports the message of the song. The classic structure for a song starts with a verse which presents a story or situation. It tells you what happened, how you got into this situation in the first place. The chorus section then conveys the emotional result of the story that has just been told. It tells the listener what has resulted from the events told in the verse. Usually, there is a back and forth profession between verse and chorus that may lead into a breakdown or bridge section. The breakdown or bridge sections will take you to another perspective of the story. It may be the truth of what has transpired, it may represent a reprieve from the story so that the impact of the remaining story is more dynamically felt when the next chapter is told. This traditional method of songwriting is not necessary if a creative way to keep the interest of a listener is created. A song about the repetitive nature of living and working in a big city may benefit from a repetitive loop or programmed rhythm. The programed, repetitive nature of the production may help to convey the feeling of living a robotic life, repeating the same pattern of living day after day. The reason why the traditional verse, chorus, bridge method works is that there is a template that will most likely to hold the interest of the listener if presented well. Every story has a setup (verse) a problem or dilemma (chorus), a realization or solution (bridge or breakdown), and an ending. The ending can be any of the other song elements or something completely different depending on how the story ends. A song is basically a 3-5 minute movie in audio form. I like to use visual references when talking about any kind of audio because the reality is that sound is a secondary sense to sight. Up until the age of synthesis, every sound that we ever heard came from a physical object that we could visualize. This programming has been built into us for thousands of years and serves us well as a survival mechanism. Sound allows us to perceive and interpret things we may not be able to see. Sometimes they are dangerous things, like a car racing through an intersection you are about to cross. Sounds presented well in musical form also help to support or create the images or feelings that are presented in the song. A song is no different than any other form of audio. A song can create images in a person’s mind. They listener may recall past events in their life that relate to the story being told in the song. The music production helps to support that imagery. When properly done it may bring a person back to their own personal experiences that they can remember and relive through your song.
Feeling Over Thinking
When a song is well written the dynamic of the song will be clearly spelled out by the story. It will help you decide if you should use a breakdown section instead of a bridge section. It will help you decide whether to fade out on chorus sections, a vamp section, end the song with big crash or just a simple melody. Unless you are writing a song that is meditation music or attempting to put the listener into some kind of hypnotic state, people will respond most to differences in things, not sameness. Without this progression of dynamic changes, people will get bored and turn you off. The best way to judge whether a song is ready for the music production process is to FEEL it instead of listening to it. In other words, stop thinking and just let it speak to you. Pay close attention to any section of the song where you lose interest or feel your attention is taken somewhere else. Does the song hold your full attention from beginning to the end? Does it drag on too long? Do you feel cheated of shortchanged by the song because it is too short? Do you feel satisfied after listening to it ? Remember, feeling will always outweigh thinking! If you find yourself trying to convince somebody why a song is good, then you should already know that something is wrong. If you have completely lost your perspective, shelve the song for a while until you can listen with fresh ears. Listening to the same thing over and over can have the effect of burning it into your consciousness. You lose the ability to be objective. Finally, when writing a song, never ask somebody what they think of it. Unless they are a professional producer or artist and are brutally honest people, they will usually BS you because they are your friend and trying to support you. The best way to judge a song is to play it in the background and just watch for reactions without soliciting one. Do they move their head or body to the beat? Do they leave the room singing the lyric or melody? Do they ask you about whose song this is? These are clear signs that something is right because they are feeling it, not listening to it. You may want sometimes to write down some melodies or chords.
Using symbols C, C#, D, D#, E, F, F#, G, G#, A, A#, B for writing down notes can be helpful when you need to capture melodies, baselines, etc.
Using common chords symbols like C, Cm, Am, or D can be handy to write down chords. Also for chords it can be handy to store how many times the chord is played. Using C/ Am/ E/ C for wiring down your chord list might not be enough. So you can write C/ Am / E (2/ 2/ 4), this means the C chord is played 2 times, the Am chord is played 2 times, the E chord is player 4 times. You can safely say that (2/2/4) is the same as (4/4) , but at least you can write down what your intending to do with the chords, take in account of how many times a chord is played inside bars. Anyway it is important to have a system for writing down notes, chords for melodies and composition. I do not use any scores for writing down, scoring is a better way of doing things, but it can be more complicated to learn and more time consuming.
Keyboard Playing
Playing on midi keyboards is a common thing, now days music making on a single computer can stand with one single keyboard for inputting notes and chords. When you are new to playing a keyboard we will first explain how it works while composing music.
Note C.

You can see we will start basic with the note C.
Octaves 1 to 5.

On this keyboard there are 5 octaves and the C note can be played five times from C1 to C5.
Notes C, C#, D, D#, E , F , F#, G, G#, A , A# and B.

Let’s investigate one of the octaves. The white notes labels are C, D, E, F, G, A, B. The black notes labels are C#, D#, F#, G#, A#. Together they form one octave.
Major Chords.

Now here is where it is getting interesting, to remember all Major Chords, remember the sequence 1-4-3!
The Cmajor chord is played by pressing C, E and G together.
Minor Chords.
To remember all Minor Chords, remember the sequence 1-3-4!
The Cminor chord is played by pressing C, D#, G together.
Major Septime7 Chords.

To remember all MajorSeptime7 Chords, remember the sequence 1-3-4-3!
The CmajorSeptime7 chord is played by pressing C, E, G, A# together.
Major Kwint Chords.

To remember all MajorKwint Chords, remember the sequence 1-3-4-1!
The CmajorKwint chord is played by pressing C, E, G, G# together.
Just a quick overview:
Major Chords 1 - 4 - 3
Minor Chords 1 - 3 - 4
Major Septime7 1 - 4 - 3 - 3
Major Kwint 1 - 4 - 3 - 1
You may want sometimes to write down some melodies or chords.
Using symbols C, C#, D, D#, E, F, F#, G, G#, A, A#, B for writing down notes can be helpful when you need to capture melodies, baselines, etc. Using common chords symbols like C, Cm, Am, or D can be handy to write down chords. Also for chords it can be handy to store how many times the chord is played. Using C/ Am/ E/ C for wiring down your chord list might not be enough. So you can write C/ Am / E (2/ 2/ 4), this means the C chord is played 2 times, the Am chord is played 2 times, the E chord is player 4 times. You can safely say that (2/2/4) is the same as (4/4) , but at least you can write down what your intending to do with the chords, take in account of how many times a chord is played inside bars. Anyway it is important to have a system for writing down notes, chords for melodies and composition. I do not use any scores for writing down, scoring is a better way of doing things, but it can be more complicated to learn and more time consuming.
The Keyboard.
Advice for all computer and keyboard users is that a modern midi keyboard will be sufficient. But there are some traps to avoid. Get a midi keyboard that supports aftertouch and is touch sensitive. Cheaper keyboards do not support this kind of features, so really be sure you have these features on board. Touch sensitive playing. When you press a note on the keyboard, not only the note is send to the computer but also how fast and hard you are hitting it, this is most useful when playing natural instruments alike a piano. You can vary playing soft and hard, this is more expressive then playing a keyboard without Touch Sensitive keys.
Aftertouch.
Another things the Touch Sensitive keyboard can do, is when you are holding a note you can press softer or harder when to note progresses. For like Organ playing this can be a handy feature to control the effect of the rotary speaker. With Touch Sensitive Keys and Aftertouch you can at least input what your fingers are doing and record it more natural, both are highly recommended. It is likely when you do not need these features, when you do have them you can always turn them off. But you are at least sure that you’re getting the maximum out of your midi keyboard.
Pitch Control.
The place for pitch control on a keyboard is mostly on the left hand side, next to the keyboards lowest keys. Most common are wheels, joysticks and faders for this kind of operation. It is handy to have pitch control on your midi keyboard.
Modulation Control.
The place for modulation control on a keyboard is mostly on the left hand side, next to the keyboards lowest keys. Most common are wheels, joysticks and faders for this kind of operation. It is handy to have pitch control on your midi keyboard.
Other Controls.
Some midi keyboard do have touchpad’s and more wheels and faders for you to assign. For people using synths on a computer these can be handy to adjust parameters. But these can be done with the mouse or controller equipment, it is not as important as it can be fun. Most controlling on cheaper midi keyboard is quite good, but one you start to be a control freak maybe you will later look for more controlling options.
Midi or USB connections.
There has to be at least one Midi-Out to connect to the computer. This can be done using an USB-cable or midi cable. I still prefer the keyboard to be connected to a real midi cable, instead of using USB. So when there is a midi in and output on the keyboard or USB, choose midi to connect to your computer. Although USB is faster than midi, midi is more stable then USB. It is a matter of timing, when notes arrive to a computer. Until now USB is fast but can deliver notes that are just not the same as you played. Mainly a good written USB driver will help, but some manufacturers do better just then others by making USB drivers for their keyboard. Midi is proven, so connecting the midi cable to your computer is a good safe option.
Do Re Mi - Finding Chords
Minor 1 - 3 - 4
Major 1 - 4 - 3
Septime7 1 - 4 - 3 - 3
Kwint 1 - 4 - 3 - 1
White and Black Keys
The white keys are C, D, E ,F, G, A, Flats ' b' and sharps '#' are all black keys called
C#, D#,F#,G#,A#. The ' b' symbol can be used when ever needed.
One Octave are 12 notes in a row called C, C# or Db, D, D# or Eb, E, F, F# or Gb, G, G# or Ab, A, A# or Bb, B.
Major
Any time you see a letter on its own for example “F” this is called F Major or “F Maj”.
The Major Scale are seven notes in order 1 2 3 4 5 6 7 .
Root - Tone – Tone – Semitone – Tone – Tone – Tone – Semitone
Do – Re – Mi – Far – So – La – Ti – Do
You choose a note or chord like C then count 4 notes up for E and 3 notes up for G, so C, E, G make up for Cmajor or just talking chords C.
Major = 1 - 4 - 3
Key Root 2n d 3rd 4th 5th 6th 7th
Cm c d e f g a b
Gm g a b c d e F#
Dm d e f# g a b c#
Am a b c# d e f# g#
Em e f# g # a b c# d#
F# F#/Gb G#/Ab A#/Bb B/Cb C#/Db D#/Eb E#/F
Db-m Db Eb F Gb Ab Bb C
Ab-m Ab Bb C Db Eb F G
Eb-m Eb F G Ab Bb c d
Bb-m Bb C D Eb F G A
F-m F G A Bb C D E
Minor
Every major key has a corresponding relative minor key. You choose a note or chord like C then count 3 notes up for D# and 4 notes up for G. So C, D#, G make up for Cm.
Minor = Notes 1 - 3 - 4
The minor key will be in the same key signature, and will contain the same notes as the major key. The only difference between the two is that the minor key simply starts on a different note. In the key of C Major, the relevant, corresponding minor key is A minor.
You can always find the relative minor key by counting up six notes from the root of the Major key. So in the C Major example: C, D, E, F, G, ->A<-, B, C.. The minor key starts on A.
Root – Tone – Semitone – Tone – Tone –Semitone – Tone - Tone
So if as an example we use the A minor scale which is the relative minor scale of C Major, we have the following sequence of notes:
A B C D E F G A
If we were playing in F Major, the relative minor would again begin on the sixth note in the key, which would be the D, and the sequence of notes would be:
D E F G A Bb C D
Minor.
If you see "Fm" or "Fmin" this is called Fminor.
Key Root 2nd 3rd 4th 5th 6th 7th
A-min A B C D E F G
E-min E F# G A B C D
B-min B C# D E F# G A
F#-min F# G# A B C# D E
C#-min C# D# E F# G# A B
D#- Eb- D#/Eb E#/F F#/Gb G#/Ab A#/Bb B/Cb C#/Db
Bb-min Bb C Db Eb F Gb Ab
F-min F G Ab Bb C Db Eb
C-min C D Eb F G Ab Bb
G-min G A Bb C D Eb F
D-min D E F G A Bb C
A semitone (or half step) is the smallest increment on a western musical instrument. On a piano, it is represented by moving from one key to the next, and on a guitar, it is represented by moving from one fret to the next. As an example, on a piano, moving from middle C to the black key directly next to it on the right, we would get a C# would be a semitone. Moving from middle C to the next WHITE key on the right, which is the D, would be a tone from the middle C (also known as two semitones or a whole step). On a guitar, moving from the open A string to the first fret on the A string A# would be a semitone, whilst moving from the open A string to the second fret B would be a tone (two semitones).
Major Again
So if we look at the C Major scale, it looks like this:
C (root note)
Then up a TONE to D
Then up a TONE to E
Then up a SEMITONE to F
Then up a TONE to G
Then up a TONE to A
Then up a TONE to B
And finally up a SEMITONE again to finish back on C.
All major keys follow this pattern, and you can start a Major scale on any note.
A couple of things to be aware of: Some notes have the same sound, but different names depending on which KEY they are in. For example, an A# is the same note as a Bb as if you move up ONE semitone from A it becomes A# and if you move down ONE semitone from B it becomes a Bb. Again, you don’t need to worry too much about this if it’s confusing you as we’re going to stick mainly to simple chords and keys.
Intervals and Chords.
Basically each note and the following note is half a step. From the first note to the next nearest note is half a step (the same) and is called a semitone. On a piano this is each following key. On a guitar this is each following fret.
Timeline.
The purpose of a time signature is to show you what type of feel, rhythm, and speed you should play certain notes, phrases and bars. There are various time signatures in music. The two most common are Four-Four time, and Three- Four time. The first number in the time signature denotes the NUMBER of notes you will be playing, PER BAR and the second number tells you what TYPE of note you’ll be playing. So if we’re playing in Four-Four time, you would have four even beats of quarter notes, and count like this: One, Two, Three, Four, One, Two Three, Four etc. If you were playing in three four time, you’d be using the same length notes, but only count three of them per bar, for example: One, Two, Three, One, Two, Three etc. The following are the most common types of note found in Western music, and each of these notes also has a corresponding rest that has the same duration. These are also found on the examples below.

1 2 3 4 5 6 7
C D E F G A B
C# D# F F# G# A# C
D E F# G A B C#
D# F G G# A# C D
E F# G# A B C# D#
F G A A# C D E
F# G# A# B C# D# F
G A B C D E F#
G# A# C C# D# F G
A B C# D E F# G#
A# C D D# F G A
B C# D# E F# G# A#
Ionian: No Change
Dorian: 3b,7b
Locrian: 2,3,5,6,7b
Lydian: 5b
Phyrgian: 2,3,6,7b
Mixolydian: 7b
Aeolian: 3,6,7b
Major: 1,3,5
Sus2: 1,2,5
Minor7th: 1,3b,5,7b
Minor: 1,3b,5
Sus4: 1,4,5
Major7th: 1,3,5,7
Add2: 1,2,3,5
Fifth: 1,5
Diminished: 1,3b,5b
Scales
Major pentatonic c d e g a
Neapolitan minor C Db Eb F G Ab B C
Hemitonic pent3 C D Eb G B Spooky
Pent var C E G A Bb Smooth
C-majdom7 C E G B yawm, a major scale
c-mindom7 C Eb G Bb minor
Harmonic mindom7 C Eb G B phantom minor
Melodic mindom7 C Eb F A Really F-majdim7,2nd
Esoteric 6th Cb D F A Dreams ?
Augmented C E G# Tence
Diminished C Eb Gb Also Tence
Minor 3rds C Eb Gb A Tence , dreamy
Harmonic minor C D Eb F G Ab B Sad
Melodic minor C D Eb F G A B Nice sweat
Whole tone C D E F# G# A# Whoa tripping!
Augmented C D# E F# G# B# nasty tension
diminished C D Eb F Gb Ab B Sad Ab+B = Bbb/Cbb
Enigmatic C Db E F# G# A# B Indeed very strange
Bizantine (gypsy) C Db E F# G# A# B Spooky
Locrian (arabian) C D E F Gb Ab Bb Drunk
Persian C Db E F G A# B Secrets
Spanish 8 tone C C# D# E F F# G# A# Ummm
Native American C D E F# A B Bold btw which tribe
Major bebop C D E F G Ab A B Funky min/maj
Barber shop1 C D E F G B D F G B Full
Barber shop2 C G C E G B Same as 1 but sad
Rain A# D E F# G# C D F# G# Messed pissed off
Crystalline min9#7 C G B Eb G D Eb Bb D
Gb Bb F Gb Db F A Very mad as hell
Popular blues C D# F F# G A# pissed crunchy
Blues II C D# E G Ab D# G Spacy dissonant
Total disharmony C Db E F G Ab B C D Eb
F# G A Bb C# D# Ouch thunder
Sus2 C D G Cool nine
C-phuq'd C F Ab Bb
Db-grace major C F Ab Db F G Db Gb
E-blues C D E G Ab Gb Db F
Neaplotitan major C Db Eb F G A B C
Oriental C Db E F Gb A Bb C
Double harmonic C Db E F G Ab B C
Enigmatic C Db E F# G# A# B C
Hirajoshi A B C E F A
Kumoi E F A B C E
Iwato B C E F A B
Hindu C D E F G Ab Bb C
Pelog C Db Eb G Bb C
Gypsy C D Eb F# G Ab Bb C
Maj phrygian C D F E F G Ab Bb C
Maj locrian C D E F Gb Ab Bb C
Lydian min C D E F# G Ab Bb C
Overtone C D E F# G A Bb C
Arabian C D E F Gb Ab Bb C
balinese C Db Eb G Ab C
Gypsy C Db E F G Ab B C
Mohammeddan C D Eb F G Ab B C
Javanese C Db Eb F G A Bb C
Persian C Db E F Gb Ab B C
Algerian C D Eb F G Ab B C D Eb F
Aeolian C D Eb F G Ab Bb C
byzantine C Db E F G Ab B C
Hawaian C D Eb F G A B C
Jewish E F G# A B C D E
Mongolian C D E G A C
Ethiopian G A Bb (b) C D Eb (e) F (F#) G
Spanish C Db E F G Ab Bb C
Egyptian C D F G Bb C
Japanese C Db F G Ab C
Chinese F G A C D F C E F# G B C
New pentatonic C D E F# A
jap penta C Db F G Ab
Bal penta C Db F Gb A freaky = Db-maj7dim4?
Pelog penta C Db Eb G Bb dreamy
Musical Definitions, Terms relating to TEMPO.
GRAVE - Very slow and solemn
LARGO - Very slow and broad, with dignity
LENT or LENTO - Very slow
ADAGIO - Very slow and expressive
LARGHETTO - Not as slow as LARGO, but slower than ANDANTE
ANDANTE - Rather slow, but with a flowing movement ("Walking tempo")
ANDANTINO - A little quicker than ANDANTE
MODERATO - Moderate speed- not fast, not slow
ALLEGRETTO - Light and cheerful, but not as fast as ALLEGRO
ALLEGRO - Merry, quick, lively, bright
VIVO - Lively, brisk (usually with ALLEGRO, as ALLEGRO VIVO
VIVACE -Vivacious, faster than ALLEGRO
PRESTO -Very quick, faster than VIVACE
ACCELERANDO - Abbreviated: accel. To increase the speed gradually
STRINGENDO - Abbreviated: string. To increase intensity by increasing tempo
AFFRETTANDO - To increase the speed gradually
ALLARGANDO - Abbreviated: allarg. Slower and louder
RITARDANDO - Abbreviated: Ritard. or Rit. Gradually slackening the speed.
RALLENTANDO - Abbreviated: Rall. Slowing down, gradually.
RUBATO - Literally means "Robbed"- a lingering on some notes and hurrying of others; free from strict tempo, but preserving the value of the rhythmic notation.
A TEMPO - Return to original tempo after a RITARD
TEMPO I (PRIMO) - Return to original tempo after a RITARD
Words that often accompany TEMPO Markings:
MOLTO -Very much. MOLTO RITARD means to slow down exceedingly
MENO - Less. E.g., MENO MOSSO means less fast (slower)
PIU - More
NON TROPPO - Not too much, e.g., ALLEGRO NON TROPPO means fast, but not too fast
POCO A POCO - literally "little by little". Used in combination with tempo markings. e.g., ACCEL. POCO A POCO means to increase the speed gradually over a span of measures.
Terms relating to DYNAMICS (from soft to loud):
PIANISSIMO -(abbr: pp). Very soft
PIANO - (abbr: p). Soft
MEZZO - Medium or moderately
MEZZO PIANO - (abbr: mp). Medium soft
MEZZO FORTE - (abbr: mf). Moderately loud
FORTE - (abbr: f). Loud
FORTISSIMO - (abbr: ff) Very loud
DIMINUENDO - (abbr: dim.) or the sign means gradually getting softer
CRESCENDO - (abbr: cresc.) or the sign means gradually getting louder
POCO A POCO - Little by little. Indicates a gradual increase or decrease in volume of sound.
ACCENT - A stress on notes so marked
SFORZANDO - (abbr: sfz) A strongly accented note or chord
SFORZATO - (abbr: sfp) strongly accented by then immediately PIANO
SUBITO - Suddenly. Usually to indicate a dramatically sudden change in dynamic level of sound.
AGITATO - With agitation- excitedly
ALLA - In the style of (always used with other words).
CON - With (as a connecting word), e.g., ANDANTE CON AMORE- slowly, with tenderness
ANIMATO - With animation, in a spirited manner
APPASSIONATO - With intensity and depth of feeling
BRILLANTE - Bright, sparkling, brilliant
BRIO - Vigor, spirit
CANTABILE - In a singing style
DOLCE - Sweetly and softly
ENERGICO, CON - With expression
FUOCO, CON - With fire or much energy
GRANDIOSO - In a noble, elevated style
GRAZIA, CON - With a graceful, flowing style
LEGATO - Smooth and connected, in a flowing manner (Opposite of STACCATO)
MAESTOSO - With majesty and grandeur
MARCATO - In a marked and emphatic style
PESANTE - Heavily, every note with marked emphasis
QUASI - In the manner of; e.g., QUASI UNA FANTASIA- in the style of a fantasia
SCHERZANDO - In a light playful and sportive manner
SCHERZO - A jest, one of the movements of certain symphonies, a composition of light and playful character
SECCO - Dry, plain, without ornamentation
SEMPRE - Always; e.g., SEMPRE STACCATO- to continue playing in a short and detached style
SPIRITO, CON - With spirit, or animation
STACCATO - Short and detached, with distinct precision (the opposite of LEGATO)
TENUTO - Sustained for the full time-value
TRANQUILLO - With tranquility, quietly, restfully
LARGO MA NON TROPPO - Slow, but not too slow (ma = but)
ADAGIO CANTABILE E SOSTENUTO - ('e' = and) Very slow and in a sustained and singing style
ANDANTINO, CON AFFETUOSO - Faster than ANDANTE, with tender feeling
ALLEGRETTO CON GRAZIA - A moving tempo with a graceful flowing style
ALLEGRO AGITATO - Quick with agitation
POCO PIU MOSSO - A little quicker
ALLEGRO CON MOLTO SPIRITO - Fast with much spirit
ANDANTE MAESTOSO - Rather slow-moving tempo, majestic feeling
PRESTO CON LEGGIEREZZA - Very fast with lightness and delicacy
ACCIDENTALS - Flats and double flats, naturals, sharps and double sharps
ALLA BREVE - Cut time. The half-note is the unit of the meter
ARPEGGIO - A broken chord (Each note of the chord played in succession)
ATTACCA - Begin the next movement immediately
CADENCE - The close or ending of a phrase
CADENZA - An elaborate solo passage with fancy embellishments to display the proficiency of a performer.
CHROMATIC - Proceeding by semitones
CODA - Literally "A tail"- the closing measures of a piece of music
CON - With; e.g., CON SORDINO means "with mute"
DA CAPO - (abbr: D.C.) from the beginning
DAL SEGNO - (abbr: D.S.) to the sign
DIVISI - Divided, one performer plays the upper notes, the other plays the lower notes
FERMATA - A pause, marked
FINE - The end
G.P. - General Pause; a dramatic moment of silence for the entire ensemble
SEGUE - To the next piece without pause
SENZA - Without; e.g., SENZA SORDINO means without mute
SORDINO - A mute (used by brass and string players)
TACET - Be silent
TEMPO PRIMO - (Sometimes TEMPO I), means to return to the original tempo after a RITARD or ACCEL.
V.S. - Abbreviation found at the lower right corner of a music page and means to turn the page quickly.
COL LEGNO - Applies to string instruments.
GLISSANDO - To slide. Pulling or drawing the finger quickly up or down a series of adjacent notes. Also poss. on trombone and other inst..
That is all for now...

Denis van der Velde
AAMS Auto Audio Mastering System
www.curioza.com
Recording
Welcome to the infomation page about recording music.
Sequencers
Without a doubt the computer is mostly where you go for the good sequencers, but in the older day they only had hardware and tape recording. So there are two ways to do music, that is knowing what you can learn. Or not knowing to play chords and not kwoning the key etc, but still fiddle around to get something at random. Anyway for composing music a midi sequencer will do, mostly also audio will you get also. If it is hardware or software, most sequencers on the market do have rizen to having it all. Even scoring and pluging instrumnets and effects, mixing and also maybe mastering. So mostly with one sequencer that is good, is worth all for composing and making music production happen.
Recording Music
The art of recording music is filled with information that is mostly technical. There is loads of information on miking techniques, what microphones and preamps to use, and how to process them. What is less often talked about are the fundamentals that underlie those techniques and choices. The acoustics of the recording space and the quality of the musician will define the sound of the recording more than any mic technique or processing chain ever will. Behind the techniques lies the real foundation of making great recordings. It's the information you don't often get because most are not keenly aware of its existence. Many have only worked in professionally treated acoustic spaces designed for recording and can often forget that their audience is not working in the same conditions. Many work through the problems that arise with intuition rather than taking the time to really understand what lies underneath all the technical choices they make. In reality, it usually takes years to become great at recording music. During that time, allegiances to different pieces of gear will come and go and solutions will be based mostly on experience. When problems arise, it is often easier to blame the studio, available mic selection, recording console or the recording space. If you want to make great recordings, regardless of the recording space and equipment you are working with, you will have to learn something that is more fundamental. Essentially, no two recording situations are identical and each requires a discerning ear and eye. Most of the great engineers learned by experience, trial and error, and working under great engineers before them that understood how sound works. They learned how to use acoustics to their favor, and learned how to work with musicians to get the best performances out of them.
The 3 Types of Recording
In this article I will break down the art of recording music to its most basic elements. The articles that follow in the links at the bottom of the page will get into details about recording specific instruments and the best way to manage those recording situations
Essentially you can break down the types of recording into 3 basic categories:
1. Acoustic Recordings
2. Electronic Recordings
3. In the Box Recordings
Even though, electronic and in the box recordings are not dependent on the acoustic space, the principles of acoustics are still very much at play because that is the only way we know how to perceive sound. Let's take a closer look at each:
Acoustic Recordings
Recording music in the acoustic realm is all about capturing sound waves through microphones and converting them into an electronic signal so they can be captured and recorded. Today, those recordings are mostly into computers and onto hard drives. Whether you are recording analog or digital, the basic process hasn't really changed a whole lot of over the last century or so. Music, for the vast majority of its history to humankind, has always been acoustic. It is only in recent decades that music has gone to purely electronic sources.
The concept of recording, came into play in late 1800s with the inventions of Thomas Edison. Music recording soon followed, although the capabilities were very limited. Primarily, all recording was acoustic material. The technical issues of capturing music in recorded form have undergone immense development over the last 100 years or so. In years past, the mechanical limitations of recording devices limited the engineer's options. Today, those options are seemingly endless. The irony is that the greater number of options available today have taken many engineers away from the fundamentals of acoustics and focused them on new gear and plugins instead. As the quality of recording technology increased, so too did the importance of the acoustic recording space. The decisions made about how to manage the recording space became critical to the quality of a music recording. If you want to achieve a very big live drum sound, you are not going to get it by recording in a small dry space. In the end, no mic will make a recording space sound bigger than it is.
Managing Acoustics
When you place an instrument in a recording environment, that instrument will sound different, sometimes radically different, depending upon how and where you place it in the room. This is especially important for recording music in spaces that are smaller than 20 x 20 feet. There is no microphone that will solve all of the problems with a bad acoustic environment. Even with the best gear all you will get is a very accurate recording of very limited acoustic environment. This does not mean you have to spend thousands of dollars on acoustic treatments. Even professionally treated recording studio environments require careful placement and attention. The most important thing, in any recording situation, is to listen carefully as you move the instrument around room. Find a place in the room that enhances the sound of the instrument without making it sound unnatural. Acoustics is really the key to capturing great recordings and is often overlooked by most novice engineers. If you just dump an instrument anywhere in the room and throw a mic in front of it, you are basically rolling the dice and hoping that a good sound comes up. If you're a bit more conscious about how you place an instrument in a recording space, then you will get significantly better results, with much less effort, and be much happier in the end, even if you are using inexpensive recording equipment. How you choose the right acoustic environment, and how you treat the immediate space around the instrument is unique to each instrument and the sound you are trying to achieve. These guidelines and methods will be covered with more detail in the individual recording instrument links at the bottom of the page.
Electronic Recording
The second method of recording music is electronic recording. Electronic recordings go back to the invention of keyboards and synthesizers, and also with basses and guitars. The idea of using a direct electrical signal is that you are bypassing the acoustics altogether. For many instruments like bass and guitar, the amplifier is a huge part of the sound you are trying to create. Without the speakers and acoustic environment, you have to count on the electronics you are using to create the sound for you. The typical method for capturing electronic audio is through a DI box. The DI box will take any signal that comes from a high impedance unbalanced source, like from a guitar or bass and convert it into a balanced signal so it can be plugged into a mic preamp and recorded. The balanced lines help to keep the signal quiet with a minimum of degradation. Long guitar cables will pick up loads of noise and you can end up with significant signal degradation. Always keep unbalanced cables to a minimum in terms of their length. When recording music with keyboards, you are dealing with electronics that are controlling oscillators to generate synthesized sounds that are sometimes meant to emulate acoustic instruments. The older ones are typically connected to a DI although many of them now have balanced line level outputs. This allows them to be brought directly into a line level input in a recording console. They can then be recorded without having to add a significant amount of gain, thus keeping noise to a minimum. The only issues from a technical perspective are selecting the sounds and editing them until you get it to sound the way you like. If it is a bass, you will need to change pickups, adjust the tome knobs or switch between picks or fingering methods to get the sound you're looking for. Many direct boxes, designed for bass, have pre-amplification stages that include distortion equalization and tube components that allow you to add some character. The same can be done with guitar using pedals and effects to add warmth and depth to the sound before gets recorded. Otherwise, the only other issues that you are making sure the signal passes cleanly, is full frequency, and that there are no buzzes, hums or noises. Most DI boxes have ground lift switches that help to eliminate these problems.
In the Box Recording
The third method of recording music is in the box recording. In the box recordings are primarily referencing to computer recordings where all of the recording work is done inside the actual recording application. There is no audio coming in externally into the recording device. Recording music inside the box is most often, or at least to some degree, MIDI recording. Essentially, you are capturing the technical aspects of a performance through a midi keyboard or other midi instrument. Once you have captured the performance, you have the ability to grab any sound from the vast number of software synths and sample libraries available and edit them till you get the sound you want. A performance played with a flute sound, can easily be changed or adapted to be a clarinet or oboe sound. This, of course, is not possible with acoustic recordings. The art of this types of recording lays in the ability to make these artificially generated sounds seem like the real thing. When recording music in the box what you are actually recording is MIDI control signals, not the actual audio. This allows you to edit your performance, fix wrong notes or sloppy passages. You can also change the dynamics if you play a note too loud or soft by adjusting the velocity. You can change the length or sustain of notes and countless other parameters until you to get exactly the performance you desire. When dealing with loops, you may be dealing with audio loops or MIDI loops. Audio loops are essentially acoustic recordings or electronic ones that are premixed and effected. You will have limited control in affecting audio loops, which is why the libraries are typically so vast. MIDI loops, by contrast, can be edited and manipulated in exactly the same way that any MIDI performance can including quantization and sound selection.
Moving On
All these methods for recording music are still primarily about capturing performances. To make great recordings, the goal must always be to capture great performances. Great performances will transcend the recording techniques used. Sometimes a low fi recording captures the essence of a performance better than a squeaky clean full frequency one will. Playing with this concept, is truly the art of recording music. Select from the list below for the detailed recording techniques of specific instruments.
RECORDING VOCALS PART 1
The lead vocal is typically the most important part of any song. As a result, recording vocals almost always requires the most attention to the details of performance and sound. Capturing a great performance is a byproduct of preparation, a good recording setup and great communications skills. Because the vocal is the primary focus of most music productions its importance cannot be overstated. The following tips should help to make the process of recording vocals less stressful. To capture a great performance requires as much attention from the producer and engineer as it does the artist.
The 2 Aspects Of Recording Vocals
There are 2 basic aspects to recording vocals. The technical aspect and the emotional and psychological aspect. The technical aspect of vocal recording is simple once you understand the basics principles of audio that most fundamentally affect the sound quality of a recording. These basic principles will help you to make great recordings regardless of the quality of the gear you are using. They set the foundation for all the other techniques and tricks you use. The second aspect of recording vocals is the emotional and psychological aspect. You need to make the performer feel comfortable and confident in what they are doing. This process is supported by creating the space from which they can perform well. The recording studio is a very unnatural environment, and most people don't perform well without some level of inspiration. Many feed off the excitement of an audience or the energy of a live performance with a band. The recording studio, however, is a completely different experience. Careful planning of the technical and psychological aspects of recording vocals is absolutely necessary to get the best performance possible.
The Technical Side of Recording Vocals
The technical aspects of vocal recording often get the most attention in engineering circles, and for good reason. The ability to hear subtle inflections in a performance and the ability to clearly understand the lyric and melody go a long way to adding to the listener's experience. Unfortunately, this is not the whole solution to getting great performances. Discretion must be used when applying the techniques that give you a great 'sound' so as not to put the performer in an uncomfortable position. Ultimately, it is their performance that will make people want to listen, not the quality of the recording. The following sections will break down the technical aspects that make great quality recordings while being sensitive to the needs of the artist. If you ignore this simple principle, you may end up with a great 'sounding' recording that nobody wants to listen to.
Selecting The Best Space To Record
The most important decision to make when recording vocals is selecting the right space to record in. Selecting a space that best supports the sound of the vocal while giving the artist a comfortable space to perform requires some careful attention.
Most people do not listen carefully enough to the sound of the space unless it is doing something obviously wrong. Each person has a unique voice with a unique tonal quality. No one space will work perfectly for every artist and for every song. The decisions made here affect every other level of the recording chain, for better or for worse.
What To Look For
In a professional recording studio, most engineers will record vocals in the biggest space available. The reason has nothing to do with the reverb but rather with way the early reflections will affect the tonal quality of the voice. What happens in every recording space is that sound will travel in all directions from the sound source. The direct sound wave does not stop at the microphone, it continues past it and bounces off all the surfaces. Depending on the shape of the room and the acoustic treatments, the sound will return to the sound source and mic a short time later. How long it takes to get back is critical. If it comes back within 20 milliseconds (ms) it will merge with the original signal and tonally color the sound of the voice. This is important to understand because this will greatly affect the tonal quality of the voice. It can make any voice sound hollow, bright, muddy, clouded or harsh no matter what mic you use.
A Little Math
It all starts with the speed of sound and the distance it has to travel. The rest is simple math. Sound travels at 1130 ft. per second or 344 meters per second. This amounts to .88 ms per foot or 3 ms per meter.
To get past the 20 ms delay time, you must be at least 12 ft. or 3.5 meters away from any surface. The reason for this is that the sound must travel to the surface first before coming back to the mic. The total length of travel from the sound source will determine the delay time. Because of gravity, the reflections from the floor are mostly beyond your control. They will always create a delay within 20 ms. Most engineers use rugs to help limit this transmission. The rest of the surfaces will require a bit more attention. In a large recording space this is not an issue. In a small recording space, it can be a big one. The knee-jerk reaction is to completely deaden the space with foam or absorptive materials, but this is not a truly effective solution. This will create an unnatural balance of low to low mid frequencies that are the bigger source of the problem.
Get Out Of The Closet
I am not a big fan of recording in small spaces. I find they rarely, if ever work, and are largely uncomfortable claustrophobic spaces. Not exactly the best environment to perform in for most artists. From a technical point of view, very small recording spaces create enormous problems that far outweigh the convenience. Surfaces too close to the source signal will create an enormous amount of resonant constructive interference in the low mid frequency range. The result is often a boomy, muddy or flat sound that is unbalanced and unnatural sounding. Covering the surfaces entirely with foam will only serve to further cause imbalances in the frequency response. It's not the deadness of a space that creates the sense of dryness or immediacy. It is the balance of dry to reflected energy that creates that sense. Without the reflected energy in the sound the sense of space is entirely lost and the dry signal flattens out and loses its sense of aliveness. There is a reason nobody records in anechoic chambers. It's important to understand the difference between tonal coloration and frequency response. Tonal coloration comes from reflections that return to the source within 20 ms. Signals this close in time get merged together by our brain. This process is called temporal fusion. Once these tonal imbalances are recorded, they cannot be removed with EQ.
How To Record Vocals In A Small Room
Just because small rooms are not ideal recording spaces doesn't mean that you can't get great results. There are many ways to control the effect of early reflections without sucking all of the energy out of a room. While some of this will involve acoustic treatments, the process starts with something more fundamental. The first step in getting a great sound involves finding the best placement for the vocal. Start by having the vocalist sing the song as you walk around the recording space. If you have more than one space to work with, walk through them all until you find the best sound. Try to focus on the tonal quality of the voice and not the reverberant energy of the room. Notice if the tone becomes boomy, hollow or thin sounding. As you walk around the space take note of where the voice sounds most balanced and natural. This is the best place to start.
Treating The Space
The standard procedure for recording vocals in a professional recording studio is to build a semicircular booth around the vocalist in the biggest room. The booth is created by using gobos. A gobo is a freestanding acoustic baffle that can be easily moved around a room. The ones used for vocals stand at least 6 feet tall. The booth should be large enough to allow freedom of movement by the artist without creating a claustrophobic feeling. A rug is usually set on the floor inside the booth area. In addition to absorbing reflections from the floor it also serves to minimize noise from shoes and vibrational energy transmitting through the stand to the mic. The reason this works is that it minimizes the effect of tonal coloration from the early reflections (less than 20 ms) and also minimizes the reverberant energy from getting into the microphone. It's important to note that it doesn't eliminate them, just minimizes their effect. With a little resourcefulness, a very similar approach can be used in the home recording environment. Suspending heavy packing blankets from the ceiling around the recording area can achieve a similar effect. The difference between this approach and layering the walls with foam is that the sound will get absorbed from both directions. Leaving the booth and returning to it after reflecting off the wall. Layering the walls with foam does not minimize the early reflections nearly as well as the booth and it kills all of the higher frequency reflections that make a recording sound alive and present. By allowing those frequencies to propagate around the outside of the booth, a subtle sense of presence will be added to the vocal recording.
Selecting a Mic
Selecting a mic is the next step in getting a great vocal sound. No mic will undo a poor recording space, but once you have established the best recording space, the mic selection will take your sound to the next level. Microphones are like gloves. There is no one glove that fits everybody perfectly. There are some microphones that are exceptionally good at capturing most people's voices, but every person's voice is still unique. Unless you happen to own one of these very rare microphones, it must be selected uniquely for each person. I've always found the best results were gained by setting up as many microphones as I felt might work for the voice I was going to record. Aside from the time it takes to set up the microphones, it doesn't actually take a lot of time to pick one.
How to Pick the Best Mic
Start by recording a vocal line with each mic. The vocalist should sing a line or two from the song that you're going to be recording. One of the mics will to stand out beyond the others in terms of imaging and tonal quality. If there is a significant change in the vocal range later in the song, it may be worth recording that as well to make sure the mic can maintain the sound. It is typical that tube mics and condenser mics are selected most often for recording vocals because they give the most clarity. With voices that are very bright, a dynamic mic can also come in very handy. Dynamic mics can cut away some of the harshness of a voice and add some warmth and body when needed. It important not to rule out a mic because of its type or price tag. The most important part of recording vocals is getting the sound you're looking for no matter how you have to get it. If you need to, make the test blind so that you are not swayed by preconceived notions of quality.
Pop Filters
One of the many technical issues with recording vocals is plosives. A plosive is puff of air that is sometimes emanated by the vocalist when singing words that contain the letter P. This puff of air can strike the diaphragm of the microphone with enough force that it causes a low frequency pop or distortion. A pop filter, or pop screen, can be used to break up the puff of air while still allowing the sound to pass through to the microphone. If you don't have a pop filter handy, another way of getting rid of plosives is by taping a sharpie to the front of the microphone. It should go right down the center of the diaphragm. The sharpie will spread the air out around the diaphragm without really affecting the frequency response. Pop filters can serve a second valuable purpose even if there's not a big plosive problem with your vocalist. A pop filter also allows you to set a distance from the microphone to which the vocalist can easily and consistently return. It is very important to keep a vocalist singing at an even distance from the microphone. The distance is important for creating a consistency in terms of frequency response and tonal characteristic. If the vocalist is pulling away or moving around or turning their head when singing then will not be singing directly into the diaphragm. The result is variations in the tonal quality of the voice.
Mic Placement
The real issue with microphone placement for recording vocals is a matter of comfort for the vocalist. If the microphone setup feels obstructive to the vocalist it will take way from their performance. Doing everything possible to make the artist comfortable will always yield the best results. The primary focus of your setup will be to make sure that the vocalist is able to perform comfortably with good posture. The professional method of recording vocals involves the use of a big boom stand. The boom stand is set up out of the way to the left or right of the vocalist. The boom stand extends above the head of the vocalist and drops the mic from above down in front of the mouth of the vocalist. This typically works very well because it keeps the microphone out of the way and allows the vocalist to maintain good posture. As a general rule, the artist should never be seated when recording vocals. If standing is a problem for the artist, then the next best option is to use a stool. This way, they are at least mostly standing up. This can also be handy if you have a long session planned and want to keep the vocalist fresh.
Lyric Sheets
There is one issue that often arises when the microphone is coming from above the head of the vocalist. If the vocalist needs to look at a lyric sheet, the microphone is directly in the way of their sight line. What happens is that the lyrics will either be placed to the left of the right of the microphone. This naturally leads the vocalist to turn away from the mic and not directly into it when they look at the lyrics. There are 2 ways to deal with this issue when recording vocals using lyric sheets. One way is to set up a mic stand so the microphone can be flipped upside down and come up from below the head, not above. This way they can look straight over the top of the microphone to see the lyrics. As the singer looks at the lyrics they are actually leaning into the microphone not looking away from it. The pop screen will help to keep them at the exact distance you want them to be from the front of the microphone. Sometimes it is best to set up a vocal mic coming from the side if you have a quality heavy duty mic stand that can handle the weight of a good microphone. The benefit of this setup comes when using tube mics. The tubes will generate heat that naturally goes up towards the diaphragm if set upside down as in the previous example. This can negatively affect the quality of the sound because the diaphragm will be heated and expand thus changing its performance characteristics. Using a side position will allow the vocalist to see the lyrics and sing directly into the microphone while also keeping the heat from affecting the sound.
Mic Settings
There may be a series of options on your vocal microphone that will help control the sound quality when recording vocals. These options vary from mic to mic, but here is a list of the most common ones found on quality vocal mics.
• Polar Pattern
• Filters (EQ)
• Pads
Polar Pattern:
The polar pattern of a microphone determines the direction from which the microphone is most sensitive to sound sources. The selection of the polar pattern will also determine from what direction, if any, the mic will reject signals. When recording a single vocalist, the pattern is typically set to cardiod. The cardio pattern will, to greater or lesser degrees, reject signals from all directions except from directly in front of the mic. This polar pattern is most suitable for recording a single vocalist. When recording two vocalists with at the same time one mic, a figure 8 pattern will allow equal sensitivity from both the front and back of the mic while rejecting sounds from the sides. This pattern makes recording more comfortable because they do not have to crowd around the front of the mic. When recording a group of vocalists through one mic, it is typical that the omnidirectional polar pattern is selected. the selection of Omni enables equal sensitivity from all directions. This allows the vocalists to comfortably sing toward the mic from every direction.
Filters (EQ):
Filters are a very powerful equalization tool used to eliminate problematic frequencies that are not a necessary part of the sound source. There are 3 basic types of filters, High Pass, Low Pass and Notch. While all three types are helpful, only the high pass filter type is used for recording vocals. It is the only type you will typically find on a mic. Many large diaphragm microphones use a High Pass (low cut) filter because of their increased sensitivity to low frequencies. This allows the engineer to dramatically remove low frequency rumble that can be caused by air conditioning systems and poor acoustic isolation. Some have selectable frequencies but most are fixed to a single frequency below which signals are cut. The quality of these filters vary with the quality of the mic and it is common for many mic preamps and audio interfaces to include a High Pass (low cut) filter. Check to see which sounds best without affecting the quality of the vocal recording. If the low frequency rumble in a room is excessive, it may be necessary to use both if there is no way to eliminate the source of the rumble.
Pads:
A pad allows the electronics of the microphone to be buffered from sound sources that create high sound pressure levels. This does not necessarily mean that you won't get distortion as the diaphragm of the mic may not be able to handle the excessive sound pressure levels. If this is the case the mic will need to moved farther from the sound source. For most vocalists a pad is not necessary, and it is often better to back the vocalist away from the mic if they project too loudly. This is a very common practice when recording opera singers that are trained to project with enough power to fill an opera house.
Controlling Dynamics
Headphones
Although the headphones are technically on the performers side of the recording, their control is almost always the dominion of the engineer. Here are some tips that will help to make your headphone mixes best for recording vocals. The best place to start is by using the best quality headphones you can find. You want to avoid "open back" headphones because they are vented and the sound will bleed into the mic. Make sure you have a good cleanly amplified signal with no distortion. When preparing a mix for the artist, try to make the mix as dynamic and alive sounding as possible. The mix should be exciting so that the artist can feed off the energy of the song the same way they would in a live performance. Be very attentive to how the artist feels about the mix. Make sure they are able to hear themselves clearly and cleanly. I generally try to avoid using reverbs when recording vocals because it makes it harder to hear pitch accurately. If the headphone mix does not feel right to the artist without reverb, then add in just as much as is needed to add the presence they need to perform well. Try to avoid long washy reverbs if possible. If the artist is having problems with pitch using headphones, have them take one headphone off so they can tune acoustically. This is a very common solution to solve pitch problems when using headphones. Create a mono mix and cut signal to the unused headphone so that it doesn't bleed into the mic.
Controlling Dynamics Acoustically
There are many different thoughts about how to best control dynamics of a vocalist in the recording room. It is typical that the artist will sing louder in different sections of the song if the melody takes them to the power range of their voice. Most vocalists will pull away from the microphone when these parts arise. While this is very dramatic looking in concert it is not always great for recording vocals. Generally, I would rather have them at an even distance from the mic throughout the performance if possible. If the artist will give me a better performance because they don't have to think about staying in one position, I will deal with the sound later. Always take a quality performance over a quality sound if there's no way to get both. A well trained vocalist with good technique will not necessarily sing louder when going to the power range of their voice. Unfortunately, this is the exception rather than the rule and you will have to deal with these issues as part of the recording process. Never force an artist to think about technique when recording vocals. It is always better to work out the technical issues of a performance in a rehearsal session so that the focus is entirely on expression and feeling in the recording session.
Mic Preamps
Selecting the best quality mic preamp is the next stage of the vocal chain. A good mic preamp will have loads of headroom and will not distort if the vocalist belts away. Compare as many mic preamps as you have available to find the one that best suits the vocalist.
Always leave yourself a good bit of headroom, especially with very dynamic performers. You can always make up again at a later stage in the recording chain, but you will not be able to get rid of the distortion. If the gain is too high for your mic pre, you may need to use a pad. Most mic preamps have a pad, but make sure you compare the quality to the one on the microphone to see which sounds best. If necessary, you can ride the mic preamp gain during the performance to help even out the gain. Make every attempt to eliminate distortion at every phase of the recording chain. Be careful to monitor the gain as the voice starts to open up. Usually, a vocalist will not sing with full power until they are warmed up and singing the song full force. Be prepared...
Compression and EQ
If all of the previous details have been considered and brought into focus, what happens with the EQ and Compression should be a breeze. There are many thoughts regarding what the processing order should be after the mic preamp. Here is my general view:
EQ Before Compression
Subtractive EQ is best before compression, additive EQ is typically best after the compression. The reason for this is simple, subtractive EQ is meant to eliminate noise that you don't want. If you don't get rid of this noise before compressing then the compressor will make the noise louder and it will be harder to remove later. The most typical form of subtractive EQ is a high pass or low cut filter. The purpose of this filter is to roll off low frequency rumble or noise that is below the frequency range of the voice. Many vocal mics have this filter built into a switch. It is also common to find a filter stage built into the mic pre. Make sure that when the filter is engaged, it does not roll off frequencies from the low end of the voice. You may need to check the specifications of the owner’s manual to verify the frequencies if it is not labeled on the mic or preamp.
EQ After Compression
EQ after compression is typically additive. If you have followed all of the techniques in the prior 2 articles leading up to this point, you should need very little if any EQ. If the recording setup is too limited to accommodate all of the techniques outlined in the previous articles, then some EQ may be necessary to make up for what is missing. More on this later in Recording Vocals part 4.
Compression
Generally, most engineers agree that compression, when recording vocals, should be as transparent as possible. You don't really want hear the compression you just want to control the dynamic of the vocal. There are many ways to approach doing this, let's take a look at a few.
One Compressor Approach
One very simple approach to getting transparent compression and tighten up the dynamic of a performance is to set the ratio to a very low setting 1.5:1 or lower. Set the set the attack and release times to a medium setting and then set the threshold until you get a consistent 2-3 dB of gain reduction. The idea of this approach is to have the compressor consistently working. Most compression is perceived when overused or when it kicks in intermittently. This is especially true when the compression kicks in aggressively for high peek signals. Adjust the attack and release time until it feels musical. The attack and release times will typically mirror the tempo. Faster attack and release times for a faster tempo, slower attack and release times for a slower tempo. This very general guideline and must ultimately be based on the approach of the performance.
The Compressor Limiter Approach
It is a very common approach to use a limiter and compressor or two compressors in series to control the dynamics when recording vocals. The basic approach is very simple. Set the limiter, or first compressor, with a high threshold so that it only captures peak signals. This will help to control the amount of gain going into the compressor so that it does not have to respond to the high peaks. If using a compressor, you will want to use faster attack and release times with a high ratio to emulate the action of a limiter.
If you set the limiter stage up correctly, it should control the peak signals and allow you to set the compressor to yield consistent gain reduction. This will allow the compressor to better focus the performance.
Additive EQ and Interfaces
Okay, this is the home stretch! As we have learned, recording vocals involves attention to the fundamental principles of acoustics. We started by selecting the best recording space and treating it acoustically to optimize the sound of the voice. Next, we looked at the process of selecting the best microphone and how to set it up so that the artist can perform comfortably. Adjustments to the setup may be necessary to accommodate the use of music stands and pop screens for plosives. With the vocal setup complete, the next step was learning to control the dynamics of a performance both acoustically and electronically to keep consistency in the performance. We also looked at the recording chain and how best to apply compression and subtractive EQ. In this article, we will take a closer look at the use of additive EQ and how best to deal with recording interfaces when recording vocals. So without further ado, let's dive in to the tricky world of EQ for vocals.
EQ
I strongly believe that compression is a better way to add presence to a voice rather than EQ. If you have set up your compression well, this will be apparent in the vocal sound and the need for EQ should be minimal, if at all. If the sound is still not what was expected and I have exhausted all of my options with the setup, I will look at adding EQ. The best approach is always try and remove what you don't like first before using additive EQ. Unless I am completely convinced that the EQ I've added is exactly the sound I want I will leave it out of the record chain. If you are not 100% sure about the EQ, it is always best to leave it for later where it can approached with fresh ears.
Adding Presence
The most common reason for additive EQ when recording vocals is to add presence. Presence frequencies generally live in the 2-6K range. Unless this area is particularly deficient, I usually try to avoid adding frequencies here because you will most likely start to accentuate sibilance. Sibilance is a pronounced peak in frequencies that are usually heard when sing words with the letter S, T and a soft C. De-esser are used to rid these problems if they cannot be dealt with using EQ. De-esser are very fast limiter stages that are keyed by these frequency areas. As a result, the limiter stage only kicks in when these frequencies are overtly present. A safer way to add the feeling of presence without adding in the extra problem of sibilance is to add air to the voice. This is easily accomplished with a shelving EQ at around 10K. The shelving EQ will affect all frequencies above the selected frequency. Adding frequencies in this range will brighten and raise the vocal up in the speakers. Adding frequencies in the 2-6K range will draw the vocal out of the speaker toward you but may also draw out problems. The best approach is really a matter of taste, the style of music and the meaning of the song. Remember that there are many ways to add presence to a vocal with reverb or effects. If you are not convinced that your EQ is perfect, leave it for later.
Adding Warmth
The best way to add warmth to a voice is to move the vocalist closer to the mic. The proximity effect will add some natural warmth and body to the voice without adding muddiness. If this doesn't work it is worth considering a dynamic mic that is used for radio broadcasts.
Broadcast mics will add warmth to the harshest of voices and tone down sibilance problems as well. If a broadcast mic is not available, then you may want to consider adding the low end in before the compressor instead of after it. Adding the low end before the compressor allows the compressor to help make the added low end integrate better with the rest of the sound. It will also allow you to get better results with less EQ. In general, this is a problem best addressed in the mix session where more tools will be available to you with less pressure.
Using Interfaces With Mic Preamps
For many of the home recording enthusiasts, the only mic pre available is the one in the interface. The quality of the mic pre will vary with amount of money spent of the interface. If the interface is connected to an AC outlet you are more likely to have some headroom for recording dynamic vocals. If the interface is bus powered by USB or Firewire then you will have more difficulties recording vocals without distortion. The reason for this is very simple. The dynamic range of a mic pre is determined by the quality and strength of the power source. Many high end mic preamps will have a separate transformer used to clean up and convert the power source feed to the electronics to optimize their performance.
Dealing With Buss Powered Interfaces
If a USB or Firewire powered interface is the only option for recording vocals, good results can still be achieved with a little ingenuity. The best place to start is to keep the mic preamp as low as possible when recording so that the preamp does not clip.
Although, this approach in not optimal for signal to noise ratio, at least the vocal will be distortion free. The remaining gain issues can then be better dealt with in the box. If your interface has an insert point available, you can use an external compressor to help control the dynamics of the vocal performance and add the necessary gain before going into the ADC of the interface. This will help to create some consistency with the levels. An alternative approach would be to ride the mic preamp, in real time, with the vocal performance to prevent overload. This can be a bit tricky, however, if you are familiar with the song and vocalist. If you are familiar, then this can be a nice alternative way of controlling the gain before conversion to digital.
Conclusion
The best results for recording vocals are always achieved by getting the fundamentals straight. Start with the best sounding room and treat it well so that the voice sounds focused, full-bodied and dynamic as possible. Taking time to select the best mic will go a long way to bringing the sound to the next level. Make sure the artist is comfortable so that you get the best performance out of them. Adjust the mic setup if necessary to accommodate their needs. Select you processing stages carefully and only use compression and EQ if you are getting the sound you are looking for. Never force processing on a sound if it does not sound or feel right. Remember that as long as you can get a good clean distortion free recording, everything else can be dealt with at a later time with less pressure. Experiment with these ideas until you find the setup that works best for you. Every situation is unique and no one setup will work for every situation. The purpose of this article is to focus you on the fundamental aspects of recording vocals that have worked professionally for decades. I hope you found this series of articles on recording vocals helpful !!!
Becoming an Audio Engineer
The audio engineer is perhaps the most unheralded person in the recording studio. The impact he or she has on the outcome of any production is incredible. Every decision made regarding how a performance is recorded, stored, edited, processed and mixed can have a tremendous effect on the final product. It's no wonder that artists and producers select their engineers very carefully. Becoming an engineer is journey that takes years to develop. Having good technical skills is only part of the equation for success. You must build a bond of trust with the clients you work with on every level. The client must be able to count on you when everything else is falling apart around them. The confidence you exude in a session will go a long way to making the client feel comfortable so they can focus on their role in the production process. If you are interested in becoming an audio engineer, you must exhibit skills that include a meticulous attention to detail. In addition to learning the technical skills of engineering, a recording engineer must be organized, communicate well with people and be attentive to the needs of the client. Most importantly, you must be a good problem solver.
Experience is the Key
The majority of skills necessary to become a recording engineer can only be gained by the experience of doing it over and over again. The best way to learn is to get a job at a recording studio and learn from the people who make a living at it. People who make a full time living as an engineer are generally, though not always, free of most of the bad habits that plague the novice. Remember that you can gain valuable experience by watching others work. This is the primary role of the assistant engineer in a recording studio. Pay careful attention to what the members of a recording session are doing, how they act, and what the end results are. You can learn just as much from a bad engineer or producer (what not to do) as you can from a good one. Then, take what you have learned and try to do it yourself in your own projects. This will tell you how much you really understand about the engineering process. The term audio engineer is one that is generally used in the context of studio recording. Audio engineers, however, can take on a great number of roles that are not specific to music production. The following, is a list of some of the roles taken by engineers in their most common career paths.
Studio Music Production
• Tracking Engineer
• Overdub Engineer
• Editing Engineer
• Mixing Engineer
• Mastering Engineer
Live sound Music
• Front of House Engineer
• Monitor Mixer
• Location Recording Engineer
Theater
• Sound effects engineer
• Stage Sound and Front of House Support
• Recording Engineer
Broadcast TV
• Dialog Engineer
• Location Engineer
• Sound Effects Engineer
• Mixing Engineer
• Broadcast engineer
Film
• Location Recording
• Foley Engineer
• Sound Effects Engineer
• Sound Design Engineer
• Mix Engineer
Radio
• Broadcast Engineer
• Voiceover Engineer
• Location Engineer
Cable TV
• Location Engineer
• Voiceover Engineer
• Sound Effects
• Sound Design Engineer
• Mixing Engineer
Video Games
• Sound Design
Advertising
• Recording Engineer
• Voiceover Engineer
• Sound Effects
• Mixing Engineer
Many other roles for audio engineers exist in the world today. Almost everything that generates sound has run through the hands of an engineer somewhere in the process of development and production. Engineers are often hired as consultants for the development of products like cell phones, mp3 players, radios, headphones, speakers, home stereo systems, car stereo systems, microphones, pro audio gear and software. The list goes on and on…
Technology and the Audio Engineer
Audio engineering is an art form that is typically appreciated only by audiophiles and those who engineer or produce music for a living. Behind every engineer is the technology that helped create the sounds we hear. Ask the average person to name a recording engineer and they will most likely have no reply. Ask them to name any of the equipment used to make a recording and they will be equally dumbfounded. Although the names may not be known by those outside the music industry, the impact they have had on music production throughout the decades is immeasurable. The expertise and ingenuity of the audio engineer has brought many artists to the forefront of the industry. In many cases, those accomplishments were backed by advancements in recording technology. The Beatles, for example, were known for many amazing creative and technical feats in the recording studio. The vision of George Martin and the genius of the Fab Four had to be realized in physical form by engineers who found ways to make that vision a reality. They stretched the boundaries of what was possible, by embracing new technology, and made history in the process.
1900-1940's: Vinyl Discs and cutting lathes rule into the late 40's
During this era technology was fairly limited. Even though there were major technological developments, their use in the recording studio was limited by the marketplace. Vinyl disc sales had not quite grown big enough to support large recording budgets and thus support radical change in the design of recording studios. As you will see in the coming decades, this outlook would change dramatically. All records, during this period, were largely made the same way with the same recording techniques and recording technology. The audio engineer, sporting a white lab coat, was not generally considered part of creative process. The audio engineer was primarily there to just capture performances. Artists, composers and arrangers were largely responsible for the success or failure of their production. At this point in history, the limitations of cutting lathe technology did not allow the audio engineer enough latitude to enhance the artist's performance by any great measure.
1950's: Analog tape machines replace cutting lathes in the recording studio.
Analog recording technology was developed in the late 40's but its true impact was not felt until the 50's. The physical limitations of vinyl were coming to a head. Performances captured on cutting lathes for vinyl production were limited by the time available on a disc side, the amount of low frequency content, and the dynamics of the performance. Any of these basic issues, out of balance, could easily render a beautiful performance destroyed. Analog tape changed these parameters dramatically. At worst, performances that were too long, bass heavy or with excessive dynamics might require editing or suffer from some distortion or tape compression. Multiple performances or takes could be easily edited together to make one better performance. Performances that would not fit on one side of a record could be easily split between Side A and Side B or edited in length to fit on one side of a vinyl disc. The transfer engineer, now known as mastering, was born.
1960's: Multitrack recording technology and the release of stereo recordings.
The 1960's saw the full realization of stereo technology that was created in the 50's. The recording technology that emerged from the 60's would change the way recordings were made forever. While consumers were enjoying stereo on vinyl discs, recording engineers were working with multitrack recording. Multitrack recording allowed individual instruments to be recorded on separate tracks. Once separated they could be processed individually when mixed into stereo for the commercial release. The Mix engineer's position was born.
Sel-Sync multitrack recording (selective synchronization) allowed the audio engineer to rerecord individual performances synchronously with other tracks on the same tape machine. This would allow the vocalist to rerecord their part if the band captured a perfect take but the vocal performance was not up to the same standard. With careful forethought, It would also be possible for additional parts to be layered. Harmonies, doubles and additional instruments could be added to a performance to enhance or sweeten the sound of the recording. The term "overdubbing" was now part of audio engineer's vocabulary. This was a truly revolutionary change in the production process. The ability to separate and layer performances would grow exponentially in the coming years. It would expand the time artists spent in the recording studio dramatically. The early albums of the 60's might take a few days to complete. By the end of the 60's those same records would take weeks or even months to complete. The job of the audio engineer was taking on a greater role in the recording studio. As recording technology was getting more complicated, so too was the role of the engineer. The engineer, once seen as a technician only, was taking on a much more creative role in the music production process.
1970's: Expanded track counts lead to larger recording consoles and studios. What happened in the 70's was an explosion of technological development that saw track counts rise and recording consoles get larger. Parametric equalizers and compressors were stock features of professional recording consoles. New microphones, compressors and equalizers were entering the studio for external processing. Companies like Lexicon and EMT brought digital reverb and effects processing into recording studios with the EMT 250 and the Lexicon 224. The creation of digital effects processing would become a major part of the mixing process. New recording studios, like the world famous Power Station, were being built with isolation booths for better separation of instruments in the multitrack recording environment. Studios were being designed to record specific styles of music. The audio engineer, once an employee of the recording studio, would start to become a commodity for artists and producers. Seeing the benefit of having a great engineer, artists would start to hire the best engineers to work with them away from their home studio. The freelance engineer would become a force in the recording industry.
1980's: The compact disc, midi, synthesis and digital recording.
The 80's saw a largely unwelcome guest enter the recording industry. The introduction of the compact disc in 1980 changed the way people listened to music and brought digital technology into the recording studio. The CD was a huge success on the consumer level and ushered in a huge influx of money into the recording industry as record companies reaped the profits of reselling every previously released vinyl album in compact disc form. Most of the recording community thought it an abomination compared to the much warmer and pleasing vinyl disc. While digital technology took away the clicks, pops and skipping of the vinyl disc it also brought a cold clinical sound that was hard to swallow by professionals. Those that embraced digital technology were served well in the long-run though. Digital offered many advantages over analog, including increased dynamic range, no tape hiss and the ability to make exact copies of tracks without loss of quality. The 80's also saw midi sequencers enter the studio, allowing performances to be captured and edited until perfected. The influx of synthesizers, drum machines and samplers would usher in a whole new style of recording studio that would embrace synthetically generated sound over real acoustic instruments. Smaller recording spaces and larger control rooms would accommodate a new breed of client for recording studios, the programmer, the DJ and the electronic musician. Digital multitrack tape machines called DASH machines entered the recording studio as an alternative to analog tape machines. Although initially realized in 2 track format, these DASH machines would eventually accommodate up to 48 tracks of digital recording on 1/2 inch tape. The built-in self-synchronizing technology would allow for 96 tracks of recording capability by simply locking 2 machines together. It became evident that the much slower and limited 24 track analog tape machine was beginning a steady decline from which it would never recover.
1990's: The nondestructive recording and editing capabilities of computers
The 90's saw an explosion of radical change in digital recording. The recording industry would peak in the mid to late 90's and then start a radical fall heading into the 2000's. Computers would become a powerful force in the industry and eventually supplant all the major recording console and tape machine manufacturers as the driving force of the recording industry. The relatively cheap technology and radically enhanced editing and mixing capabilities of Pro Tools systems would allow many producers and artists to take their work into their home studios. Many commercial recording studios would close their doors forever as a result. Recording studios would also take a hit from the record companies that were lowering their recording budgets due a decrease in CD sales. The growth of the internet and the creation of file sharing websites like Napster would see piracy reach a new level never seen before in the music industry. A recording industry that once ruled with huge recording consoles and expensive tape machines suddenly had to change to a new model. This model would prove difficult to achieve as many of the big recording studios could not survive a dwindling client base and lower recording budgets. The ones that did survive now serve the high profile recording artists that have the budgets to accommodate.
2000's The explosion of new software and diversification of recording technology.
The first decade of the 21st century saw a technological explosion that has rocked all media industries including the recording industry. Increased processor speeds and hard drive capacities have made home recording a viable option for everyone. For very little money, anyone could compose, record, edit and mix their own music. The result of these rapid changes in computer technology is evident in the diversity and number of new recording software applications. Recording software design was targeting very specific markets like DJs and beat writers. Thus, filling a void left by programs primarily designed for engineers and musicians. Keeping up with this rapid growth has been a difficult task for the audio engineer. Hardware technology, once designed, would never change its signal-flow unless modified by the chief technical engineer of the studio. A recording console once learned, was learned forever. Software though, is very different matter. While the merits of software updates to fix design flaws is great, it also makes it more difficult for the new user to learn. Each update to a software program adds new features for the long-term user but also creates a steeper learning curve for someone new to the program. For this reason, a simple interface design is critical to a software's success.
The rapid development of recording software has challenged the traditional way of making records. The ability to create music inexpensively changed the way audio engineers have gone about their work. The audio engineer of today will find themselves in many nontraditional recording situations. As a result, audio engineers have been forced to be more creative in their approach to recording in an attempt to maintain a professional quality recording. Recording in these non-traditional situations requires a lot of professional recording studio experience. There are very, very few home recordings that merit a professional quality standard. The reason is simple, unless you have had a great deal of experience working in professional situations, you will have no clue what is required to create that sound. An experienced engineer working at home would create a significantly better product than the inexperienced engineer in a pro studio. Many today, aspire to become an audio engineer but few understand all that is involved. Having spent many years teaching students the art of engineering, I have come to realize the depth and enormity of information about recording audio. As you can see, an incredible amount of technology has been developed for just this purpose. Each development trying to improve on and solve the problems facing every audio engineer on a daily basis.
Denis van der Velde
AAMS Auto Audio Mastering System
www.curioza.com
Producing

Welcome to the infomation page about producing music.

So you are interested in becoming a music producer?
Be prepared to wear many hats! The producer of today may be asked to fill many roles that in the past were traditionally specialized jobs. Here is a list of many of the roles you may be responsible for:
• Maintain a recording budget
• Artist
• Composer
• Arranger
• Collaborate with an artist/songwriter
• Create a vision for the song/artist
• Adapt the lyrics and melody of a song
• Change the chord structure or arrangement
• Hire musicians or programmers
• Make a demo
• Book rehearsals
• Manage the musicians' performances and ideas
• Negotiate recording studio rates
• Engineer
• Produce performances
• Perform
• Edit and pitch correct performances
• Mixing
• Mastering
Panicked yet? Well don't be, no one person can master all of these skills. You can specialize in any one or several of these roles and still make great music. But, becoming a music producer requires that you understand the big picture of the whole production process and where you fit in. Understanding your strengths and weaknesses will help you assess what roles you can fill and where you will need support.

Assess Your Skills
• What are you good at?
• Are you proficient with a musical instrument?
• Do you have engineering skills?
• Do you have great people skills?
• Are you good with computers and technology?
• Do you understand music theory?
• Are you a songwriter or artist?
• Do you already produce your own music?
• Do you need additional education and schooling?
You are here because you obviously have a passion for music. If you are not proficient in any of these skills, do not be alarmed. Look at these questions. Do any of these skills excite or interest you? If you are truly interested in becoming a music producer, you must study at least one of these skills and know a bit about how the others work. If you do have some of these skills, can you find a way to bring those skills into a recording situation? If you are studying an instrument, can you bring those skills into a recording studio? If you are good with people how can you make that fit in to a music production situation? If you are good with computers and technology can you use those skills to produce music?
The Answer Is: Yes! Absolutely Yes!
Regardless of level of skills you have now, your passion for producing music is already there. If you are developing those skills, then becoming a music producer will come naturally because it is what you are most excited about.
I came into music production by studying guitar. I was a horrible guitar player! But the passion I had for playing my guitar and understanding it as completely as I possibly could led me to a career in engineering audio. When I started the study of audio engineering and music production, it came naturally to me. I realized, many years later, that my fascination with how records sounded and the attention to detail I paid when listening fit perfectly into the role of being an engineer and music producer. Every skill has a place in the music production process. If you are passionate about your skills, people will want to hire for them. Whatever skills you have, bring them into a recording studio situation, no matter how small. The more skills you bring to the table, the more involved you will be in recording, and the more you will learn about how the whole production process works. If becoming a music producer is your goal, nothing teaches better than experience!

Getting The Gig
Whenever someone asks me how they can get production or engineering jobs, I always tell them the same thing. Get a job in a recording studio that records the style of music you want to produce. The reason for this is simple. Where else are you going to meet people that are making a living doing what you want to do? Those people are your future clients! If you put in the effort and hang around long enough, I guarantee that you will get a chance to show what you are capable of. If you have a full time job already, you can still work in a studio. Many recording studios need people to work nights and weekends.
These Are Some Of The Benefits Of Working In A Recording Studio:

Learn From Professionals
Where else are you going to get to watch professional producers, engineers, composers, arrangers, studio musicians, programmers and performers do their thing? A recording studio. Pay attention! You absolutely need to absorb as many ideas, problem solving skills and methods professionals use to produce music. You will see these producers and engineers do amazing things. You will also see then create catastrophic failures. Both are equally important! Either way, you will get valuable insights and ideas about what to do, and more importantly, what not to do.
Make Connections
The best way to make connections in the recording studio is to make yourself a valuable part of the recording session to the client. By showing extra effort and attention to each client, they will quickly grow used to your helpful ways. Learn to think like the people you are working for so that you are handing them what they want before they have a chance to ask. The path to becoming a music producer is learning to think like the people who make a living doing what you want to do. The attention to detail you pay in the recording session will result in work down the road. When a client calls a recording studio and asks specifically for you to assist the recording session, you will know you are on the right track.

Climb The Ladder Of Success
One of the biggest kept secrets to becoming a music producer is to be relaxed and confident, even if you are 'losing it' on the inside. Your good vibes and confidence in the studio will get you more work than your skills. If the people you are working with don't feel comfortable with you, they will not want to work with you. Who wants to work with someone they don't feel comfortable with. You must be composed, confident and aware of everything that is going on around you. By studying hard and watching the production process unfold, day in and day out, you will always know what to do and when to do it. Remember, the process should be fun and creative, so always keep that attitude in mind. This positive attitude will set you on the path toward becoming a music producer.
Gain Access To The Recording Studios
After you have built a bond of trust with the studio owner, you may be allowed to use the studios, nights or weekends if there are no paying clients. This is a great opportunity to try out many of the production techniques you have learned by being in professional recording situations day in and day out. I cannot stress enough how important it is to take advantage of these opportunities! You must practice the lessons you learn in the studio till they become second nature. As I always say, record your friends and make your mistakes with them. This way, you won't make the same mistakes with your paid clients.
Music Production Career
We all want a music production career. So what separates the part timer from the person who wants to produce music for a living? Dedication. How dedicated are you to making a career producing music? How willing are you to change the way you live your life? Are you willing to quit your job for a production gig? Are you willing to commit the extra time it takes to make the necessary connections to get gigs? How willing are you to sacrifice your spare time to achieve the goals you have set for yourself ? In the following article, I will talk about what that extra effort is and why some producers succeed where others fail. I will talk about the biggest blocks to success in in establishing a music production career and how to assess and rearrange those priorities to support your music production goals.
How Bad Do You Want It?
Ultimately the path to a music production career involves a simple self-examination about your priorities. We will start by making a list of all of the jobs, chores, tasks and recreation time you spend each day. Do not include time you currently spend making, recording or producing music, we will address that later. Download this PDF as a guide. Download and print the pdf file and take a close look at each day of the week. List everything for each day that you spend time on no matter how small it may seem. This list should include time spent on your job, chores and recreation such as time spent online, talking or texting on the phone, playing games, etc… This is not about taking away all the things you love to do. This is a tool to help you assess the way you spend your time. Once you have a list for each day, use the four columns to the right of your list and fill in each one of these four aspects starting with hours per day.
1. Hours per day
2. Priority (how important is this in your life right now)
3. Enjoyment (how much do you enjoy doing each task)
4. Goals
After you list the hours per day for each item, rate them in terms of priority. In other words how important is each item to you in your daily life. Rate each on a scale of 1-10 where 10 is a high priority. For example, if you have a job that pays your rent and feeds you, that's obviously going to be a high priority. Playing video games 4 hours a day should not be a high priority. To help determine whether something is a high priority in your life, take note of how you feel after doing it. If it is good for your health or state of mind, then it should be a high priority in your life. Once you have assessed your priorities, go back and rate each item in terms of enjoyment. Use the same 1-10 scale. Which of the things on this list do you enjoy doing most. Be really honest with yourself! Don't equate something that has a high priority in your life as necessarily enjoyable. You may hate getting up early in the morning to go to work but it's obviously a high priority in your life if it is paying the bills.
Assess Your Goals
Finally, close your eyes and think about having a music production career. Imagine yourself being successful in that roll. Imagine yourself achieving whatever level of success you feel is possible. It is very important to only imagine what you believe is possible. Otherwise, you will be imagining a pipe dream. This process is not about pipe dreams, this is about achieving realistic goals. Is holding up a Grammy for best producer a reality for you? If you can really feel that, great! A more realistic goal may be maintaining a successful music production career. Can you imagine yourself doing this full time? Hold that feeling, whatever it is, and then look at your list. Look at each item on the list and put a check next to anything on your list that supports your goal for a career in music production. Put an X next to everything that does not support your goal. Keep in mind two things as you make your checks and Xs. 1. Does the item support your health or wellbeing. This is not about working twenty hours a day in the studio, sometimes that is necessary, but it is not healthy. 2. Does it support your goal to become a music producer even if you hate doing it. A part time job waiting tables may help you with your goal if it offers you some stability while you are establishing music business connections.
Personal Assessment Time
If you rate your desire to have a music production career higher than most of the items on your list, then you have a chance at a music production career. Not everybody is cut out to make a career in music production. It is a highly competitive field of work. There is nothing wrong with doing something you love part time if you enjoy it. If you have a good stable job and are happy with your life situation then you can still have loads of fun making music and recording. Not everyone thrives off of the pressure to do it for a living. Now it is time to make an honest assessment of your available time and how to best manage the things you don't like or don't serve you in your goals. Look for items on your list that are not a high priority and are not supporting your goals. Think about how you could better use that time to support your goals. Could you be working in a studio? Researching and studying music production techniques? making phone calls to set up production jobs ? The idea here is for you to become consciously aware of how you use your time. It's very important to become conscious of where you are wasting time. Are you wasting countless hours surfing the net instead of making music? Find a way to better organize the high priority things in your life so that you can spend time in the studio producing music or studying to increase your music production skills.
Commitment
Once you have assessed your time and how best to manage it, the time has come for you to make a decision. How committed are you to a music production career. What lengths are willing or able to go through to get to that goal. If you come to the conclusion that music production is only a part time possibility for you then make sure you are at peace with that decision. There is no right or wrong answer here, you must be honest with yourself. When I was at college many years ago a guest music producer came in to give a lecture for one of my classes. He was late for the class and scrambled to get himself together, but when he spoke it came from a place of truth. After a long speech on the art of music production that he very cleverly laid out with audio examples of before and after productions, he said something that stuck with me to this day. He said: "If you can do any other kind of work other than music and be a happy person, do it." In other words, if you are not completely committed to having a music production career then don't attempt to make a living out of it. Although this brief story aptly fits the music industry, I believe this is true of any kind of work. Why would you ever decide to something as a career that you do not love. One of the many reasons I tell people to get a job or internship in a recording studio is that you will find out if you have the stomach for it. Not everyone does. But one thing is for certain, you MUST be committed 100% to succeed.
Transitioning
Admittedly, it's not easy. Nobody is just going to hand you the keys to a big record company project. You have to be willing to go the extra mile until you have established a music production career deserving of special treatment. Every successful business starts with an owner and an idea. The ones who succeed are the ones who find answers to the problems that arise. They spend the extra time to develop and promote what they are selling. They spend countless late nights finding ways to make their business better. You are no different. Make a goal for yourself. Remember, you are the business, and the person you are investing in is you. Every time you go that extra step to get it right, you establish reputation as someone who does not accept "good enough". As your reputation grows, so does the quality of people you work with. The more demand there is for your services, the more you will be able to charge for them. The closer you are to having a music production career.
Moving on to the Demo
Once you are satisfied with the song, you are ready to take the next step. Step 2 is the Demo stage of the music production process. In all of the excitement over writing a song, it is easy to overlook this important part of the process. This is an experimental phase of the production process that allows you discover how to best present your song to the listener. Lack of preparation before recording can completely ruin a great song. Do not underestimate or bypass this important step!
Step 2: Recording a Demo
Once the song is written to the satisfaction of the artist or producer, recording a demo is usually the next step in the music production process. It can be as simple as a single instrument with voice, or it can be a mock production that attempts to demonstrate what the full production will sound like once recorded. In either case, it must represent the fundamental message of the song no matter what way it is presented. It will serve as a reference to all other people who will working on the project. Quite often, the demo recording is part of the songwriting process. When inspiration strikes, it must be captured so not forgotten. In many cases, these ideas are put together in a piecemeal fashion in an effort to create the song, but do not have the same coherency as a cleanly recorded demo. Once the ideas are worked out, it is very important to rerecord these ideas as a single performance. A piecemeal recording may not uncover issues that arise in the transitions from one section to the next. Recording a demo will help you to solve those problems before entering the recording studio for real. In addition to smoothing out transitions, recording a demo is critical to the development of the song and its music production elements. A demo will allow you to audition ideas without the need to necessarily perfect them. When recording a demo, a harmony part added in the chorus section does not need to be perfectly in tune or in time. It just needs to convey the intention so that a critical determination of the part can be made. Does the harmony convey the proper emotion? Does it achieve a desired effect like raising the energy of chorus section? Should it be used throughout the song or just for select words or phrases ? Answering these types of questions will help you to find the best approach for the final music production. When recording a demo, you can make mistakes, play around with ideas and add depth and meaning to the song. There are many ways to go about this critical process. The best way for you depends on what skills you have, how well you collaborate with others, and what kind of guidance and perspective you may need to achieve the best results. The following article presents three approaches that may help you to make best decisions for recording a demo.
1. Let's Get the Band Back Together...
The great part about recording a demo using this method is that it allows you to get the input of other musicians who likely think the same way you do. Especially if you are in a band together. Because they likely study their own instrument more that you do, they can help to create parts that are not generic or typical. Good musicians will be sensitive to the ebb and flow of the song, they will add ideas and will adjust their performances accordingly to the ideas of others.
Of course, not every musician has those sensitivities. In the wrong hands, a song can become completely butchered if the musicians are not sensitive to the message of the song. It is critical that the message, intention, feeling and motivation of the song is made very clear to everyone involved. You may already have an idea of the direction you want to take when recording a demo of your song. It is very important that this message is conveyed when presented to the band.
Conflicts
Whenever you work with different personalities in creative situations there is always the potential for conflict. It is important to work with people who are like minded or have a complimentary personality to yours. Creative partnerships are not always easy to come by. Musicians that are very good at what they do are likely in demand and may be hard to pin down. Depending on your personality, collaborating with others, when recording a demo, will generally take on one of 3 basic directions. A simple evaluation of yourself will determine what the best way to proceed when creating your demos.
The Three Basic Artist Types:
A. Strong Personalities: An artist with a strong personality is best suited to pay musicians to work for them when recording a demo. If you know exactly what you want, paying people gives you the levity to demand a course of action or direction as you see fit. Conflict often arises when a strong personality tries to impose their way of thinking on a musician who is not getting paid. What is in it for them? If they have no creative input then there is no reason for them to be there in the first place.
B. Collaborators: Collaborators work well with other people and are open to feedback and input from other musicians. Unlike the Strong personality type that dictates all the terms, the other musicians involved are allowed to give feedback and creative input when recording a demo. Since there is an exchange, the musician is more likely to work with you for little are no money because they feel they are part of the creative process. Of course, if you reap rewards from the fruit of your work together it is wise to share those earnings to keep the productive relationship working.
C. Pure Artists: The pure artist is one that seemingly lives in their own little world but somehow has great insights into the way the "real" world works. They offer a fresh perspective of life through the creation of their art. Words like organization, planning, direction and focus on mundane matters are not part of their world. This type of artist is best suited to work with a producer or manager that can help them to bring their art into tangible form. A guiding hand that allows their creative energies to be channeled into something productive like recording a demo.
Once you have determined where you stand as an artist you will be able to answer the following questions:
• Who should you work with?
• Under what terms or conditions should you work with them?
• How will your collaboration with other people benefit them as well as you?
It is important to be true to yourself in the process. Do not try to cheat others by just getting free time from them recording a demo. There must always be a fair exchange, whether it is monetary, exchange of favor or by including them in the creative process.
2. Recording a Demo Yourself
One of the great things about technology is the ability to have almost any instrument instantly available to you in some form to aid in the creative process. Whether the sounds are pre-recorded music and MIDI loops or raw sample libraries that require your to perform the part entirely yourself, the possibilities are endless. Whatever music style you write in, there is a library of sounds and technology available to help fulfill your vision when recording a demo. The greatest benefit to this way of working is that it is always on your terms. You can write or work on your music whenever the creative juices are flowing. Whether you are an impulsive writer or very disciplined one, this method often achieves the best results for those that have a clear vision of what they want and the ability to perform or program it. In some cases, if the level of understanding and musicianship in working with different instruments is deep enough, a final product that is worthy of commercial release can be created. If the songwriter has a limited relationship with instruments other than their own, they will often create something that is generic or outside of the design and realistic capabilities of the acoustic instrument. This may achieve interesting results, but could also render an acoustic version impossible to recreate.

Honesty
The biggest hurdle to overcome, when recording a demo, is being completely honest with yourself about what works and what doesn't. More simply stated, perspective. The biggest issue in creating a music production is that when we listen to something over and over again, it becomes ingrained in our consciousness and can easily be misconstrued as catchy or easy to remember. It's too easy to convince yourself that your ideas are good, because you don't have the perspective of a person who is reacting on a first listen. Preconceived ideas about what your song "is", or "isn't", can sometimes destroy a song, and limit its potential. Historically, very few successful artists produce all of their own studio work without the help or guidance of a producer. The ones that do, often collaborate with other songwriters or people whose opinion they respect. In a nutshell, most artists need somebody to call then on their own BS.
Feedback and Opinions
Artists that are overly sensitive to honest feedback have the most to lose in situations like this. Keep an open mind! The important thing to remember here is that the specific feedback given by others is not always right. It's more important to understand that the "negative" feedback may be drawing attention to the fact that something about your music production is not right. Somehow, the message of your song is not obvious and undeniable at first listen. It's very important not to solicit opinions from everybody. When you play your music for others, watching them is more important than asking them what they think. Notice if their body moves to the beat or if their attention wanes and they start talking about something else. Most importantly, notice where in the song that you lose them, if at all. If you notice that people always turn to comment to you at the same point in the song, you have may a clue to where the problem is. Remember, the body is always more honest than what someone says. Notice if they move, bounce, tap their feet, bob their head when listening to the track. Do they sing the melody when walking out of the room, or when they come back into the room? These are clear honest signals that come from an unconscious reaction to your music. This is how almost all consumers make their decisions when buying music. From the gut!
3. Getting Production Help.
Sometimes, we can lose perspective on our own work because we are too deep into the details and have no vision of the overall song. This is a very common problem today for artists that spend too much time with production elements before the basics of the song are written and in place. When you find yourself in these situations, it usually means that it is time to get help and a fresh perspective. If you are not clear about how to produce your song, team up with someone you trust to help give you a fresh perspective. A fellow musician, songwriter or producer with a fresh set of ears may hear immediately what the issue is and add inspiration for a new direction when recording a demo. Keep an open mind and work with them if you can. If their ideas don't pan out, at least you'll know what doesn't work. A fresh perspective may also help you find problem areas in your song that were not apparent to you as you were writing it. This is typically the part of the music production process where a producer takes over to give a coherent direction for the project as a whole. The reason why a good producer is so valuable is that they can respond to a production from a professional perspective that includes both the overall vision of the project as well as the most minute details.
Brutal Honesty
Unless you have a friend that is brutally honest with you, and I mean BRUTAL, it is usually best to work with someone that is not familiar with you. The problem when recording a demo with friends is that they are very aware of who you are and what your personality is. When listening to your song, they will 'get it' because they have a history with you. They know you. They have a perspective of you that almost nobody else in the world does. When working with a good producer that does not know you personally, they will confront you very directly on what does not work. It can be very uncomfortable as ideas you may cherish are bowled over because they realize that no one else will understand them. This is a great opportunity to grow as a songwriter and an artist. This is quite often the biggest failing of artists and songwriters. Sticking to your guns and pretending that your work is perfect and everyone will get it almost always leads to an early demise. This does not mean that you sell your soul and give up all you believe in and just do what the producer says. Your personality as an artist is what is most important to selling your work. The bottom line is to make that message clear to the producer so that they will guide you in that direction. Don't let a producer create an image for you that does not feel true to who you are or how you want to be seen. Not every producer is a good fit. It may be that the producer you found just doesn't get your music. Find one that does…
The demo is an idea generating machine. It allows us to formulate what works and what doesn't before committing to the process of creating the final music production. Occasionally, some or all of the demo ends up being used as the final product. On Alanis Morissette's "Jagged Little Pill", the demo vocals were used in the final production because they conveyed incredible emotion and power that was too difficult to reproduce in the professional production. Anything is possible... The next step in the music production process is rehearsals. Some artists think that rehearsals only apply to band recordings because this is the most obvious situation. In my opinion, however, any music that needs live performances like vocals or acoustic instruments is better served by working out the studio recording approach as well as the finer details that need attention before the final recording. This is particularly true for hired performers that may have never heard the song before or do not what will be expected of them.
The Music Production Process Step 3: Rehearsals and Band Rehearsals for a Studio Recording
Band rehearsals are an often overlooked but necessary part of the music production process. Rehearsals are most commonly associated with live performances but can also be an important part of the preparation process prior to a recording session. The rehearsal is all about making sure everybody involved knows what they are doing and how they are doing it. Two hours spent in the recording studio going through the arrangement, parts and sounds are two hours wasted for getting a good take. These things can be more readily addressed in a rehearsal studio with a lot less pressure. Rehearsals are not just limited to bands but also are an effective way of working with vocalists or hired musicians that may not be familiar with the song. It is important not to assume that everything is going to go smoothly in the studio. Unless you are working with seasoned professional studio musicians, you will be better off assuming that there will be unforeseen issues in the studio. Band rehearsals will help you to lessen the effect of those issues, so you can deal with those situations better. The pressure of time and money in the recording studio can easily lead to getting something "recorded" instead of getting something "special" recorded. Rehearsals for studio recordings allow the producer and artist to realize their needs before going into the recording studio for real. By working out all of the performance matters, the artist will be better prepared to deal with the recording studio environment.
Here is a list of a few matters that can be easily resolved with band rehearsals:
1. Musicians learn the song arrangement.
2. Establish the best tempo for the song and note what it is.
3. Focus on individual parts and the way those individual instruments work together.
4. Find the best instrument, tone or sound for each part.
5. Discover and resolve new issues that may not have been apparent in the demo recording.
6. Get creative input from the musicians to help enhance the song.
7. Weed out musicians that don't have the right feel for the particular song or part.
8. Determine any additional resources that might be necessary for the upcoming recording.
9. Create a reference demo by recording the rehearsal so that the details of each part can be referenced in the recording session.
I cannot overemphasize the importance of rehearsals before recording, no matter what kind of music. A studio recording is very different from a live performance. Remember, there is no visual on an audio recording. There is no way for the listener to see the passion of your performance. The passion has to come across in a way that is much more obvious in the recording. Additionally, since there is no audience to feed off of in the studio, the energy of the song must be self-generated.
How Band Rehearsals Affect the Recording
The performance process is very different in the recording studio than any other place. Quite honestly, it is a very unnatural environment for most musicians. The use of isolation booths to separate musicians, headphones and lack of clear sight lines between musicians can greatly impede any performance. A bass player using a direct box will not feel the vibration of an amplifier. The lack of good sight lines between musicians may diminish subtle visual cues that musicians use to usher in transitions between sections of the song. The maze of microphones and cables can make any musician feel confined or restricted. Because of these and many other issues, the musicians must be well rehearsed before entering the recording studio. If a song is not properly rehearsed, these minor annoyances in the studio can create confusion and frustration. Something as simple as a bad headphone mix can cause a performance to be dragged down tremendously. Imagine trying to work out your part with the rest of the band when you are having difficulty even hearing them. Is it any wonder that good studio performances are hard to come by?
Organizing Band Rehearsals for Recording
This one may seem to be obvious on the surface, "just get everybody there at the same time", is one strategy. A little careful planning, however, may help to make sure your rehearsal sessions are more productive. When a rehearsal is the focus of preparing for a recording session, you want to make the most of your time. A simple matter like bringing people in only when you are ready for them and need them will help you to be more productive with the people that are there. Being respectful of the others time will make them fresher and more productive when they come in. Because individual situations vary greatly, not everything here may apply to you. Take from it what does…
Here are a few tips to help make your band rehearsals more efficient:
1. Send the demo recordings prior to the rehearsal session.
This is easier than ever. Convert your demo into an mp3 file and send it over email. Make sure that all the band members have received the demos and listen to them prior to the rehearsal session. If they are already familiar with the material then this step may not be necessary unless there is something different for them to listen to.
2. Organizing and scheduling band rehearsals
If you have a group of musicians that you are rehearsing, think about who needs to be there for the basics of the session. For example, it makes no sense to have back ground singers at the rehearsal while you are going over the arrangement with the rhythm section. Ask them to come later so that they are not bored waiting for everybody else learn the song.The best way to work is always to build from the bottom up. Rehearsing the rhythm section musicians first will allow you to really focus on their individual parts. You may hear problems you didn't know existed before because they were covered up by the other musicians. Once you have sorted these issues out, you can now add the additional musicians and work with them in a more focused manner.
3. Consulting with the studio engineer.
Once you have sorted through all the performance and part issues in the band rehearsals, it is usually a good idea to bring in the engineer that will be recording the band. By seeing the setup, meeting the musicians and hearing the music, they will be able to better prepare for the studio setup. A good engineer will be able to make suggestions regarding sounds, what resources are available at the studio and what to expect on the day of the session.
A simple suggestion like making sure the drummer changes the heads before the recording session could easily save hours in the studio. Drum heads will stretch over time and will lose their pitch quickly when first put on. Giving adequate time for them to fully stretch will make the drum sounds more consistent and make the engineer's job much easier.

Rehearsing Vocals
Rehearsals can also be a very effective way of preparing a vocalist who is singing on a programmed or produced recording. In the rehearsal process, a vocalist should be taken to task on the technical aspects of a performance. Pitch, timing, phrasing, annunciation, etc… If there are difficult parts that are tongue twisters or stretch the range of the artist, they can be worked on and strengthened before going into the studio to record for real. Once the technical aspects are sorted through, a rough vocal should be immediately recorded to act as a reference for later band rehearsals and the recording session. If well-rehearsed, the producer can focus on the more important aspects of the vocal performance like the expression of feeling, emotion and the continuity of the song from section to section. These are the things that the listener will relate to in the real world and will influence them to buy the song. I never bought a record because the artists pitch, timing and tone were perfect. I bought many records because the attitude, feeling or emotion struck a chord with me. Once drawn in, I would put on my producer's or engineer's cap on and try to figure out how it was all put together. I wanted to see what was going on under the hood so that I could learn from it. If you are a budding producer, engineer or artist, this habit is a must for your success in the music industry.
What to do if Band Rehearsals are not Possible
Given the fast pace of today’s society and the need to get things done quickly and inexpensively, band rehearsals do not always fit into the timeframe or budget of a recording project. The basic principles can be adapted by being more creative in your preparation of a musician or recording artist.
Sending demos, music scores or chord charts and setting up a short video conference or phone call ahead of the recording can go a long way to preparing the musician for what to expect in the studio. They can prepare ideas and rehearse on their own time. Since so many musicians have recording setups, have them record and send ideas back to you. This will help you to sort out the best of what they have to offer and fashion it into a part before the recording. I have done quite a bit of "long distance" production work by preparing demo sessions for the musicians to work out their parts and add ideas. Once recorded, it is easy to go through them and pick out what works and what needs additional guidance. Using some of the powerful editing features available in most recording programs I can copy, paste and edit performances to reflect what I am looking for. Once edited, the parts can then be individually worked on, rehearsed and ready to go for the recording session. This is why the Step 2: Recording a Demo stage is such an important part of the music production process. If the parts will be dubbed in by the musician from their home studio, a Skype session may be an easy way to make sure you are getting the performances you are looking for.
Over-Rehearsing
There is a fine line between being well rehearsed and being over rehearsed. Band rehearsals serve an important role in the music production process by preparing the musicians for the technical challenges of performing a song well in the studio. It is similar to basketball practice where you work on the fundamentals so that when you are in the game, you perform well. Too much practice can wear out the player and take the edge away come game time.
Here are a few tips to help keep everybody fresh for the recording:
1. Do not overwork a song. If you notice that attention in waning or there is a level of frustration with the process for a particular song, changeover to another song that may be easier to rehearse. This will refresh everyone’s interest so that you can revisit the other song later with a fresh attitude. If a particular musician is struggling with a part, it is best to either simplify it, or ask them to work it out on their own time before the next rehearsal. This will limit the frustration of the other musicians who will eventually try to put their fingers in the pie and make it even worse.
2. Rehearse the vocals or extra instruments with a recording, not the band. If you get what you want from the rhythm section in the band rehearsals. Record a good take of them to use when you rehearse the vocalist or other musicians. This way you will not burn out your rhythm section by making them play the same thing over and over. You can bring everyone in together for a final rehearsal before the recording if necessary.
3. Book a live show before the recording. If you feel that the songs in your band rehearsals are starting to lose a bit of life when performed, book a live performance before going in to record. This is a great way to pump some life into the songs. The energy of the crowd and performing on stage will inspire more spirited performances. All the technical issues you worked so intently on in the band rehearsal will show up in the dynamics of the performance. This is an amazing way to prime the attitude you will be looking for in the recording studio.
The difference between a professionally recorded production versus and amateur one is mostly in the preparation. Any advantage that can be had before entering the recording studio will pay dividends no matter the level of recording facility you are working at. Expect the unexpected when going into a recording situation. Even the most seasoned professionals get hit with unexpected situations. It is their preparation and experience that allow them to adapt easily and find a way to get what they are looking for. Up to this point, we have mostly focussed on preparation for the actual recording. We have written the song, recorded a demo and have refined and prepared the performances in the band rehearsals. Now it is time to go into the studio and capture the magic you have worked so hard find with your songs. In Step 4, Laying the Basic Tracks, we will focus on what to expect in the recording studio and how to lay a solid foundation for the rest of the music production process.
Step 4: Recording the Basic Tracks
Laying down the basic tracks restarts the music production process, but this time with a more critical ear. Issues of timing, dynamic, pitch, tone and performance are all under the microscope. Basic tracking sessions are designed to lay the foundation of a song. The focus will be primarily on the rhythm section, in particular the drums and bass. The process outlined here is most typically associated with band recordings, but many of the techniques can be applied to all recording situations that involve one or more musicians. Like all other parts of the music production process, preparation is always key to making a professional recording. It's really all about gathering information and resources. Gather as much information as possible about what you are attempting to do and that the people who need to know it fully understand their roles in the studio. You need to make sure that all necessary resources are readily available. There are two basic paths one can take with a basic tracking session. The choices are largely governed by one basic principle: THE BUDGET. The budget will determine whether the tracking session can be booked in a professional recording facility or must be done in a home recording environment. Let's take a closer look at both...
Professional Tracking Session
What to Look for in a Professional Recording Studio
When booking a studio that is set up to records basic tracks, most of the recording resources are readily available and good to go. However, don't assume this means that all is going to go perfectly as planned. When booking a track session, most studios will have a list of microphones and a floor plan that shows the layout of the recording space, control room and the isolation booths. Make sure that you are able to visit the space before recording and take note of some very specific issues.
• How big is the live room?
• Do you notice any weird tonal changes to your voice when you talk?
• Can you hit a snare or kick drum to get a sense of the tone of the room?
• How many isolation booths are there?
• Are there good sight lines between the musicians from the booths to the live room and control room?
• Does the studio stock any amps for guitar and bass?
• Are they in good working condition?
• Are all the microphones on the list included in the studio booking?
• Are they shared with another studio in the facility?
• If so, are they all available for the time you are booking?
• Is setup and breakdown time included in the price of the booking?
• Is an engineer included in the price?
• Will a full time assistant engineer be available?
• What happens if you go over time?
• Can the gear be loaded into the studio the night before the session?
These are some of the basic questions that must be answered before booking a studio to record basic tracks. Be very clear about what you get for the rate you are paying and what will cost you extra. If you need to bring in additional resources from outside the studio, such as your own personal microphones or amps, make sure they are clearly labeled so as not to be confused with the studio's gear.
Is the Studio Designed to Get the Sound You Are Looking For?
For the novice recording artist or producer, the most difficult thing to judge when booking a studio is the sound quality of the recording space and control room monitors. If you know people who have used the studio for basic tracks, ask them what their experience was, and what to look out for. If you are using the studio's engineer, get a demo reel from them so that shows examples of tracking sessions done at the studio. Get a cd and listen at home if you can. Most studios have better monitors than you have at home and you can easily be fooled. A big recording space is not necessarily a good one for basic tracks and it is important to notice any strange tonal qualities that exist in the recording space. If your voice suddenly sounds hollow or overly resonates the live room when talking to the studio personnel, this is a bad sign. It means the recording space may have modal problems. (Specific frequencies a room will resonate at.) A good recording space should make your voice sound vibrant and alive, not hollow. Walk around the space as you talk to get a sense of the acoustics of the whole room.
Consulting professionals
If all of this information completely terrifies you, then you may need to hire a professional engineer to help you find a suitable recording space. A professional engineer with recording experience will quickly notice problems in a recording space and give you advice that will save you hours of your time, loads of money and a lot of headaches. The greatest asset an artist or producer can have in a recording situation is to consult a professional. Never seek the advice of a studio owner or manager to determine what will work best for your project. The reason is simple, in a very competitive market they are focussed on getting you to record in their facility. Once you are in, you are left to deal with making the basic tracks work with the resources that are available. A professional engineer will guide you with information about what to look for when booking a studio for the tracking session. If you are looking for a big drum sound like Led Zeppelin, you will not get it in a small space no matter how reverberant the space may be. It is important that you understand the parameters of what you are looking for when booking a studio. Take an engineer out to lunch and pick their brain, get suggestions for studios that fit the sound you are going for that work within your budget. Consider their advice and opinions carefully. Remember, the difference between a good production and a great one is a lot of subtle decisions that add up over the course of a production.
In the Studio
Because tracking sessions require a larger recording space and a lot of resources, most home setups cannot effectively accommodate a full basic tracking session without compromise. Aside from a suitable recording space that is free of environmental noise, one has to consider acquiring extra microphones, cables, stands, headphones, preamps and more inputs to get into the recording device. If your home recording setup cannot meet these basic needs you will have to consider combining your resources with friends or renting the necessary equipment from a local dealer to record your basic tracks. The approach to recording in a home studio environment presents many challenges that are not typically encountered in the commercial recording environment. Most home environments are designed with rectangular shaped rooms. Parallel surfaces in a recording space creates many problems including flutter echo, standing waves and room modes. It is important to place instruments carefully to avoid or minimize the effect of room modes and standing waves.
The Home Tracking Session

Making it Work
There is no question that recording basic tracks in a home studio environment is vastly more compromised and difficult than recording in a commercial facility. That does not mean, however, that the results cannot be as good or even better. Even the best designed commercial recording facilities present their own challenges, and getting the sound you are looking for will always require some careful planning.
The home environment also requires some ingenuity. It is more like MacGyver, however, than it is like CSI with all the latest gadgetry. Either way, you can accomplish your goal and get great results for your basic tracks with style points being the primary difference. To help you along your path to making a better home tracking session, here are some keys to success.
1. Carefully place the instruments: In smaller recording spaces (anything smaller than 20 feet by 20 feet is a small space) I find the best way to guide your drum sound is with the kick drum. In small recording spaces, the kick is most obviously affected by room resonances which are very predominant in rooms smaller than 20 by 20 feet. (More on this in Acoustics) Move the kick drum around facing the center of the room in every place that you can get it with one thing in mind. Remember that the rest of the drum kit and the drummer must be able to fit where you set it up. Hit the kick drum until you find a place where the drum tone is strongest without being muddy or over resonant. Basically, you are finding the placement that best resonates the drum shell when struck. Set up the rest of the kit around this placement. The same approach applies to all other instruments. When getting sounds for your basic tracks, always let your ear be the best judge of whether something is good or not. Even if it looks 'wrong', go with the sound before aesthetics. Sometimes interesting sounds can be achieved 'accidentally' by allowing your ears rather than your eyes be the judge. Unless you are taking photos for the CD artwork, no one will ever know or care how you got there. Follow the same process when placing bass and guitar amps. If an amp sounds muddy, put it on a chair or table to minimize the effect of the floor resonating the amp. If the amp sounds too thin, it can be moved closer to a wall or corner where the early reflections will add extra low frequencies to the tone.
2. Use of Gobos: Gobos (short for go-between) are free standing absorptive or reflective barriers that are placed between instruments. These can be used to help tighten or control the reverb or resonances of the room from overly affecting the sound going into the close mikes. Generally, it is a good idea to create a semicircular wall around the drum kit from the back side. Never obstruct the sound of the drum kit with gobos in front of the kit.
The idea here is to minimize early reflections back into the close mikes that can negatively color or flatten out the sound of the drums. If any part of your drum kit is closer than 10 feet from any surface (other than the floor of course!), you will have problems with early reflections. These early reflections create a comb filtering effect that makes the instrument sound indistinct, muddy, thin or undefined. In a home recording situation you can use mattresses, Couch cushions or even suspended packing blankets to help minimize these negative effects.
If you are recording multiple instruments in the same room for your basic tracks, using gobos between the instruments will help to isolate the bleed from one instrument to the next and give you more control of individual sounds in the mix.
3. Miking Techniques: Whether you want to use three mikes or thirty mikes for your basic tracks, you can get great sounds by understanding what is most important to look for. To me, the most important mikes for a drum kit are the overheads, followed by the Kick mic and finally the Snare mic. Everything else is filling in whatever is missing. If these basic mikes are not set up well, everything else will typically create more chaos. The overhead mikes should capture the essence of the drum sound for your basic tracks. It is the only true stereo perspective you have of the kit. In addition to capturing the sounds of the cymbals, they also capture the sound of the snare and kick in the room. Play with different mic positions including X/Y, Spaced Pair and ORTF. See what works best for your recording space. Sometimes, setting up mikes above or behind the drummer will give you a better perspective of the kit as the drummer would hear it. In a way, the more mikes you use, the more difficult it will be to get a good sound for your basic tracks. Close mikes are there to add detail to the overhead mikes, but because they also pick up every other part of the drum kit, you will get loads of off axis phase issues. This will have a tendency to whittle down the fullness of individual elements of the kit. If you focus on a great overhead sound and then the kick and snare respectively, everything else will only need a minimum of effort, if at all. Don't forget the phase reverse switch. Most USB and Firewire interfaces do not have a phase reverse switch built into the unit. This is a travesty if you are using more than one mic. Make sure you have some phase reverse XLR turnarounds on hand at all times. Because signals travel in waves over time and space, the signal reaching your overhead mic from the snare drum is most often at the compression cycle (in phase) when the close mic is receiving the rarefaction cycle (reverse phase) of the waveform. What the hell does this mean? Basically, one mic is trying to push a lot of compressed air through your speaker at the same time another mic is trying to create a vacuum of air particles. In other words, one mic is trying to push the speaker outward while the other is trying to pull the speaker inward. This results in a cancellation that leaves the snare most often sounding hollow and lifeless. Be very aware of this as you go through your drum sounds. Be sure to check the phase of all mikes to the kick and snare until the fullest sound is achieved.
4. Getting Sounds and Adjusting Levels: Be sure to leave plenty of headroom when setting levels for your basic tracks. Many USB interfaces clip well before the digital dBFS clip light goes on in the recording application. There are many reasons for this, mostly due to inexpensive components and inadequate power supplies. Remember, the performer will always play louder in the recorded performance than when getting sounds. Set your levels at least 3 to 6 dBFS lower than where you want them to end up when getting sounds. Never attempt to set sounds for any song unless the musician is playing the exact part at the correct tempo. This is the most common oversight I see with novice engineers recording basic tracks. If the drummer is playing at 125 bpm, but the song you are going to record is at 90 bpm, you will tighten up the sounds too much and the drum sound won't breathe properly. If you reverse the situation, your sounds will be too loose and open and when performing at the faster tempo the sounds will become muddy and indistinct. No one sound will work for every song, you will need to make adjustments for each track. Try to record songs that are similar in tempo and vibe together. This way, your adjustments from song to song will be minimized. Adjust the acoustics of the drum room to compensate for the tempo. The faster the tempo, the deader the room will need to be. The slower the tempo, the more reverberant a room should be. Make use of as many packing blankets, rugs, pillows, mattresses as you can have at the ready to make these changes. These are just a few tips to help you get pointed in the right direction with your basic tracks. As always, use your ears, not you head when making decisions. Your head will talk you into horrible decisions, your ears will tell you what is right or wrong. Don't be afraid to tear everything down and start over if it just isn't working. Even the best laid plans designed by professionals with years of recording experience can yield horrible results. If everything you try is just not working, then start over with a completely different approach. What sense does it make to waste hours of time trying to fit a round peg in a square hole. Aside from being completely liberating, you will learn a ton of new ways to record!!!
5. Communication and Headphone Mixes: There are very few things that can mess up a great recording setup more than bad headphone mixes and a lack of good communication. It is worth the extra time to get a headphone mix that works for everyone when laying the basic tracks. If that is not possible, then create two or more even if they have to be mono mixes. Make sure the everybody can hear themselves as well as everybody else. Talkback mikes are a must in the studio to allow free communication between takes. These mikes do not have to be recorded and can be shared by musicians if necessary. It may be necessary to run them through a small mixer so they are added to the headphone mixes. The engineer is usually responsible for opening up the talkback between takes, but using inexpensive mikes that have an on/off switch can sometimes be a more convenient solution.
6. Miscellaneous Thoughts: Remember that your basic tracking session is meant to lay a new foundation for the rest of the recording. The most common issue that arises with basic tracks is that musicians will have a tendency to overplay because they are not hearing the whole production. They will naturally try to fill holes in the song that are meant to be filled later with other instruments. If this is the case and you have a demo with all of the planned parts recorded, use this as a reference in the studio and point out that it is important to stick with the plan and not try to overplay your part in the production.
Make sure that everybody is comfortable with their headphone mixes and have everything they need at the ready before you start recording. You want your musicians to be 100% focussed on their performance, not on the fact that they can't hear themselves in the headphones. Keep a close eye on this and ask regularly if there is anything anybody needs.
Finally, a little advice on using a click track for your basic tracks. Tread carefully when asking musicians to play to click tracks. If the drummer practices regularly with a metronome then this should not be an issue. If not, then use the click to introduce the desired tempo and let the rest happen. You can easily edit a performance back to a click and still preserve the feel if done carefully. You will never be able to make a lifeless performance sound great once bludgeoned by a click track. If you find the drummer struggling to maintain consistency with the click then take careful notice of how it affects the song. Maybe the song needs a faster tempo to get the desired feel. It can be much harder to fight the natural tendencies of a musician than to just go with it, get the feel you want, and deal with the rest later.
As you can see, recording in a home studio requires much more preparation and planning than working in a professional studio. Essentially, you are trying to recreate what happens in a carefully designed recording studio in your home environment. This can be a great challenge even for a professional engineer, never mind the novice. Always let your ears be the best judge. If something sounds good to you, go with it. Don't concern yourself with looks or whether it is an "excepted" method for recording. Finally, use reference recordings. If you are trying to get a particular sound from another recording, have it available to you when getting sounds. Even if there is no chance of capturing it exactly, at least you will be focusing your efforts in the right direction. Once you have laid the basic tracks, it is time to prepare for the next phase of the music production process, Overdubbing. Overdubbing allows each part and performance to be focussed on in detail. Any variations of performance, pitch, tone and timing can be scrutinized until the desired effect is achieved. Click below to read more about this important phase of the music production process.
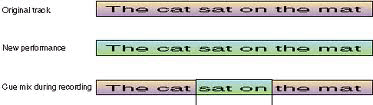
Step 5: Overdubbing
Overdubbing is the next stage of the music production process. A well thought out approach is absolutely necessary when taking on this stage of the music production process. The importance of the demo looms large in this step. If you have already sorted out the majority of your ideas and the individual parts the overdubs will be primarily focussed on capturing the sounds and performances that fill out the production. Ignoring the demo stage in the music production process can easily turn your studio production into a high priced demo. A very common problem today...
What is Overdubbing?
Overdubbing, sometimes called "sweetening", is a process that allows performances to be recorded synchronously with prerecorded material. Imagine recording your band where each instrument has a dedicated track or series of tracks. If each performer is isolated acoustically from the others, they can be rerecorded at will without affecting the other musicians' performances. The benefits of overdubbing are tremendous. It means that a single bad musician in a band will not ruin the whole recording, because their part can be replaced. In the days of mono and early stereo recording, everybody was in the same room and recorded together. The inability of the singer to perform well might mean that the band would have to play the song over and over again till the vocalist got their performance right. In the professional recording world this was the music production process until the invention of Sel/Sync recording in the 60's. Sel/Sync stands for Selective Synchronization. A multitrack recorder with Sel/Sync capabilities would allow additional tracks to be recorded synchronously with the original performance on the same tape machine. Later, those performances would be mixed into mono or stereo for the commercial release. The invention of isolation booths in recording studios soon followed, and allowed individual musicians to be recorded with a minimum of bleed into the mikes of the other instruments. If one person's performance was lacking, it could be easily be rerecorded without affecting the other musician's performances. It also allowed more flexibility with processing during the mix down session. Over the years, the number of tracks available to record on steadily increased allowing music productions to get larger and more sophisticated. Overdubbing became the norm for almost all music productions. Although some feel this has degraded the quality of music, very few artists record without overdubbing.
So What are the Benefits?
The benefit of overdubbing is that it allows the each individual part to be focussed on and perfected to the artist and producer's taste. This requires a lot of discipline and can sometimes lead to performances that are technically perfect, yet sterile and lifeless. It's not natural for musicians to perform individually. This is why a tracking session requires the whole band to perform together. The drummer needs something to respond to in order for his/her performance to sound "live" and not programmed. Overdubbing is a very difficult thing to get right. Because of the lack of visual cues that would normally lead a performance from one section to the next in a song, the musician has to record their part blind against the prerecorded band. Subtle pushes and pulls in a performance that may be conducted by subtle visual cues of the other musicians now disappear. The overdubbing performer is then left to guess or adapt their performance to match what was captured in the tracking session. This has naturally led most multitrack productions to the use of click tracks which even out the tempo of the tracking performance. With a click track, the overdubbing process is less of a guessing game and more of a known quantity. Because of the difficulties overdubbing presented in the recording studio, musicians who were good at it became hired guns to quicken the production process. Many musicians have made very successful careers only working on other artists recordings in the studio.
Getting Into the Process
Multitrack recording is far more sophisticated than it may appear on the surface. If a song is not thought out well enough in the demo stage, the music production can easily turn into a big mess of overdubs in an attempt to find a magical part. This is the mud against the wall approach. The engineer is then left to sort out all of this junk in an attempt to make it sound professional. In a professional music production, the overdubbing process must be very directed. If it is, there will always be room for experimentation with the overdubs when called for. Many music productions come to life in the overdubbing stage where key hooks in the song can be created and developed. If the overdubs are created upon a foundation of quality work from the tracking session, then a song can really take shape quickly. If not, the overdub stage is relegated to a rescue mission in an attempt to save the song. Every part must be layered on with a measured goal or what you will be left with, at best, is a good sounding demo instead of a quality recording.
There are many stumbling blocks in the overdubbing process. Here is a list of the most common ones encountered:
1. Easy to make everything too perfect. Performances can lack a vitality and freshness.
2. Layering too many parts usually makes everything sound smaller, not bigger and creates a lot of extra work.
3. You can wear out a performer by having them repeat their performances too often.
4. Easy to lose perspective on the whole production. (forest through the trees syndrome)
5. Quality of sounds can become more important that the performance.
6. Easy to over complicate the process in an attempt to make a part sound unique.
7. The production can easily take on a "paint by numbers" feel.
8. Easy to accept average performances thinking they can be fixed with editing.
Where Has All The Time Gone
In a standard 10-15 song CD, overdubbing is the stage where the most time is spent in the music production process. In a typical production that lasts about 3 months, 7-10 days are for tracking, 10-14 days are for mixing, and everything in between is overdubbing. That's more than 2/3 of the production time! You can see why it is critical to be well prepared for this stage. Today, many productions are taken on a song at a time. This is particularly true in modern Hip Hop and R&B music production where most of the work, other than the vocals, is programmed. The benefit of this style of production is that the resources available to you are virtually limitless. You are not necessarily subject to what the performer can give you in terms of acoustic sounds. In many ways, the one song at a time approach is much better. Each song can be addressed, focussed on and finished individually without distraction. Unfortunately, this is a less efficient approach when recording bands because it may take you a whole day just to get the sounds right and ready to record. To go through this for each song is impractical and expensive. It makes more sense to record all of the basic tracks for each song at once, making adjustments to the sounds for each new song as required. The issue at the overdubbing stage is that it is also more efficient to rerecord all the bass parts together, all the guitar parts together, all the keyboard parts together, etc… To keep 10-15 songs fresh in your head and really hone in on the message and feeling for each can be a difficult task for the producer. If you cannot change gears from one track to the next quickly, the process can easily turn into a factory mill production. The end result can be that each song does not stand out as unique against any of the others. We've all heard records where every song sounds the same, and the CD is just complete blur.
A Better Approach
What's best is not always what's practical. Most budgets today do not allow for a song by song production style. This is why the Demo stage is so important. If each song has a properly recorded demo it will be much easier to organize your recording time to get what is essential for each song. The demo serves as a reminder of the essence of each song and how it should be presented. In the demo stage you are forced to focus your attention on one song at a time. The idea is that you are attempting to dig out the core essence of the song. The process forces you to find out what makes the song tick. The resultant parts may not have the sound quality of the professional recording session, but they carry something much more valuable. The feeling, the vibe, and the truth of what the song is about.
So What's the Upshot?
If the music production process is carefully thought out and worked through step by step, then the Overdub process is all about capturing the best performance. If the parts are already sorted out in the Demo stage, you will not be wasting time in the studio trying to create them. If worked out ahead of time, there will be more time left for experimentation if the inspiration arises. One focus of the overdub stage is to create great sounds that makes each performance really come alive. It is much more difficult to create a unique sound for each instrument in a tracking session because amps and instruments are often forced into small booths, sound locks and closets. Creating a big sound in a small space can be very challenging. Add on the fact that the engineer is trying to record several musicians, sort through headphone mixes, talkback mikes and get great drum sounds all at once. Not an easy feat, even for a seasoned professional.
The Overdubbing Process
Preparation is always key in any recording situation. This is easier to consider with large setups, but is equally important in the overdubbing stage. Preparation does not guarantee that everything will go perfectly as planned, but it does allow you to adapt more quickly to the unexpected events that do occur. It's very easy to overestimate what you can accomplish on any given day of recording. No matter how well you plan the recording date, there are always things that are out of your control. If the vocalist comes into the studio with a cold that day, you might find yourself with a lot of spare time. If they are having problems hitting a certain note, you may walk away with vocals on one song instead of two.
Here are a few helpful hints to help make your overdubbing sessions go a bit more smoothly:
1. Know exactly what you are working on that day
2. Have all the resources you need available.
3. Make sure all parts have been rehearsed and that all performance issues have been sorted out.
4. The overdubbing musician should play their part at the tempo of the song when getting sounds.
5. Set up a comfortable space for the musician to work in.
6. Always have a plan B, incase everything you planned goes wrong.
7. Never rush through performances in an attempt to complete your goal for the day.
8. Never settle for average performances that will need to be fixed with editing.
9. When you capture the essence of a part, record it everywhere it needs to be without delay.
10. Take regular breaks, especially if there is frustration and confusion in the studio.
11. Always communicate with the musician immediately after a take, even if it's to tell them you are not sure or need to listen to it again.

A Special Note on Vocals
Recording vocals is perhaps the trickiest of all the overdubbing processes you will undertake. Because the vocal is typically the primary focal point of a music production, there will often be added pressure on the quality of their performance. Depending on the personality type of the artist this can go easily or be a complete nightmare. Some artists will rise to the pressure, some will collapse under it. How you manage these situations can and will make or break the project. There are two sides to the vocal recording process that will help yield the best results. There is the technical side and the emotional side. The technical side is easy for the most part, but it is easy to overlook some subtle details that may affect the quality of the performance. Here are a few technical setup tips:
1. Create a comfortable recording area for the vocalist.
2. Keep all cables and equipment neat and as out of the way as possible.
3. Make sure the vocalist has all their needs readily available. Music stand, pencil, lamp, hot tea and lemon or honey, etc…
4. Position the mic as unobtrusively as possible. Make sure it does not interfere with the lyric sheet.
5. Mark a clear, comfortable distance from the mic for the performer. Using a pop screen is an easy way to accomplish this.
6. Make a great headphone mix. They must feed off the energy of the music and must hear themselves clearly.
7. Make sure they are comfortable, ask often if they need anything.
8. Always communicate IMMEDIATELY after a take. NEVER leave the artist in the room wondering what is going on.

The Psychological Side
The most unpredictable aspect of recording vocals in the studio is what it will bring up emotionally for the artist in the recording studio. I have seen everything from downright panic, convulsions, vomiting and total self-destruction to complete one take performances that blow you away. People will always show their true colors when under pressure. This is why, it is critically important to create a bond of trust when working with the artist through the production process. If you want to produce music for a living, the best advice I could give you is to study human psychology. It's not your job, as a producer, to be the therapist. It's your job to channel their personalities and issues into quality performances. Sometimes that means being a hard ass, sometimes that means giving them a shoulder to ball their eyes out. The goal here is to get great performances. How you respond to these situations will do more to make or break a production than you could possibly imagine.
Here are a few tips to help set the stage for quality performances:
1. Create a comfortable recording environment for the artist.
2. Be sensitive to the artist's needs and look for any signs of discomfort. Address them immediately.
3. Talk about the song before recording. Bring them into the feeling that inspired the song in the first place.
4. Never overwork a vocalist. If they are not feeling it, move on to something else or take a break to refocus their energy.
5. Allow the artist to express their frustrations between takes. These are usually blocks that inhibit better performances, acknowledge them, talk about it, and get them out of the way.
6. Always respect the artist the same way you want to be respected.
7. Don't over dwell on technical issues like pitch and timing. These problems are usually due to trying too hard or an inability to feel the music through the headphones.
8. If all else fails, do something radically different. Have them perform with a handheld mic in front of speakers if necessary.
9. The performance is always primary over the sound quality.
Sometimes, it's the unorthodox approach that works best in the studio. We all want to get the highest quality vocal sound in our performances. If that quality comes at the price of a compromised performance, then it is all for naught. NOBODY buys records because of the quality of the mic used in a recording. They buy a record because the performance on that recording speaks to them. It's an intangible quality that cannot be defined in terms of frequencies and dynamic range. You just know it when you hear it.
If there is one bit of advice I can give you that will help your overdubbing sessions yield the results you hope for is to let your gut be the guide. Your ability to judge how something feels will always get you closer to what you are looking for than looking for technical issues. The whole idea of the preparation process prior to recording is to keep the technical issues outside of the studio. Once you are in the studio, your focus must be on the quality of the performance. The Demo stage allows you to work out the parts. The Rehearsals allow you to hone the performance issues of pitch and timing. Work out ahead of time with the engineer how to keep the recording setup as transparent as possible. The recording session must be all about capturing the magic. Nothing else… Inevitably, all of your best efforts in the studio will still require some editing work. The process of editing performances, like the process of overdubbing, requires a lot of discipline. Just because you can, doesn't always mean you should. Click on the link below to move on to Step 6 of the Music Production Process, Editing Audio.
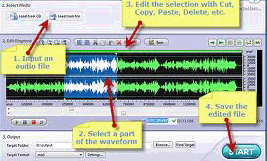
Step 6: Editing Music
Through every stage of the recording process it is imperative that the editing music work be addressed as soon after recording as possible. Editing, left undone will compromise any future overdubbing and ultimately, compromise the song. The process of editing is one that is fraught with critical decisions. Over-editing can lead to cold, lifeless performances. Under-editing can leave your song sounding unfocussed and sloppy. In this article I want to address the editing process and how to make the best decisions for your music productions.
What Does it Mean to Edit Music?
Before we take a closer look at the editing process, let's start by defining what editing is. Computer technology and software development has blown the doors open for what is possible when it comes to editing music. Today, we are doing things with audio that was inconceivable a mere 20 years ago. To put this all in perspective, let's start with a little history…
Analog Tape Editing (The Analog Era)
The concept of editing was not even an option to the audio engineer until the 50's when analog tape entered the recording industry. From 1908 until the mid-50's, all recordings were literally cut directly to lacquer. A lacquer is a softer version of the vinyl disc. A lacquer was used to record a performance and later to create the stampers that physically pressed vinyl discs for commercial release. A lacquer disc was good for one recording. No editing! At this point all recordings were mono, and musicians performed in the same recording space together. No room for mistakes. Analog tape ushered in the world of editing music. If the first half of one take was great and the second half of another take was great, the two performances could be spliced together with a razor blade and some splicing tape. These simple rough edits changed the recording process, because difficult to perform sections of a song could be recorded over and over until a suitable take was achieved. That take could then be edited into the rest of the song. The Beatles were famous for this type of editing work in the studio under the brilliant guidance of Sir George Martin. As analog tape recording technology developed, the ability to punch in on a performance would also redefine the way performances were recorded on multitrack tape machines. If a vocalist had difficulty singing a particular lyric or melody, the line could be rerecorded over and over again on the same track until the desired result was achieved. By the 70's, this was a standard production procedure. As track counts increased, it was common to record many vocal performances of the same song on different tracks and selectively choose the best performances, section by section, line by line, word by word, and syllable by syllable. Using a process called bouncing, the best of the best could be recorded onto another track and serve as the "compiled" master take, called a "comp" for short.
Sampling
In the 80's, sampling started to take over as the preferred method for editing music. If a performance in the first chorus of a song was better than the subsequent choruses, the part could easily be sampled, or recorded to another tape machine, and "flown in" to the other choruses. This greatly simplified the recording process for background vocals that were difficult to perform and require many tracks to capture. Rather than having the vocalists record every section of the song with the same part, it was much easier to record it well, once, and then "fly" it to the other sections of the song where it was needed.
Digital Editing
In the late 80's and early 90's digital recording technology forever changed the quality and detail of editing music. Once a sample was loaded, it could also be adapted in terms of pitch and timing. Although many of the tools used were crude by today's standards and had very little input in terms of visual editing, they were quite effective if the editor had good ears. Digital processing, eliminated many of the physical and technical issues associated with analog processing technology.
Non Destructive Editing
Enter computers… Once professional audio recording with personal computers, entered the recording studio for real in the mid 90's, the world of editing music nondestructively was born. The biggest issue of all tape based recording was that it was all destructive. Once you hit record, there was no undo button to get you back where you were. I often blame the lack of hair on my head on the destructive recording I did throughout the 80's and 90's! The ability to save and store a virtual infinite number of performances, takes, and overdubs allowed them to be edited in a way never possible. Multiple takes could easily be copied, pasted and moved around at will without ever affecting the original recorded performance. Each kick and snare hit of a drum performance could be perfectly matched up to a click if desired. The delicate timing of a guitar solo could be moved around with incredible accuracy until the perfect feeling was achieved.
Pitch Processing
Throughout most of the history of professional recording, pitch and timing were always subject to the ability of the performer. If you listen closely to many of the great artists of the 50's and 60's and 70's you may be horrified to find how "off " pitch many of the vocal performances were by comparison to today's standards. Singing perfectly in pitch is not the deciding factor in the quality of an artist. The era of multitrack recording, overdubbing and editing music led many down artists down the trail of trying to "perfect" their performances. This led to torturous sessions where parts were sometimes recorded over and over hundreds of times. Although sampling technology allowed some of this to be less work for the artist, the time consuming and tedious work just shifted to the producer and engineer. In 1997, a processor created by Antares, called Auto-Tune, forever changed the way people recorded vocals. The difficulties of recording in the studio and having perfect pitch while monitoring through headphones was alleviated. The producer could focus more on the performance and attitude rather than the pitch being perfect. Once the best performance was achieved, the pitch could be corrected to taste with a minimum of effort.
Editing Music Defined
Although I have avoided it to this point, editing music must be defined as any process that alters the original performance. This includes, but is not limited to, splicing, punching, flying, comping, sampling, pitch correction, stretching and compressing, cut-copy-pasting, and any other method used to alter the tempo, timing and pitch of a performance.
To Edit or Not to Edit, That is the Question…
The process of editing music has raised ethical questions in the minds of many artists and consumers. Many feel that if you cannot actually perform your song in a live setting with the same quality of performance as the recording, then you are merely a product of technology and not a true artist. It's important to note that the vast majority of these artists do not record live to stereo. They all use some form of editing technology. It's all a matter of where you draw the line…
Many artists, today, use editing technology to create art that stretches the boundaries of what is possible in acoustic only recordings. They are creating something new that can be as compelling and artful as any acoustically recorded performance. To summarily dismiss these artists because they are not "natural" amounts to a form of prohibition of the art of music. Any restriction on any art form is completely unacceptable.
For those that disagree, let me be clear. Do what you do, the way you want to do it, nobody's stopping you… If you create something that is worthwhile, people will buy it and you will have a career. Never blame technology for lack of sales or success, use what technology suits the type of music you make and take responsibility for the quality of your own work.
The Recording and Editing Music Process
There is not one single method of recording and editing music that will work with every artist and every situation. There are many factors that lead down the trail of making the best decisions. The amount of editing necessary will be based on many factors that have more to do with the ability of the artist to perform well in a recording studio situation than it does the level of their talent.
Start With a Good Recording
When entering any kind of recording situation, you never really know what you are going to get. A maze of issues can arise including inadequate monitoring, uncomfortable recording environment, psychological issues, physical issues, equipment issues, time issues, etc… The ability to minimize and control the effect of these problems in the studio will go a long way in determining how much editing work is necessary. In my personal experience, preparation, communication and making the artist comfortable are my priorities. A producer or engineer cannot control how and artist will respond to a recording situation. They have very limited control over the artist's abilities. They do, however, have control in adapting the recording environment to give the artist whatever they need to feel comfortable. Very few artists perform better in stressful, encumbered situations. Always put the artist in the best situation to succeed. Make sure they are comfortable with everything before you begin recording. Keep a close eye and notice if they are feeling stressed or uncomfortable. Address it immediately before it takes over the session. Never accept mediocre performances with the idea that you can edit it into something. When editing music, there are only so many factors under your control. Attitude, energy and feeling cannot be edited into a performance consistently. Before you start editing, take a good listen through the song, section by section and make sure that you have enough of what you need to start the editing music process. If you find a particular section of the song is weak by comparison to the others. It may be worth recording a few extra takes with a more concentrated effort in that area if the attention is needed. Once you have a performer in the right frame of mind, it is better to capture them with as many takes as you can. It is much more difficult to come back a day or a week later and capture the exact same feel.
The Process of Editing Music
The amount of work editing music you will do is dependent on the quality of the performances you have captured. The better the performances, the less editing work will be necessary. If you focus on the quality of performances first then the editing work will be a breeze. All the editing work that follows should take on the 3 step process that follows. Depending on how well the recording stage went, it may not be necessary to do all 3 steps. It is a process, that will keep you from diving in too deep, too quickly. The 3 steps for editing music outlined here can be approached in 2 basic ways. One way is to work section by section with each step going as deep as is necessary. The other is to address the song as a whole and work each step in the context of the big picture. I prefer the later approach, because it helps to prevent you from going down the rabbit hole of over-editing and keeps the song in perspective. The following process will be explained using the example of editing a vocal performance. Because vocal editing typically requires the most attention, the example should be easy to understand. If understood, the same process can easily be66 followed using any instrument or performance when editing music.
Step 1: General Editing
General editing work involves determining what works best on a global basis. If you have 3 vocal performances, start by determining which of the 3 is best overall. That will be the take you build the rest of the editing work off of. Now determine if there are better performances for sections of the song in the other takes. It may be that the 2nd take has a better bridge section performance than the best overall take. Continue this process, section by section till you have the, overall, best of the best performances. Once you are done, listen to the general edits you have made to determine if the performance sounds coherent and believable. You may need to match levels between edits so your decisions are not swayed by technical differences. Take note of sections that need more detailed work before continuing on to the next stage of the editing music process. To help you with the assessment process, it may be worth making a spreadsheet that has the lyrics in one column and a separate column for each take. Click here for an example copy. Write out the lyric line by line in the first column and use the columns to the right for each take. You can use a grading system (A, B, C, D), a numbered system (1-10), check and x, or whatever system works for you. I prefer simple check marks for what works and an X for unusable lines. With the right artist, I sometimes do this as I am recording. This way I can see quickly if a certain line or section of the song needs more work before deciding to edit.
Step 2: Medium Editing
Only enter this stage of the editing music process if there are lingering issues with the General Editing step. Through the course of making the general edits you find that there are certain sections, phrases or words that need a bit more attention. If you have made notes about each section take them out and start addressing them one by one. Start by grabbing whole phrases if possible. Look for attitude and feel instead of perfect pitch when gauging the quality of a performance. A little pitch correction on an otherwise good performance will sound much better than a perfectly pitched average performance. If you need to steal a word of two from another take, make sure that the timing and feel of the edit sounds natural. Remember that you can copy and paste the same performances from later or earlier sections of the song. This is necessary if none of the existing performances in that section of the song work. Make sure that the timing and melody are the same or at least work. Use the previous performance as a gauge when matching up the timing. I always try to avoid using the same exact performance in more than one section if possible. Sometimes it is better to grab an alternate performance from another section if there is a good one available. This way you can keep the subtle differences that occur from one section to the next. This will add a sense that the song is more of a "live" performance.
Step 3: Fine Editing
Before you start to get into the detailed fine editing music process, it is worth a fresh listen to the overall song. When you listen, focus on the whole song and not on the vocal part. Listening to the same part over and over can start to take you into the world of minutia and away from what is most important, the overall feeling. Too many musicians, engineers and producers get so caught up in the small details, they forget that that larger picture is also being effected.
The end result of this behavior can turn a vibrant performance into a plastic surgery case where everything sounds perfect, but somehow seems wrong. Remember that part of the music experience are the subtle "imperfections" that make the song believable. Once you have assessed this situation, you can then turn to the finer details that trim everything out just so. Pick your spots. Start with the most obvious problem areas and work from there. Try to avoid the, "start from the beginning" approach where you edit the crap out of everything. It’s important to keep the perspective of the whole song in mind. Certain songs may require this type of "bully" editing as part of the driving message of the song. If you have a hip hop track that's all about being the greatest ever, heavy editing may be a necessary part of achieving that effect. There are no hard and fast rules when editing music. The best advice I can give to you here is to always keep the message of the song in mind when deciding the extent of the editing work. Try to capture in the recording as close to the desired effect as possible, even if the desired effect is unnatural. There is a method to recording vocals that makes the T-Pain/Cher effect work more effectively. If you are unsure, record a short section and try to edit it to see if the desired effect can be achieved. Keep working at it until you discover the best approach before recording the whole song.
Finally, always try to edit while the material is most fresh in your head. Even if the edits are rough, general edits, they may save you hours of time later trying to reacquaint yourself with the performances. The vocal comp sheet can also be a great guide for you if you need to do the edits later. You may have a completely different perspective the next day and hate everything, but at least you finished what you thought was good that day…
Now that the approach for editing music is laid out, you may find that you will be doing much less work and getting better results. Although the editing music process is mostly associated with cleanup of the recording and overdub phases, it also finds its way into the next phase of the music production process, Mixing. The process of mixing may reveal many flaws that were not as apparent during the recording phase. As each part comes into focus, so do the leftover issues. Of all the stages of the music production process, mixing is by far the most difficult. Click below to discover some simple secrets to making the mixing experience, less frustrating and more fruitful.
Step 7 (Part 1):
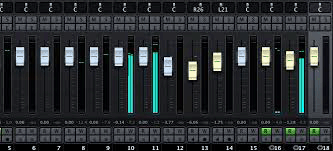
The Music Mixing Mindset
The art of music mixing is by far the most elusive and difficult part of the music production process to comprehend. Of all the engineering skills one could learn, mixing audio is by far the most difficult to master. That's why, in the professional audio engineering world, it is by far the highest paying job. The record companies are well aware of this critical part of the music production process and will pay a premium for engineers that do it well.
I am often humored by home recording enthusiasts, musicians and students of engineering when they fail to understand why their mixes don't measure up to what they hear on CDs. To give an analogy that may put this in perspective, let's say that you are a guitar player who idolizes Jeff Beck. You've been playing guitar for 1 year and can't understand why your guitar playing is not as good as Jeff Beck's. Mixing is as much of an art as guitar playing. It requires a lot of patience, knowledge, and practice. In this article, I want to give you some insights that will help correct your approach to music mixing. Without the right mindset, you will be embarking on a journey with no map and no idea of where you are going. Mixing is not about processing, tricks, effects or EQ. It is all about understanding how we perceive sound, and how to capture that essence in a pair of speakers.
Zen and the Art of Music Mixing
The art of music mixing is very much the path of the Zen master. The more present you are when you mix, the more quickly you will work and the less you will fall prey to the trappings that come from over processing. You will only do what is necessary, no more, no less. The biggest problem I see today with music mixing is that the mindset for mixing is completely wrong. It's easy to get caught up using compressors, equalizers and effects processing on everything without even listening to see how it affects the whole production and the message of the song. There are some basic rules I always use when mixing music. What's great about these basic rules, is how simple the concepts are. Essentially, your frame of mind, when music mixing, will take you much farther than any plugin ever will. Playing Jeff Beck's guitar will never make you play like Jeff Beck. Understanding how Jeff Beck approaches guitar playing will not either, but it will at least send you off in the right direction.
A Humbling Perspective on Sound
The sense of hearing is one of five physical senses we have as human beings. For those who have all five functioning properly, the most predominant sense is sight. Our ability to see something has the greatest impact on our lives. Think about all the things we say, "You've got to see it to believe it" or "seeing is believing". We are a "visionary" or have "foresight". We want to "look" somebody in the eyes to see if they are lying to us. It is the sense we trust most.
By contrast, sound is lest trustworthy. We use phrases like, "That's just hearsay", "we'll play it by ear" or you should be "seen and not heard". The term "phony" was coined with the invention of telephones. It implied a lack of trust with the person on the other side of the phone because you could look them in the eye to judge if they were lying to you. In general, our innate measure of sound is not a very trusting or positive one. The truth is that sound is secondary to sight. Sound adds meaning and feeling to what we see. It forewarns us of what to look for as we are out in the world. This understanding is very important. To put it simply, everything we have heard throughout the existence of mankind is related to something we can see or at least feel. It is a fundamental part of the design of our brain. Even with the invention of synthesis, sampling and processing technologies, the neurological programming remains. We still have the ability to visualize what we hear. Once you understand this fundamental design, you will start to "look" at your music instead of listen to it. You will start to become conscious of the unconscious programming of the listening audience. Your mixes will start to sound good on all speakers, not just on the ones in your studio. Most engineers call this "imaging". Learning the skill of imaging for your music is a process that requires a lot of listening, practice and a basic understanding of acoustics.
How We Hear
There are two basic aspects of hearing, the physical and the psychological. There is loads of information on how the hearing mechanism works and, while this is important, it is more or less easy to understand. What I want to focus on here is the part that isn't as obvious or understandable, the psychological.

It's All About Contrast
The programming of all of our senses has been primarily developed for one purpose, survival. Our sight allows us to see things that are in front of us, like a truck passing through an intersection. Our hearing forewarns of things we cannot see, like a car racing from around the corner. The survival mechanism focusses on one basic principle, what is changing in front of us. What is it in contrast to the environment. If you are sitting in a room and hear the air conditioning turn on, you will notice it. After a short time, your conscious awareness will shift to something else in the room that is changing. You will forget about the AC because it stays the same. A soon as it turns off, however, you will notice it again because it has changed. This analogy is one of the most basic principles to understand when music mixing. In order for something to stand out, it must be changing in a meaningful way. In other words, what you want the listener to focus on must somehow contrast the environment of the rest of the music. This basic principle works hand in hand with another key element of the way we perceive sound.
One Thing At A Time
As much as we all like to believe that we can multitask, study after study continues to show that it is impossible to effectively focus on more than one thing at a time. This is perhaps the biggest reason why most people’s mixes sound like crap. They are trying to get you to focus on everything in the mix all at the same time. If you've ever been in a situation where two or more people are trying to talk to you at the same time, you can understand why mixing music with this same principle in mind does not work. Your immediate reaction to such a situation typically is to step back and say, "wait a minute, one person at a time…" To approach your mixing in this way is to make one of the most basic music mixing errors. Remember, a song is essentially a story, that can only be told by one person or instrument at a time. The rest, must support that message without extended conflict.
A Deeper Understanding of Music Mixing
Music mixing is very much like moving into a house. The furniture and personal items you bring in will determine how inviting your house will be to your guests, the listeners. Anyone that plans to move into a new house or apartment will typically become aware of what other peoples places look like. The layout of the house, the positioning of the furniture, the size of the TV, etc… You will notice things you like and things that you don't about each place you go into.
If you extend these natural skills of curiosity to music, your job must then become to look at the music mixes you like and try to figure out how they got to be that way. You may find yourself studying the "mansions" of the music industry in your quest. There is nothing wrong with that. In fact, it is critically important to study the best of the best in order to absorb the highest level of the art.
Transforming Your Music Mixing Approach
Even though you may not be working with the same quality of songs, performances, and equipment, you can still achieve very similar results. It's just like the reality show where the host comes in and makes the crappy beat up studio apartment look like a great place to live. The interior decorator studies mansions, and great decorating through magazines and seeing great houses whenever possible. They study the intricate details that make a space convey the feeling that is appropriate to the purpose of the room being decorated. What I am attempting to do here is to perform the music mixing equivalent of an intervention much like the many makeover shows we see on reality TV. Every decision you make in a mix directly affects the feeling and message of the lyric and song. Are you using bright EQ in a song that is about depression? Are you adding too much low end to an upbeat fun song? You must become sensitive to the technical aspects of what makes a song work, while being sensitive to the feeling that results. Study mixes of songs that you love. Grab a pad of paper and start by writing down what you think the song is about. What is the prevailing sentiment, depression, love, jealousy, is it a party track or inspirational in nature? Next, you can write down every instrument that you hear in the mix. On a scale of 1-10 (10 being loudest) how loud is each instrument or element. Note where each instrument is panned in the speakers. What effects do you hear, delays, reverb, chorusing or flanging. Close your eyes and try to see the music. Where does each instrument in the mix sound like it is coming from. Is it far away or close up front. Is it loud or low, clean or distorted. Any adjective you can use to describe what you hear. If you notice certain types of effects, list them as best as you can. By taking on this practice, what you are doing is creating maps for how music is mixed.
The Importance of Music Mixing Maps
I cannot overstate how important the process of studying mixes and making maps is to becoming a good mix engineer. The purpose of this approach is not to duplicate everything you hear in other mixes. The purpose is to create templates for the production style so that you can get most of the mix done in an efficient manner. Once you have built a good foundation, you can get creative to make the song unique. Every style of music has certain music mixing principles that are fundamental to making in work. You can make a dance mix with a small kick and bass sound that is low in level relative to the other instruments, but no DJ will ever play it in the club. The more you understand, from an engineering perspective, what makes a particular type of music tick, the quicker you will be able to build that strong foundation from which to build a great mix. Remember that everything you do in a mix must support what the message of the song is about. There is no one way to EQ, compress or otherwise process any given instrument that will work for every song and every style of music. Each song is unique and must be approached as such. There are many common practices and methods for music mixing that are embraced by the professional engineering community. These are not hard and fast rules, but rather guidelines that are a good foundation to start from. They allow you to get from point A to point B in an efficient way. Once there, it's the creative decisions that separate the great music mixers from the amateurs. In Part 2 of the Music Mixing Process we will look closer to this approach.
Step 7 (Part 2):
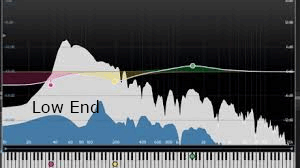
The Music Mixing Process
In Part 1 (LINK HERE), I talked about the importance of the music mixing mindset and the necessity to study and make maps of the music that you love. If you have spent time mapping out mixes that are in the same musical genre as the music you are currently working on, you should have created good maps for your current mix. Now you will need to learn how to recreate what you have heard in those mixes to bring the essence of them into your current mix. Music mixing is akin to moving into a new house or apartment. Your furniture and belongings represent all the individual performances that you have recorded in a song. Your job is to situate those performances in a manner much like you would the furniture you are moving to your new home. If done right, it is something that you can enjoy for years to come. Whether the results are good or not depends on the decisions you make along the way.
Getting Started
Because every song is unique it will require creative decisions that are impossible to formulate. I can't tell you what color to use on the walls, where to place the furniture in the room, what types of shades or blinds you use on your windows. These are creative choices, you have to make based on the layout and square footage of the house. What I do hope to accomplish here is to give you a fundamental process that underlies every decision you make. This way, every decision you make will come from a fundamentally sound place. To carry the moving analogy further, let's look at the fundamental process of music mixing. There are many things in this process that are subject to interpretation. If you want to open all the boxes with a sawzall, that's up to you. The beauty of mixing is that , unlike moving, at least you can always hit the undo button if you butcher something! The process laid out here is not entirely a linear way of working through a mix. You may find that you have to take steps back in this process quite often in order to find you way to a great mix. When you step back to make changes, continue to follow the outlined steps in order.
The Fundamental Music Mixing Process
1. Levels And Panning
2. Subtractive Eq And Editing
3. Adjust Levels
4. Compression
5. Adjust Levels
6. Effects Processing
7. Adjust Levels
8. Shaping Eq
9. Adjust Levels
10. Grouping Instruments
11. Automating Levels
12. Printing The Final Mix
Let’s dive right in with the first step in the music mixing process.
Moving In (Levels and Panning)
Imagine yourself moving into a new house. You bring in furniture, loads of boxes full of clothing, books, pots and pans, etc… You then go about the process of unpacking all of your boxes, taking the packing blankets off of your furniture and starting to organize your belongings. Boxes marked Kitchen will go into the kitchen. Boxes marked bedroom go to the bedroom. Boxes marked office, go into the office, etc… Move tracks that work together in your mix next to each. This will keep you from moving around too much in your mix window. Imagine now that each box and piece of furniture is an audio recording that is part of your mix. The elements of your song that run throughout, drums, bass, guitars, and vocals are the furniture. The added tracks that fill out the rest of the recording are the pots and pans, lamps, books, paintings etc… This is the Level and Panning phase of the music mixing process. You should carefully place sounds, like your furniture, in a way that is complimentary to the song. If the focus of a room is the TV, then all of the furniture in that space should be pointing towards the TV and arranged in such a way that you can enjoy watching it.
The mindset of levels and panning has to do with the relative distance (levels) and the placement in the room (panning) to the TV. If the TV represents the lead vocal in your mix, the same care should be taken to make sure the other instruments compliment the placement of the lead vocal. If they get in the way, the attention to the vocal will be lost. Start with the big stuff first and move it into place. There is a reason that most engineers start with Drums and Bass first before moving on to other instruments. Even engineer's that start with the vocals first (a top down mix) usually go straight to drums and bass after getting a vocal sound.
Take Out the Garbage (Subtractive EQ and Editing)
Once you have finished unpacking and placing your furniture you will be left with piles of empty boxes and packing materials that no longer serve a purpose. You may even realize that you have extra stuff you don't really need anymore. This will become evident as you continue the process. The idea here is to strip away what is not necessary from the audio tracks. This includes, but is not limited to, filtering off low frequency rumble or hiss, eliminating or muting performances that don't work or cloud the production, applying subtractive EQ to recordings that are muddy of indistinct and editing out areas of regions where no music is present. This phase of music mixing process yields enormous benefits. It allows you to better enjoy the details of the individual performances. By removing the clutter, space will be created that gives you the flexibility and room to shape the sounds any way you like. After using applying this process, adjust levels to compensate for the changes that you have made. This is critical because removing the garbage from your tracks will mean that other tracks are less covered up and may be louder in the mix. The tracks you apply subtractive EQ to may also sound lower in the mix and need to be raised.
Packing It In (Compression)
There is no perfect analogy of compression to the move into your new house. Compression directly affects the perceived size and density of a sound. The closest analogy I can give is based on how much furniture you have, and how big all of it is. The more furniture, the more closely packed each piece may need to be placed. You may also decide to put a smaller couch in the TV room if that is what the room allows. Compression is by far the most misunderstood form of processing for the novice or inexperienced professional in the music mixing process. The fact that it is difficult to hear for most has to do with the fact that most don't really know what to listen for. If you look at what compressors do in our everyday world though, the picture should be a little clearer. In general, compressors make things smaller and more dense. Pressing on the cap of a can of compressed air will show you the effects of compression. If you apply this same principle to audio, the track you apply the compression to will also become smaller and more dense. The sound emanating from the speaker will also be projected more forcefully similar to the way the compressed air escapes the can.
Compressors can serve many different purposes when music mixing and it's very important to know what these basic uses are and when you need them. Never apply compression to a sound unless it serves a specific purpose. If you don't achieve the desired effect you are looking for, leave it out.
The Primary Functions Of A Compressor Are As Follows:
1. Even Out A Performance
2. Add Presence To A Performance
3. Control The Perceived Sustain And Groove Of A Performance
4. Add Aggressiveness To A Performance
5. Shrink The Size Of A Performance
All of these forms of compression have very specific purposes in music mixing. They allow the sound to move around in the speakers mostly front to back but also up and down if used within specific frequency areas. After the subtractive EQ is done, compression can serve many of the purposes additive EQ will serve in a mix but with an added benefit. EQ adds volume to given frequency areas, compressors add density. One makes the track bigger, the other more dense and powerful. Compression, like any other form of processing, requires that you zoom your attention out to the whole mix and adjust levels after processing. Notice how the adjustments you have made affect the other tracks in the mix. The fundamental idea here is to always make sure all the individual performances are working together in a mix.
Size Matters (Effects Processing)
The size of your mix is defined by reverbs and effects processing in the music mixing process. To carry this out through the moving analogy, the larger the house, the bigger the furniture that goes into it can be. Most confuse size with frequencies, particularly with the amount to low end. This could not be further from the truth. Size is a function of the perceived 3 dimensional space, EQ is primarily a 2 dimensional tool. Like the bigger house, the size of the space you select determines how big you can make the individual performances in your mix. Another common misconception is that the size of a space is determined by reverb time. Actually, it's determined by the amount of pre-delay. Think about what size space is appropriate for the type of music you are mixing. Classical music does not generally sound great when placed in a small space. A punk rock record will be a huge mess if placed in a very large reverent space. These decisions are mostly based on the musical style of the song. An aggressive song generally needs to be dryer in order for it to sound "in your face". A slower song requires more reverb and effects to fill in the empty space.
The Benefit Of Effects Processing Before Additive EQ
Unless there are any pressing needs for additive EQ I usually like to add effects before shaping frequencies. The use of reverbs, delays and modulation effects like flanging in music mixing can usually do more to help get the sound you are looking for. Effects processors add Tone to a sound, not EQ. They also allow you to separate instruments by helping to create a 3 dimensional space in the speakers. When used properly, you can get a lot of perceived size out of your mix without overloading frequency areas in the mix.
Let's take a quick look at some examples:
1. Tone: The tone of a harsh bright vocal can rarely be satisfactorily fixed with EQ. Using a very short, warm sounding, reverb or early reflections program will instantly add body to the voice. Throw a longer warm reverb like a hall program on top and you will have accomplished the majority of the warming you want without losing the presence of the voice. The same concept can be applied to a dull sounding voice by using a bright reverb to add presence.
2. Space: Short room programs are a great way to add depth and space to a sound. How close the dry original sound is depends on the amount of pre-delay. Pre-delay is the amount of time before the onset of reverb. The longer the delay, the larger the perceived space. The wet dry balance determines how far back in the speakers the dry sound is from you when using a reverb with no pre-delay. Using longer pre-delays will make the reverb sink back behind the speakers.
3. Spread: A chorus effect panned in stereo will widen and thin out a sound that is too dense. It can also spread a sound outside of the speakers to the left and right by panning the dry signal to one side and the mono chorus effect to the other. The modulation effect can be hidden by minimizing the depth and speed of the chorus. Effects processing can also be used to group instruments together or separate them from each other. Using the same short room program on all the rhythm section instruments is a great way to make them sound like they are performing together. Using a unique effect for the vocal, that no other instrument shares, will make it stand out from the other vocals and instruments. Always adjust levels after adding effects.
Moving On
In Part 3 of The Music Mixing Process, we will continue this step by step process. You will learn about shaping your music with additive EQ, the many benefits of audio grouping, applying mix automation and printing your final mix.
The Music Production Process
Step 7 (Part 3):
The Music Mixing Process
In Part 1 of The Music Mixing Process , I talked at length about having the right mindset before starting a mix. Remember that your approach to a mix is the most important part of the process. You must have a direction or a goal in mind in order to achieve the desired results. This requires studying the technical side of engineering by learning to listen for the technical details of how a mix is constructed. In Part 2 of The Music Mixing Process , I started to outline a step by step process that should help give you good mixing habits. Using the analogy of moving into a new house, I have attempted to help you understand the connection between what we see and what we hear. Each step in the process has a connection to the "imaging" aspect of audio that built into out DNA. Below is an outline of that process.
The Fundamental Music Mixing Process
1. Levels And Panning
2. Subtractive Eq And Editing
3. Adjust Levels
4. Compression
5. Adjust Levels
6. Effects Processing
7. Adjust Levels
8. Shaping Eq
9. Adjust Levels
10. Grouping Instruments
11. Automating Levels
12. Printing The Final Mix
To pick up from where we left off in step 2, let's begin with additive EQ:
Shaping the Mix (Additive EQ)
With all your best efforts to set the tone, depth and balances of your mix, there is almost always some work that remains. This is where the EQ is best used. I have rarely been satisfied with mixes that are primarily EQ driven. Music mixing is a process better started by creating the tone, depth and balance of your mix first using the tools we have already spoken of. The EQ is a great tool for cleaning up what could not be accomplished by those tools. The main problem with EQ is that when you add it to one track in your mix, it will cover up something else that needs the same frequency area. Looking back to the moving analogy, if your furniture is too big, there will be no room for you to walk around it and use it. If you put a huge lampshade on the lamp next to the couch, you may find that it gets in the way of your head and blocks the view to that side of the room. More than any other form of processing, you need to be conscious of where you add EQ into a mix. Decisions must be made regarding which instruments are dominant in the mix and require certain frequency areas the most. For example a bass guitar needs low midrange frequencies more than a kick drum does to sound good. Scooping low Mids out of the kick may allow you to add them to the bass to achieve the warmth you are looking for. The concept of give and take with frequencies with music mixing is a crucial one to understand. The individual instruments are like puzzle pieces that must fit together in order to form the whole picture. Remember that any form of additive EQ will require an adjustment of levels throughout the mix. If you don't listen to how the EQ you added affects the other instruments in the mix, it will soon fall apart like a house of cards.
Grouping Instruments
There are many forms of grouping in music mixing. The most common one used is Mix Grouping. The idea is that you can change the level or mute state of all members of the group by changing the level or mute state of any one member. It is usually not beneficial to enable a mix group until your balances and sounds are very close to what you are looking for. Otherwise, you may find yourself unwittingly changing balances to the other members of the group. The other type is Audio Grouping where all the members of the group are bussed into a single stereo track so that they can be processed together in their stereo mix form. A group buss is a form of combining amplifier where signals are combined into what is called a mix stem or sub mix before being sent to the master stereo mix. This concept serves many valuable purposes in the music mixing process.
1. Allows groups of instruments to be processed together.
2. Allows for the easy creation of mix stems for remixing.
3. Allows you to easily create simple variations of a mix.
Typically, mix stems are divided into four categories:
1. Drums and percussion with effects
2. All melodic/harmonic music instruments with effects
3. Backing Vocals with effects
4. Lead Vocals with effects
These four mix stems can then be sent to the Master Fader for the final mix output. They can be selectively soloed or muted for the creation of A Capella mixes, Instrumental Mixes, TV Mixes (mix minus Lead Vocal) etc… It also allows quick and easy creation of "vocal up" or "vocal down" versions. The individual mix stems can also be processed to make the sound more coherent.
Mix Automation
Adjusting levels after every level of processing is a necessary step in the music mixing process. At some point in your mix, however, you will need to automate those fader levels to accommodate changes from section to section in the song. Additionally, automation can help enhance the dynamics of the song by pushing and pulling levels as needed. Why is this necessary ? The modern music production process does not typically have all musicians performing the entirety of a production all at one recording session. Songs are typically recorded in stages as outlined here in the Music Production Process. As a result, the musicians that layer on overdubs can only respond to what has already been recorded. Even with the guidance of a good producer, the musician will subtly push or pull in places that may not entirely support the parts that will be layered on later. The end result is that the dynamics of each performance will need to be adjusted based on what else is going on at the same time in the song. The fundamental purpose of automation in music mixing allows for the adjustment of these inconsistencies. The ability to move things in and out of your attention in this way helps to cover up the fact that the performances were recorded separately. When done properly, the song will sound like a complete performance and will take on a life of its own. In the music industry this is called "making a record". It is the final step of the music mixing process that takes all the individual performances and weaves them together into the final product. It is an absolutely essential process for the production to sound complete.
The 4 Step Basic Process For Applying Mix Automation:
1. General Levels
2. Section To Section Levels
3. Weaving Performances Together
4. Fine Tuning
Always start with the big picture, make sure the general levels work well. If you cannot get good balances then you still have more processing work to do. Once the sounds and general levels are good you will still find that certain parts are loud in some sections and soft in others. Make these adjustments section to section. Take careful note of how your automation affects everything else in the mix and adjust accordingly. The next step is to weave the performances together so that the instruments you need to hear most prominently are not masked by other performances. When raising the level of one instrument, I usually look to pull down the level of another instrument that occupies a similar space or frequencies. This simple idea will keep you from crushing the whole mix just because you wanted the guitar solo to be louder. The fine tuning stage involves making sure that all the subtle nuances of a performance are heard. This is typically done most with lead vocal rides. Riding in the subtle details of the lead vocal will help to focus listener's attention on that performance. It's important not to do this with every instrument. If you applied the same technique to every instrument, you may find too many tracks fighting for attention from the listener.
Printing the Final Mix
Printing the mix is the last step in the music mixing process. Music mixing "inside the box" has made this stage far less stressful than in times past. Since the era of multitrack recording in the 60's, mixing has progressively become more complicated. The stress of getting it right the first time was much higher because of the difficulty to restore the exact same sound at a later date. A 48 track mix in Pro Tools will come back in a few seconds after loading the session file. This allows a mix to be revisited at any time with the full expectation that everything will be exactly as it was. To restore a 48 track mix on an analog console with an average amount of external gear is at least a 4-5 hour process, even with very detailed notes. Ironically, the biggest benefit of computer based music mixing is also the biggest problem. Because it's so easy to bring the mix back up, the mixing process can go on forever. This can easily lead to a final mix that's been stripped of all its character and uniqueness. At some point you have to let it go and move on to creating new music. When you have finally decided to commit to printing, make sure you print the individual mix stems. These stems can come in very handy for many reasons. They can be sent out to remixers who will want the groupings of instruments to be isolated for sampling purposes. Because all the automation and effects are burned into the stems, the remixer won't have to spend time trying to recreate the vibe of the original mix. They are also handy to have around in case the mastering engineer has issues with your mixes. The mix stems can easily be put together in the mastering computer where drums can be processed separately from the vocals and other instruments. Almost any variation of a mix for rehearsals, live performances, TV performances etc… can be created from these four simple stems.
The music mixing process is one that involves a load of practice, listening skills and patience. A mix is like a house of cards that can easily fall apart with one misplaced sound. The more you listen to quality productions, the more you will find ways to duplicate what you hear. Your listening will be much more analytical in nature as you increase your mixing skills. Eventually, you will be able to create the sound you want with ease. In the final step of the music production process, we will go into the process of mastering. You will learn the basic process and why it is so vital and necessary for your music productions. Click below to move on to step 8 of the music production process, Mastering.
The Music Production Process
Step 8: Mastering Audio
The art of mastering audio has developed immensely since its start in the early 1900's. Up until the creation of the analog tape machine, all performances were captured directly to a form of vinyl disc called a lacquer. Once cut, the disc was processed to create what is called a metal "stamper" used to press the melted vinyl into the actual discs played on a turntable. Mastering, by technical definition, is the actual process of creating the stampers that are used to press the vinyl discs. The mastering process has evolved over the years to follow the changes in commercially released technology from the original 78 rpm discs. These changes include 33 1/3 and 45 rpm discs, audio cassettes, 8 track tapes, CD's, mini discs and mp3s. Each emerging technology presented new options to the consumer and new challenges to the mastering engineer. In the professional recording studios, the emergence of the analog tape machine in the 1950s changed the way records were made forever. The process of recording to analog tape removed many technical limitations of recording directly to a lacquer and added an important new job, the transfer engineer. The transfer engineer's job is what we commonly call today, the mastering engineer.
The Transfer Engineer and Pre-Mastering
The job of a transfer engineer was to take the analog tape master and transfer it to the lacquer so that the metal stampers could be created. This extra step in the process took a load of pressure off of the recording engineer who could focus primarily on capturing the performance and not have to worry about whether it would cut well to the lacquer. Overly dynamic performances or excessive bass frequencies, that would normally destroy the lacquer, could be more easily dealt with in the transfer process. Soon, the job of the transfer engineer would become an art-form of its own. Technology would quickly develop to accommodate the issues faced in the transfer process. As this technology developed the term pre-mastering entered the lexicon of the audio world. Pre-mastering is the preparation process before the actual mastering of the stampers takes place. Special control rooms and consoles were created to aid the process. The addition precision equalizers and high end compressors helped to address the increasing demand for sonically superior records. The loudness wars began with the pressure to make every song louder than all the others on the radio. Pre mastering audio became the bridge from the recording studio to the consumer and a critical part of the music industry.
The Process Of Mastering Audio
The Process of mastering audio involves a series of steps that have not changed very much over the decades. What has changed is the tools used, the medium worked with and the end product that is released to the public. While the mediums have evolved and the number of ways we can master audio have increased, the basic steps remain. Let's review those step one by one and show how they have developed over the years.
1. Prepare The Master Mixes
2. Transfer
3. Set The Song Order
4. Edit
5. Set The Space Between Songs
6. Processing
7. Levels vPQ and ID Coding
8. Dithering
9. Create The Final Production Master
Although the order in which some of these steps are taken has changed through the decades, each step must still be carefully considered. The development of digital technology, in particular, has increased the options of mastering audio exponentially. Today, mastering engineers can do things that were not even conceivable just a few decades ago. Let's take a quick look at each step in the process.
Prepare The Master Mixes
The final mixes must be brought into the mastering studio in some format. Since the start of multitrack recording in the 1960s, this format was always analog tape. In the late 80s, many final mixes were recorded onto digital tape in RDAT or Reel to Reel format. As computer technology developed through the 90s, a data disc or hard drive became a suitable medium to bring to the mastering engineer. With the development of the internet, FTP would also become an acceptable method for supplying the final masters. Whatever the delivery medium, the client must present it in a format that the mastering engineer is capable of working with. The mastering engineer is responsible to manage the masters with a careful discerning ear. They must determine that the masters are suitable for processing and decide the best method of transfer. Analog tape masters must have a tone reel, used to align the tape machine electronics, in order for the masters to be accurately transferred. Digital tapes must be carefully viewed for error counts, dropouts and clocking issues that may degrade the master. Computer based mixes must be examined for sample rate, bit depth and file format to determine if the best quality format has been presented.
The Transfer Process
The transfer process, for mastering audio, has been greatly simplified over recent years as a majority of final mixes are presented as digital audio files on a hard drive. This has largely negated the need for analog to digital conversion. Since the 1980s the conversion from analog to digital was seen as the weakest link in the mastering process. Because this technology has received an enormous amount of attention over the decades, it is not uncommon for digital files to be converted to analog for processing before being transferred back into the mastering program for processing. Mastering audio for vinyl was a simple matter of organizing the final mixes onto 2 large reels representing side A and B. Any editing or spacing between songs would need to be done with a razor blade and splicing tape before being sent to the mastering console for processing and leveling. Once the processing and levels was determined for each song, the final masters would be transferred to the lacquer, in real time, one side at a time. For CD and downloadable releases, analog tapes may be processed first, using analog compressors and equalizers, before the conversion process to digital. The decision to process first before transfer would be based entirely on which method sounded best. The sample rate, bit depth, quality of A/D converters and digital clocking source would all be careful decisions to best preserve the original quality of the final mixes.
Setting The Song Order
Many mastering engineers will import songs in the order in which they would appear on the CD. Sometimes there is a specific reason to import them in a different order due to the media they are being transferred from or specific analog processing that works well only for selected tracks. Once imported into the mastering program, changes of song order can easily be made without affecting any other level of processing or editing.
In the days of vinyl records, the song order was a carefully weighed decision. Because there are 2 sides to a vinyl disc, a decision must be made for each song to determine if it belongs on side A or side B. Songs can be divided up in a variety of ways that capture a certain vibe or feeling for each side. The total running time for each side also weighs in greatly and can affect the audio quality if not divided equally. The more audio there is on one side of a vinyl disc, the less deep each groove can be cut and the lower the quality will be. When mastering audio for CD the song order should be focussed on the overall flow of the entire CD. The CD must start with a strong song but not necessarily the single that would be released radio play and promotion. If you focus all the best songs early, the listener may not ever make it through the CD. Even though many will listen on an mp3 player and only keep what they like, weaving a coherent flow of songs will eventually draw a fan into enjoying all the songs on the CD, not just the singles.
Editing
Once the masters are transferred, the files will need to be edited so that the start and end of each song is clean. There is usually a short breath of space left in at the beginning of a song, with a fade-in, to smooth in the transition from silence. End edits involve getting rid of extra noises and chasing the ending with a fade-out to conclude the song naturally. When preparing your final mixes for mastering it is always best to supply mixes that have extra room at the head and tail of each song. This way the mastering engineer has something to work with. It is not uncommon for mixes to be presented to the mastering engineer with the heads and tails clipped. This leads to extra editing work for the mastering engineer who then has to find a way to make the start and end sound natural.
Setting The Space Between Songs
The space between songs will define the flow of the record from beginning to end. When mastering audio, the producer and artist will help to define when the entry of the next song sounds natural. You may need a longer space after a hard hitting track if the next song is lighter in feel. Conversely, coming out of a softer song you may want the space to be short if you want the next song to have more impact. Many dance records line up the next song to start on a virtual downbeat as if the tempo from the previous song had continued through the space in between.
Processing
Mastering audio can also involve a bit of processing when called for. The motto of the mastering engineer when processing is always the same, do no harm. Processing generally comes in only 2 forms even though those 2 forms can serve a large variety of purposes. The 2 forms of processing are compressors and equalizers. Compressors serve an enormous number of purposes when mastering audio. A compressor when used lightly can add overall level and power to a mix . In the form of a peak limiter can be used to control peak levels that allow the overall gain of the song to be increased. In the form of a multi-band compressor it can be used to strengthen a frequency area that is deficient in the mix. Equalizers also serve many purposes in mastering audio. An EQ can be used to subtly shape a frequency area of a mix to add clarity and depth. It can also be used to filter out low frequencies that keep a mix sounding muddy or lacking in punch. A notch filter may be employed to remove a troublesome frequency in a mix.
Levels
The next step in the mastering audio process is to make sure that the overall levels from song to song are even. This is not as easy as it may seem on the surface. The frequency content, density of frequencies and amount of compression can lead to uneven balances that require a good ear to get right. Additionally, a fade in or fade out on one song can skew the perceived level of the next. The difference between perceived level and actual level can easily lead to bad decisions if only looking at the meters for reference. The use of sonic maximizers can come in handy here. A sonic maximizer is a form of limiter that controls transient peak signals and allows all signals below the threshold to be raised up by the same amount of gain reduction. Although the design and options vary from plugin to plugin, the essential mission is the same, make it as loud as you can without destroying or distorting the mix. Today, it is the most commonly used, and abused, tool to get perceived loudness from a mix when mastering audio.
PQ Coding And ID Tags
The PQ coding and ID tagging process allows CD Text, ISRC codes, UPC/EAN and Copy Protection data to be entered into the instructional data of a CD or downloadable file. ID tagging allows downloaded digital audio files to be identified in terms of song name, artist, songwriter, date recorded, musical style, etc… The tagging can also allow for ISRC and UPC/EAN coding so that sales and radio play can be tracked by the owner of the recordings.
Dithering
A great way to preserve the quality of higher resolution masters is to apply a process called dithering. Dithering is a process that involves adding low level random noise to the audio when lowering the bit depth from 24 bit to 16 bit as required for CD mastering. The added randomness helps preserve the sense of depth in a mix that is normally found with higher bit depth masters. It is always the very last step of the mastering audio process before printing the final production master.

Creating the Final Production Master
The final stage of the mastering audio process is to burn the final production master. The final product of the mastering session can be a burned PMCD or a DDP file. PMCD stands for Pre Mastered CD which is formatted specifically for the manufacturing plant and used to create what is called a glass master. A high quality disc burner, and CD media is an absolute necessity to keep the error count low. The DDP format (Disc Description Protocol) is a data file that contains all of the necessary information for the creation of the glass master. The DDP file is saved directly to your hard drive can usually be uploaded to the manufacturing plant's web site. A DDP file is more reliable and convenient than the PMCD and has become more widely accepted. The Glass master is a glass disc with a thin film layered on it. The data from the DDP or PMCD is burned into the film with a laser that creates the microscopic pits and lands that are part of the physical creation of the audio CDs you buy in a store. From the glass master, stampers are created to press the CD discs in a very similar manner as done with vinyl records. This process creates a Red Book standard disc sometimes called a CD+G. CD's burned with a computer, by comparison, are burned optically and can have significantly higher error counts. The mastering audio process is the final stage in the music production process. The stages outlined in the Music Production Process section of this website are merely overviews of each step and should only be considered a guide. Each step in the process easily contains volumes of in depth information much of which is covered in other sections of this website.
Denis van der Velde
AAMS Auto Audio Mastering System
www.curioza.com
Technique

The Daw and files, processing, plugins.
Use 32 Bit float all the time, if possible. 24 and 16 bit files need to have a brick wall limiter and at the end process need dithering. Allow the highest possible bit depth. Do not dither 32 bit files. More bits more sound. As long as audio data remains in the 32 bit floating point resolution, your good, do not worry about potential over’s. With 16 or 24 bit levels above 0dB lead to artifacts. So maybe convert you whole sample database to 32 bit? What happens when a 16 or 24 bit file is saved as 32 bit? Free dynamic range! Always use the best possible resolution 32 or 64 bit float. Or convert. Use only 32 Bit floating point plugins (check this with a bit depth meter).

Live Recordings.
Only when it is clear that the bottom end frequencies are troublesome a low cut from 0 Hz to 30 Hz can be allpied. Sometimes even above 70 Hz for Vocals and Microphones. Real adjustment of sound is not recommended, live recordings must sound as played. Little EQ and Compression.
The bottom end of the mix.
The bottom end of a mix is fundamental. The headroom on the signal is the space between 0 dB. Strong low frequencies from 0 Hz to 100 Hz and lesser from 100 Hz to 1Khz are multiple times stronger then the signals between 1kz-22khz! Low frequencies makes a muddy mix and without power, even if all lower frequencies including the basedrum are maxed out, still there will not be a nice base bottom end. The problem is that sounds ranging from 0 Hz to 50 Hz are not heard but feld. Also up to 100 Hz most monitor speaker do not really play it like it should be heard. Headphones ofthen play from 20 Hz to 22KHz easy. Sub monitors have good quality to about 25 Hz. The human hearing accepts frequencies till 50 Hz more as a feeling experience then a hearing experience. Bottom end signals make a big factor in a mix, while high frequencies strongly loose power. A badly mixed bottom end cant be mastered, a good one with ease.
The Haas Effect.
Before we start discussing Headphones or Monitor Speakers, i would like to adress the Haas Effect. The Haas effect is a psychoacoustic effect related to a group of auditory phenomena known as the Precedence Effect or law of the first wave front. These effects, in conjunction with sensory reactions to other physical differences (such as phase differences) between perceived sounds, are responsible for the ability of listeners with two ears to accurately localize sounds coming from around them. When two identical sounds (i.e. identical sound waves of the same perceived intensity) originate from two sources at different distances from the listener, the sound created at the closest location is heard (arrives) first. To the listener, this creates the impression that the sound comes from that location alone due to a phenomenon that might be described as "involuntary sensory inhibition" in that one's perception of later arrivals is suppressed. The Haas effect occurs when arrival times of the sounds differ by up to 30–40 milliseconds. As the arrival time (in respect to the listener) of the two audio sources increasingly differ beyond 40 ms, the sounds will begin to be heard as distinct; in audio-engineering terms the increasing time difference is described as a delay, or in common terms as an echo. The Haas effect is often used in public address systems to ensure that the perceived location and/or direction of the original signal (localization) remains unchanged. In some instances, usually when serving large areas and/or large numbers of listeners, loudspeakers must be placed at some distance from a stage or other area of sound origination. The signal to these loudspeakers may be electronically or otherwise delayed for a time equal to or slightly greater than the time taken for the original sound to travel to the remote location. This serves to ensure that the sound is perceived as coming from the point of origin rather than from a loudspeaker that may be physically nearer the listener. The level of the delayed signal may be up to 10 dB louder than the original signal at the ears of the listener without disturbing the localization. The Haas effect is also responsible in large part for the perception that a complete complex audio field is reproduced by only two sound sources in stereophonic and other binaural audio systems and it is also utilized in the generation of more sophisticated audio effects by devices such as matrix decoders in surround sound technologies, such as Dolby Pro Logic. For a time in the 1970s, audio engineers used the Haas effect to simulate that a sound was coming from a single speaker in a stereo sound system, when it was actually coming from both. This was to compensate for the fact that a sound coming from a single speaker would be 3 db lower in volume than a sound coming from both. This technique has problems if the stereo sound is mixed to mono, as a comb filter effect would occur. Also, the aesthetics of sound mixing changed to exclude the use of solo instruments emanating from a single corner of the sound field in most popular recordings. Named after Helmut Haas who described the effect in his doctoral dissertation "Über den Einfluss eines Einfachechos auf die Hörsamkeit von Sprache" to the University of Göttingen, Germany. An English translation was published in December, 1949.

Headphones.
Before starting with Monitor Speakers, let's adress the headphones first in line. Composition wise headphones are just as good as using Monitor Speakers. But while mixing headphones might be a solution to many users, because it does not produce complaining neighbours or you might love the direct sound headphones produce. The direct single user headphone sound might be refreshing because the sound is directly inputted into the ears of the headphone listener. Actually while mixing on headphones, there is a lot of information lost. As an opposite to Monitor Speakers, you will miss out on the room you are listenging in. Basically this would be the least of your concern now, but by the end of reading this text you might think different. Headphones normally produce a direct sound, basically cancelling out the room (listening room as would be on loudspeakers). So the headphones can produce a sound that is only comming from the left, as this left sound goes directly into your left ear and hearing nothing on the right side. This is an impossible situation with loudspeakers, in this case there will be allways the room you listen will reflect sound as into your right ear. Also when using headphones and the sound just comes from one single side (left or right) it is allmost impossible for our brains to hear any distance (reverberation) in a correct manner, even a good headache can occur when headphones are used for a long time. Listening on headphones can be confusing while mixing frequency wise (dimension 2), it is likely you will reduce the mix more then you would do on Monitor Speakers / Loudspeakers. You will come to find this out when you listen your mix on different systems (i.e. listening on several speakersystems and headphones). Listening on as many sound systems is advisable anyway, but a special remark here when using headphones. Listing to distances, setting up a delay or reverb, creating a stage (a spacious domain), playing around with delaytimes , using the Haas Effect (Dimension 3), will be more difficult when using headphones. Basically setting up volume levels is a job that can be done with headphones. When you try to setup panning for each instrument or mixtrack (Dimension 1), you will notice that the direct sound of the headphones will produce a different sound-stage-setup, as you would with using Monitor Speakers. Try this if you have a good pair of Headphones and Monitor Speakers available. When you listen on Headphones (A) and suddenly switching to listing to Monitor Speakers (B), you will notice that the panning of some or all instruments change from slightly to more. The Monitor Speakers will produce a more open and reliable sound reproduction in Dimension 1,2 and 3, while listening to Headphones you will get the feeling you will miss out and mismatch direction. Basically to the direct sound Headphone produce, they can be generally only be used while for a vocalist or guitarist, bass, drums, as a prevention of the mix comming into the recording signal. While using Headphones for mxing the Haas Effect is cancelled out because of the direct to ear sound. The Haas effect occurs when arrival times of the sounds differ by up to 30–40 milliseconds, this is explained next under 'The Haas Effect'. And we have not discussed the bottom end yet! Having resolved spatial issues, bass levels provide the main obstacle for mixing on headphones. Deciding how much bass sounds 'correct' on headphones is a big problem because, although you hear bass through your ears, you don't get the physical full-body feelings that you do from the bass that emerges from loudspeakers. Regularly comparing your in-progress mix with commercial tracks of a similar genre always helps, but the bass end on many cheaper headphone models does not sound like the bass you will expect to hear from loudspeakers, so you can easily misjudge it. As a result, it is quite possible to end up with a mix where the bass guitar and kick drum levels seem to be correct, yet they sound 'bloated' when heard over speakers, with too much bass at 80 Hz and below and paradoxically, too little in the next octave between 80 Hz and 160 Hz, where your headphones offer much greater clarity. So my advise is to use Monitor Speakers anywhere you can and as ofthen as you can while Mixing or Mastering. Even for recording purposes a mixing engineers benefits from listening to Monitor Speakers in a control room. Use Headphones when you have little room, in a very small studio or workplace. Or as an effective way to cancel out the mix sound while recording with a microphone. For mixing or mastering purposes, prefer Monitor Speakers to finish the job, Headphones will not give you a clear mix and you will struggle in dimension 1,2 and 3. For setting up a mix as a stage, Monitor Speakers will produce a better and more understanable view to the dimensions 1,2 and 3. Ok, try to avoid using headphones, as an opposite there are plenty of mixing and mastering done with Headphones. So be aware of the differences and learn the differences between Headphones and Monitor Speakers. When understand that the common listener to commercial music is still listing on speakers (allthough walkmans or ipod's are quite commen these days) and that speakers setup correctly will produce a better listening envoiroment, it is easy to prefer Monitor Speakers and Headphones are to be avoided.

Audio Plugins that help out headphone listening.
HDPHX
VNoPhones
Crossfeed EQ
Roomsound
Monitor Speakers.
Use good reference flat monitor speakers. The smaller ones can give a good frequency range from 50 Hz to 22 Khz. The slightly bigger monitor speakers go from 35 Hz to 22 Khz. Be sure where you gain the bottom end, you might not even hear what your doing because your monitors will not play them well. Best Monitor Speakers will produce a good flat sound from 25 Hz to 22 Khz (or more). When your Monitor Speaker setup misses out on the bottom end range, get a good sub speaker. Generally a good sub speaker (placed in the middle or centre) can result in better frequency range because the bigger the sub speaker becomes the lower the frequency range. Most sub speakers will start at about 30 Hz and end at 120 Hz. Placed in centre the sub will produce a more centered placement for Drums and Bass (Basedrum and Bass), these are normally placed in centre anyway (stage plan). It is good to listen a lot of commercial available music on your monitors. Just to know how your monitors react. Also for setting up the sub speaker in comparing to the left and right monitor speakers, you must be certain of a nice flow (flat frequency range from 30 Hz to 22 Khz). The sub speaker will have and adjustable level and cutoff frequency, where at about 120 Hz or above you will need to have a crossover point, flowing most 30 Hz to 120 Hz frequencies out of the sub speaker, while crossing over at about 120 Hz to 22Khz on your monitor speakers (left and right). When you have done a lot of listening to your monitor speakers, listening on other speakers or your friends stereo system will let you hear the differences and will make your hearing adjusted to the sound of your control room or listening envoiroment. Also Surround sets are not really a good listening envoiroment for Stereo listening. When you have enough experience, thrust in your monitor speakers and trust on your hearing, do not listen any more on other speakers but stay with your monitor speaker setup. Stereo sound is made on speakers (not on headphones), for correct hearing dimension 1,2 and 3 a good monitor setup is prefered. Be in a good mood when you mix or listen. Monitor also on low levels. Every mix will sound good on loud levels, the level is better heard, different sounds are better seperated, the loudness and peaks are better heard. When you mix loud, it could be when you listen to it softly on low levels, there is nothing to hear or your mix will deflate. A good mix will listen also on low levels. A good mix produced with monitor speakers, will likely produce a good headphone sound. A mix created on headphones, will likely a less on monitor speakers. Prefer your monitor speaker setup as a first listening tool. The basics of setting up speakers ; Set up the speakers within a 60 angle (30 left of the middle and 30 right of the middle). Keep enough distance between the speakers and the walls (50cm), refer to the manual of your speakers. Listening distance at least 1 meter. The tweeters of both speakers should be the same height as your ears when sitting in you listening chair, about 120cm.
Some rules for mixing on Headphones and Monitor Speakers.
For mixes that sound good through speakers and headphones, it maybe quicker and easier to start a mix on loudspeakers and then tweak it for headphone listeners than the other way round. Don't be tempted to keep edging up headphone levels, or you'll end up with a headache, listening fatigue and eventually hearing damage. Try instead to take regular short breaks, which should keep your decision-making processes fresh. If you're using headphones, try experimenting with how you position them on your head. Wearing headphones slightly lower (by extending the headband) and slightly forward on your ears gives noticeably sharper imaging.
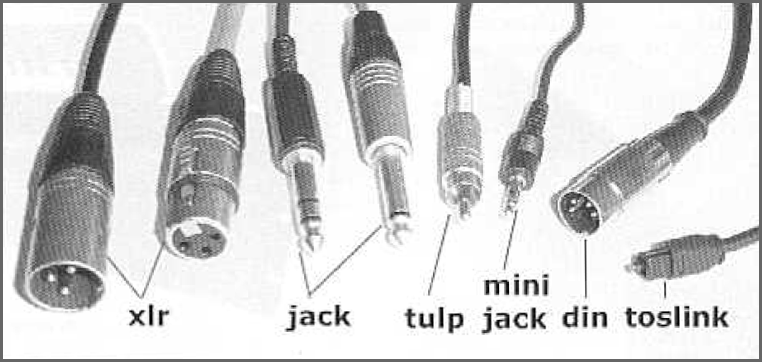
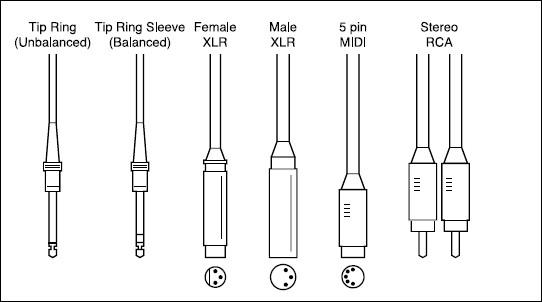
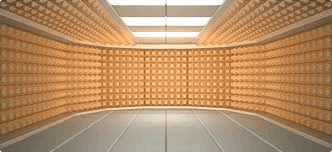
Sound isolation or soundproofing.
Despite what you may have seen in the movies or elsewhere, egg crates on the wall don't work! First, understand what's meant by soundproofing. Here we mean the means and methods to prevent sound from the outside getting in, or sound from the inside getting out. The acoustics within the room are another matter altogether. There are three very important requirements for soundproofing, mass, absorption, and isolation. Sound is the mechanical vibration propagating through a material. Thelevel of the sound is directly related to the size of those vibrations. The more massive an object is, the harder it is to move and the smaller the amplitude of the vibration set up in it under the influence of an external sound. That's why well-isolated rooms are very massive rooms. A solid concrete wall will transmit much less sound then a standard wood-framed, gypsum board wall. And a thicker concrete wall transmits less than a thinner one: not so much because of the distance, but mostly because it's heavier. Secondly, sound won't be transmitted between two objects unless it's mechanically coupled. Air is not the best coupling mechanism. But solid objects usually are. That's why well isolated rooms are often set on springs and rubber isolators. It's also why you may see rooms-within rooms: The inner room is isolated from the outer, and there may be a layer of absorptive material in the space between the two. That's also why you'll also see two sets of doors into a recording studio: so the sound does not couple directly through the door (and those doors are also very heavy!). If you are trying to isolate the sound in one room from an adjoining room, one way is to build a second wall, not attached to the first. This can go a long way to increasing the mechanical isolation. But remember, make it heavy, and isolate it. Absorptive materials like foam wedges or Sonex and such can only control the acoustics in the room: they will do nothing to prevent sound from getting in or out to begin with.
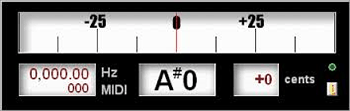
Tuning.
Instrumental tuning can be very important, while recording or mixing. Every instrument can be tuned, from start, while recording or mixing. It is a common thing to tune. Synths for instance you might believe their are well tuned, but however sweeps or calculations can make the signal off tune. Natural sounds and unnatural sounds can be tuned. So check your tunings. Tuning can be factor for mixing and making it sound right and correct. The miracle of well tunes instruments and a good mix can make the difference. Reconising tuning problems is having a lot of experience hearing. Sometime you find a tuning setting that really sounds well ? Keep it then, as long as it sounds ok. The one who is well trained in hearing tunings can make a difference. Mixing with effects and mixers is one part of the deal, tuning is also a part the must be handled and given some time and tought.
Normalizing.
Normalizing is raising the level of the peak to 0 dB and with that the rest is gained evenly. It is ofthen confused as compression, but no such thing. When normalizing to 0 dB this is done to get the most level out of a file or trakc or finished mix. Also normalizing is a common source for confusion and also is more looked at when beginners try to get the most out of their unmixed mix. Normalizing is also not mastering. Mastering is more complex and even might not include normalizing at all. On burning a compilation CD or Mp3 files, you could use normalizing to get the most level
ABC of recording/music
ABX Comparator: A device that randomly selects between two components being tested. The listener doesn't know which device is being listened to.
AC3: See Dolby Digital
AES/EBU: Balanced digital connection. For example, used to connect a CD transport to a DAC. The AES/EBU standard uses XLR type connectors.
Ambience: The acoustic characteristics of a space with regard to reverberation. A room with a lot of reverb is said to be "live"; one without much reverb is "dead."
Amplifier (Amp): A device which increases signal level. Many types of amplifiers are used in audio systems. Amplifiers typically increase voltage, current or both.
Amplifier classes Audio power amplifiers are classified primarily by the design of the output stage. Classification is based on the amount of time the output devices operate during each cycle of signal swing. Also defined in terms of output bias current, (the amount of current flowing in the output devices with no signal).
Class A operation is where both devices conduct continuously for the entire cycle of signal swing, or the bias current flows in the output devices at all times. The key ingredient of class A operation is that both devices are always on. There is no condition where one or the other is turned off. Because of this, class A amplifiers are single-ended designs with only one type polarity output devices. Class A is the most inefficient of all power amplifier designs, averaging only around 20%. Because of this, class A amplifiers are large, heavy and run very hot. All this is due to the amplifier constantly operating at full power.The positive effect of all this is that class A designs are inherently the most linear, with the least amount of distortion.
Class B operation is the opposite of class A. Both output devices are never allowed to be on at the same time, or the bias is set so that current flow in a specific output device is zero when not stimulated with an input signal, the current in a specific output flows for one half cycle. Thus each output device is on for exactly one half of a complete sinusoidal signal cycle. Due to this operation, class B designs show high efficiency but poor linearity around the crossover region. This is due to the time it takes to turn one device off and the other device on, which translates into extreme crossover distortion. Thus restricting class B designs to power consumption critical applications, e.g., battery operated equipment, such as 2-way radio and other communications audio.
Class AB operation allows both devices to be on at the same time (like in class A), but just barely. The output bias is set so that current flows in a specific output device appreciably more than a half cycle but less than the entire cycle. That is, only a small amount of current is allowed to flow through both devices, unlike the complete load current of class A designs, but enough to keep each device operating so they respond instantly to input voltage demands. Thus the inherent non-linearity of class B designs is eliminated, without the gross inefficiencies of the class A design. It is this combination of good efficiency (around 50%) with excellent linearity that makes class AB the most popular audio amplifier design.
Class AB plus B design involves two pairs of output devices: one pair operates class AB while the other (slave) pair operates class B.
Class D operation is switching, hence the term switching power amplifier. Here the output devices are rapidly switched on and off at least twice for each cycle. Since the output devices are either completely on or completely off they do not theoretically dissipate any power. Consequently class D operation is theoretically 100% efficient, but this requires zero on-impedance switches with infinitely fast switching times -- a product we're still waiting for; meanwhile designs do exist with true efficiencies approaching 90%.
Class G operation involves changing the power supply voltage from a lower level to a higher level when larger output swings are required. There have been several ways to do this. The simplest involves a single class AB output stage that is connected to two power supply rails by a diode, or a transistor switch. The design is such that for most musical program material, the output stage is connected to the lower supply voltage, and automatically switches to the higher rails for large signal peaks. Another approach uses two class AB output stages, each connected to a different power supply voltage, with the magnitude of the input signal determining the signal path. Using two power supplies improves efficiency enough to allow significantly more power for a given size and weight. Class G is becoming common for pro audio designs.
Class H operation takes the class G design one step further and actually modulates the higher power supply voltage by the input signal. This allows the power supply to track the audio input and provide just enough voltage for optimum operation of the output devices. The efficiency of class H is comparable to class G designs.
Attenuate: To reduce in level.
Analog: Before digital, the way all sound was reproduced.
Aperiodic:Refers to a type of bass-cabinet loading. An aperiodic enclosure type usually features a very restrictive, (damped), port. The purpose of this restrictive port is not to extend bass response, but lower the Q of the system and reduce the impedance peak at resonance. Most restrictive ports are heavily stuffed with fiberglass, dacron or foam.
Audiophile: A person interested in sound reproduction.
Balanced: Referring to wiring: Audio signals require two wires. In an unbalanced line the shield is one of those wires. In a balanced line, there are two wires plus the shield. For the system to be balanced requires balanced electronics and usually employs XLR connectors. Balanced lines are less apt to pick up external noise. This is usually not a factor in home audio, but is a factor in professional audio requiring hundreds or even thousands of feet of cabling. Many higher quality home audio cables terminated with RCA jacks are balanced designs using two conductors and a shield instead of one conductor plus shield.
Bandwidth: The total frequency range of any system. Usually specified as something like: 20-20,000Hz plus or minus 3 db.
Bass Reflex: A type of loudspeaker that uses a port or duct to augment the low-frequency response. Opinions vary widely over the "best" type of bass cabinet, but much has to do with how well a given design, such as a bass reflex is implemented.
Bessel crossover A type of crossover design characterized by having a linear or maximally flat phase response. Linear phase response results in constant time-delay (all frequencies within the passband are delayed the same amount). Consequently the value of linear phase is it reproduces a near-perfect step response with no overshoot or ringing. The downside of the Bessel is a slow roll-off rate. The same circuit complexity in a Butterworth response rolls off much faster.
Bi-amplify: The use of two amplifiers, one for the lows, one for the highs in a speaker system. Could be built into the speaker design or accomplished with the use of external amplifiers and electronic crossovers.
Bi-wiring: The use of two pairs of speaker wire from the same amplifier to separate bass and treble inputs on the speaker.
BNC: A type of connection often used in instrumentation and sometimes in digital audio. BNC connectors sometimes are used for digital connections such as from a CD Transport to the input of a DAC.
Boomy: Listening term, refers to an excessive bass response that has a peak(s) in it.
Bright: Listening term. Usually refers to too much upper frequency energy.
Butterworth crossover A type of crossover circuit design having a maximally flat magnitude response, i.e., no amplitude ripple in the passband. This circuit is based upon Butterworth functions, also know as Butterworth polynomials.
Channel Balance: In a stereo system, the level balance between left and right channels. Properly balance between the left-right speakers. In a home-theater system, refers to achieving correct balance between all the channels of the system.
Clipping: Refers to a type of distortion that occurs when an amplifier is driven into an overload condition. Usually the "clipped" waveform contains an excess of high-frequency energy. The sound becomes hard and edgy. Hard clipping is the most frequent cause of "burned out" tweeters. Even a low-powered amplifier or receiver driven into clipping can damage tweeters which would otherwise last virtually forever.
Class A, Class A-B etc.: In a sense,amplifying the audio signal means using the wall-current (usually either 120 or 240 volts) to increase the amplitude of the audio signal from mill-watts to watts. Different classes of amplifiers accomplish this in different ways. Turning a vacuum tube "on" or "off" with current demand increases the efficiency of the amplifier but may add switching distortion. A Class A amplifier is relatively inefficient, converting much energy to heat, but has no switching distortion.
Coloration: Listening term. A visual analog. A "colored" sound characteristic adds something not in the original sound. The coloration may be euphonically pleasant, but it is not as accurate as the original signal.
Coherence: Listening term. Refers to how well integrated the sound of the system is.
Compression: In audio, compression means to reduce the dynamic range of a signal. Compression may be intentional or one of the effects of a system that is driven to overload.
Co-axial: A speaker type that utilizes a tweeter mounted at the center of a woofer cone. The idea being to have the sound source through the full frequency range become "coincident".
Crossover: A frequency divider. Crossovers are used in speakers to route the various frequency ranges to the appropriate drivers. Additionally, many crossovers contain various filters to stabilize the impedance load of the speaker and or shape the frequency response. Some crossovers contain levels controls to attenuate various parts of the signal. A passive crossover uses capacitors, coils and resistors, usually at speaker level. A passive crossover is load dependent (the transition may not be very smooth or accurate if a different speaker is substituted for the one the crossover was designed for).
An active crossover is based on integrated circuits (ICs), discreet transistors or tubes. An active crossover is impedance buffered and gives a consistent and accurate transition regardless of load.
Crossover Slope: High and low pass filters used for speakers do not cut-off frequencies like brick walls. The rolloff occurs over a number of octaves. Common filter slopes for speakers are 1st through 4th order corresponding to 6db/oct to 24db/oct. For example, a 1st. order, 6db/oct high pass filter at 100hz will pass 6db less energy at 50Hz and 12db less energy at 25Hz. Within the common 1st through 4th filters there is an endless variety of types including Butterworth, Linkwitz-Riley, Bessel, Chebychev, etc. Salesmen and product literature will sometimes make claims of clear superiority for the filter used in the product they are trying to sell. Since the subject fills books, suffice it to say that there is no one best filter, it depends on application and intended outcome. Good designers use the filters required to get the optimum performance from the system.
Cross-talk: Unwanted breakthrough of one channel into another. Also refers to the distortion that occurs when some signal from a music source that you are not listening to leaks into the circuit of the source that you are listening to.
DAC: A Digital to Audio Converter. Converts a digital bitstream to an analog signal. Can be a separate "box" that connects between a CD Transport or CD Player and a pre-amplifier.
Damping (Damping factor, etc.) Refers to the ability of an audio component to "stop" after the signal ends. For example, if a drum is struck with a mallet, the sound will reach a peak level and then decay in a certain amount of time to no sound. An audio component that allows the decay to drag on too long has poor damping, and less definition than it should. An audio component that is overdamped does not allow the initial energy to reach the full peak and cuts the decay short. "Boomy" or "muddy" sound is often the result of underdamped systems. "Dry" or "lifeless" sound may be the result of an overdamped system.
D'Appolito: Joe D'Appolito is credited with popularizing the MTM (Midrange-Tweeter-Midrange) type of speaker.
Decibel (dB): Named after Alexander Graham Bell. We perceive differences in volume level in a logarithmic manner. Our ears become less sensitive to sound as its intensity increases. Decibels are a logarithmic scale of relative loudness. A difference of approx. 1 dB is the minimum perceptible change in volume, 3 dB is a moderate change in volume, and about 10 dB is an apparent doubling of volume
0 dB is the threshold of hearing, 130 dB is the threshold of pain. Whisper: 15-25 dB Quiet background: about 35 dB Normal home or office background: 40-60 dB Normal speaking voice: 65-70 dB Orchestral climax: 105 dB Live Rock music: 120 dB+ Jet aircraft: 140-180 dB
Dipole: An open-back speaker that radiates sound equally front and rear. The front and rear waves are out of phase and cancellation will occur when the wavelengths are long enough to "wrap around". The answer is a large, wide baffle or to enclose the driver creating a monopole.
Distortion: Anything that alters the musical signal. There are many forms of distortion, some of which are more audible than others. Distortion specs are often given for electronic equipment which are quite meaningless. As in all specifications, unless you have a thorough understanding of the whole situation, you will not be able to make conclusions about the sonic consequences.
DIY: Abbreviation for Do - It - Yourself. In audio, the most common DIY is building speakers but some hobbyists build everything from pre-amps to amplifiers to DACs.
Dolby Digital: Is a five-channel system consisting of left, center, right and left rear, right rear channels. All processing is done in the digital domain. Unlike Dolby Prologic in which the rear effects channels are frequency limited to approx. 100-7000Hz, Dolby Digital rear channels are specified to contain the full 20-20Khz frequency content. The AC3 standard also has a separate subwoofer channel for the lowest frequencies.
Dolby Prologic: Is a four-channel system consisting of left, center, right and rear channel, (the single rear channel is usually played through two speakers).
DTS: Digital Theater System. A multi-channel encoding/decoding system. Used in some movie theaters. Also now included in some home-theater processors. A competitor to Dolby Digital.
DSP: Digital Signal Processing. DSP can be used to create equalization, compression, etc. of a digital signal.
DVD: Digital Video Disc or Digital Versatile Disc. A relatively new standard that seeks to combine better-than-laser-disc quality video with better-than-CD quality audio in a disc the size of a CD. Requires special players. Seems to be a viable candidate to replace both Laser Discs and CDs, but the jury is still out.
Dynamic Headroom: The ability of an audio device to respond to musical peaks. For example, an amplifier may only be capable of a sustained 100 watts, but may be able to achieve peaks of 200 watts for the fraction of a second required for an intense, quick sound. In this example the dynamic headroom would equal 3 db.
Dynamic range: The range between the loudest and the softest sounds that are in a piece of music, or that can be reproduced by a piece of audio equipment without distortion (a ratio expressed in decibels). In speech, the range rarely exceeds 40 dB; in music, it is greatest in orchestral works, where the range may be as much as 75 dB.
Electrostatic Speaker: A speaker that radiates sound from a large diaphragm that is suspended between high-voltage grids.
Euphonic: Pleasing. As a descriptive audio term, usually refers to a coloration or inaccuracy that non-the-less may be sonically pleasing.
Extension: How extended a range of frequencies the device can reproduce accurately. Bass extension refers to how low a frequency tone will the system reproduce, high-frequency extension refers to how high in frequency will the system play.
Fletcher-Munson curve: Our sensitivity to sound depends on its frequency and volume. Human ears are most sensitive to sounds in the midrange. At lower volume levels humans are less sensitive to sounds away from the midrange, bass and treble sounds "seem" reduced in intensity at lower listening levels.
Frequency: The range of human hearing is commonly given as 20-20,000Hz (20Hz-20kHz). One hertz (Hz) represents one cycle per second, 20Hz represents 20 cycles per second and so on. Lower numbers are lower frequencies
Fundamental. The lowest frequency of a note in a complex wave form or chord.
Gain: To increase in level. The function of a volume control.
Grain: Listening term. A sonic analog of the grain seen in photos. A sort of "grittiness" added to the sound.
Haas effect: If sounds arrive from several sources, the ears and brain will identify only the nearest. In other words, if our ears receive similar sounds coming from various sources, the brain will latch onto the sound that arrives first. If the time difference is up to 50 milliseconds, the early arrival sound can dominate the later arrival sound, even if the later arrival is as much as 10 dB louder. The discovery of this effect is attributed to Halmut Haas in 1949.
Harmonics: Also called overtones, these are vibrations at frequencies that are multiples of the fundamental. Harmonics extend without limit beyond the audible range. They are characterized as even-order and odd-order harmonics. A second-order harmonic is two times the frequency of the fundamental; a third order is three times the fundamental; a fourth order is four times the fundamental; and so forth. Each even-order harmonic: second, fourth, sixth, etc.-is one octave or multiples of one octave higher than the fundamental; these even-order overtones are therefore musically related to the fundamental. Odd-order harmonics, on the other hand: third, fifth, seventh, and up-create a series of notes that are not related to any octave overtones and therefore may have an unpleasant sound. Audio systems that emphasize odd-order harmonics tend to have a harsh, hard quality.
HDCD: High-Definition Compact Disc. A proprietary system by Pacific Microsonics that requires special encoding during the recording process. Some observers report HDCD discs as having better sound. To gain the benefits requires having special HDCD in your CD player.
Headroom: The ability of an amp to go beyond its rated power for short durations in order to reproduce musical peaks without distortion. This capability is often dependent on the power supply used in the design.
Hearing Sensitivity: The human ear is less sensitive at low frequencies than in the midrange. Turn your volume knob down and notice how the bass seems to"disappear". To hear low bass requires an adequate SPL level. To hear 25Hz requires a much higher SPL level than to hear 250Hz. In the REAL world, low frequency sounds are reproduced by large objects; bass drums, string bass, concert grand pianos, etc. Listen to the exhaust rumble of a 454 cubic inch V8 engine vs. the whine of the little four banger. The growl of a lion vs. the meow of your favorite kitty. As frequency decreases we perceive more by feel than actual hearing and we lose our ability to hear exact pitch.
Hertz (Hz): A unit of measurement denoting frequency, originally measured as Cycles Per Second, (CPS): 20 Hz = 20 CPS. Kilohertz (kHz) are hertz measured in multiples of 1,000.
High-Pass Filter: A circuit that allows high frequencies to pass but rolls off the low frequencies. When adding a subwoofer it is often desirable to roll-off the low frequencies to the main amplifiers and speakers. This will allow the main speakers to play louder with less distortion. High-pass filters used at speaker level are usually not very effective unless properly designed for a specific main speaker (see impedance below).
Imaging: Listening term. A good stereo system can provide a stereo image that has width, depth and height. The best imaging systems will define a nearly holographic re-creation of the original sound
Impedance: Impedance is a measure of electrical resistance specified in ohms. Speakers are commonly listed as 4 or 8 ohms but speakers are reactive devices and a nominal 8 ohm speaker might measure from below 4 ohms to 60 or more ohms over its frequency range. This varying impedance curve is different for each speaker model and makes it impossible to design a really effective "generic" speaker level high-pass filter. Active devices like amplifiers typically have an input impedance between about 10,000-100,000 ohms and the impedance is the same regardless of frequency.
Interconnects: Cables that are used to connect components at a low signal level. Examples include CD player to receiver, pre-amplifier to amplifier, etc. Most interconnects use a shielded construction to prevent interference. Most audio interconnects use RCA connections although balanced interconnects use XLR connections.
Jitter: A tendency towards lack of synchronization caused by electrical changes. Technically the unexpected (and unwanted) phase shift of digital pulses over a transmission medium. A discrepancy between when a digital edge transition is supposed to occur and when it actually does occur - think of it as nervous digital, or maybe a digital analogy to wow and flutter.
Kevlar: Material developed by Dupont that is has an exceptional strength to weight ratio. Used extensively in bullet-proof vests, skis, sailboat hulls, etc. In audio, used in many variations for speaker cones.
Line Level: CD players, VCRs, Laserdisc Players etc., are connected in a system at line level, usually with shielded RCA type interconnects. Line level is before power amplification. In a system with separate pre-amp and power-amp the pre-amp output is line level. Many surround sound decoders and receivers have line level outputs as well.
Line-Source: A speaker device that is long and tall. Imagine a narrow dowel dropped flat onto the water's surface. The line-source has very limited vertical dispersion, but excellent horizontal dispersion.
Lobing: Any time more than one speaker device covers the same part of the frequency range there will be some unevenness in the output. (Picture the waves from one pebble dropped into a calm pool vs. two pebbles dropped several inches apart.) Lobing means that the primary radiation pattern(s) is at some angle above or below the centerline between the two drivers. Good crossover design takes this into account.
Low Frequency Extension: Manufacturers, writers and salespeople toss around all kinds of numbers and terminology that can be very confusing and misleading. "This $300 shoebox sized sub is flat to 20Hz". Right, in your dreams . . . How is that cheap, tiny box and driver going to reproduce a 56 foot wavelength with enough power to be heard? It will not to it. Good bass reproduction requires moving a lot of air and playback at realistic volumes. Remember the rule of needing to move four times the air to go down one octave. Example: You have a pair of good quality tower speakers with 10" woofers that produce good bass down to around 40Hz. The salesman is telling you that his little subwoofer with a single 10" woofer will extend your system down to 20Hz. If you've been paying attention, you know that his woofer will have to move eight times as much air as each of your 10" woofers, not likely. Adding that subwoofer to your system might give you more apparent bass energy, and in fact may help a little with movie special effects, but it is unlikely to extend bass response significantly.
Low-Pass Filter: A circuit that allows low frequencies to pass but rolls off the high frequencies. Most subwoofers have low-pass filters built in and many surround sound decoders have subwoofer outputs that have been low-pass filtered.
Loudness: Perceived volume. Loudness can be deceiving. For example, adding distortion will make a given volume level seem louder than it actually is.
Magnetic-Planar Speakers: A type of speaker that uses a flat diaphragm with a voice coil etched or bonded to it to radiate sound. If the magnets are both in front of and behind the diaphragm, it becomes a push-pull magnetic-planar.
Midrange: A speaker, (driver), used to reproduce the middle range of frequencies. A midrange is combined with a woofer for low frequencies and a tweeter for high frequencies to form a complete, full-range system.
Monopole: Any speaker that encloses the backwave of the speaker device even though part of this backwave may be released via. a port or duct. The primary radiation at most frequencies will be from the driver front. If the driver is not enclosed it becomes a dipole.
Muddy: Listening term. A sound that is poorly defined, sloppy or vague. For example, a "muddy" bass is often boomy with all the notes tending to run together.
Muting: To greatly decrease the volume level. Many receivers and pre-amplifiers have a muting control which allows the volume level to be cut way down without changing the master volume control. Great for when the phone rings.
Nonlinearity: What goes into a system comes out changed by its passage through that system-in other words, distorted. The ideal of an audio component and an audio system is to be linear, or nondistorting, with the image on one side of the mirror identical to the image on the other side.
Octave: An octave is a doubling or halving of frequency. 20Hz-40Hz is often considered the bottom octave. Each octave you add on the bottom requires that your speakers move four times as much air!
Overload: A condition in which a system is given too high of an input level. A common cause of distortion or product failure.
Overtones:See Harmonics.
PCM: Pulse Code Modulation. A means of digital encoding.
Planar Source: Most electrostatics and magnetic planars have a large surface area. Think of a wide board dropped flat onto the water surface. The sound can be extremely coherent, but the listening window is effectively limited to being directly on-axis of both the left and right planar speaker.
Point-Source: Most multi-unit loudspeakers try to approximate a point-source. Think of a pebble dropped into the water and the expanding wave pattern away from impact. Obviously it is difficult to integrate multiple point-sources into a truly coherent expanding wave. The best designs do quite well with careful driver engineering and crossover development.
Polarity: A speaker, for example, has a positive and a negative input terminal. Connecting a battery directly to the speaker will result in the diaphragm moving outward. If you reverse the battery leads, the diaphragm will move inward. Caution: Too high of a voltage battery will also burn out the speaker!
Push-pull: Most common type of amplification that amplifies the negative and positive sides of the waveform separately. Allows for much higher power output than single-ended.
Pre-amplifier: Or Pre-amp is a device that takes a source signal, such as from a turntable, tape-deck or CD player, and passes this signal on to a power-amplifier(s). The pre-amp may have a number of controls such as source selector switches, balance, volume and possibly tone-controls. Radio-frequency interference (RFI): Radio-frequency sound waves can be caused by many sources including; shortwave radio equipment, household electrical line, computers and many other electronic devices. RFI sometimes interferes with audio signals, causing noise and other distortions.
Q or Quality Factor: Is a measure of damping. Modern home speaker systems have Q values ranging from < .5 to approx. 2.0. Q values < .7 have no peak in the response. Q values around .5 are considered to be optimally damped, having a Bessel response. A Q of 1.0 is a Butterworth response. The lower the Q value, the better the transient response of the system, (less or no ringing), but the tradeoff is a larger required box size and the response begins to rolloff at a higher frequency. Another way to consider it is that the lower the Q, the more gradual the rolloff but the rolloff begins at a higher frequency.
RCA Connector: "Phono" plugs, used primarily as low-level connections between Phonographs/CD players/Tuners/Recievers/Amplifiers
Receiver: An audio component that combines a pre-amplifier, amplifier(s) and tuner in one chassis. A Dolby Prologic Receiver also contains a Dolby Prologic decoder for surround sound.
Resonant frequency: Any system has a resonance at some particular frequency. At that frequency, even a slight amount of energy can cause the system to vibrate. A stretched piano string, when plucked, will vibrate for a while at a certain fundamental frequency. Plucked again, it will again vibrate at that same frequency. This is its natural or resonant frequency. While this is the basis of musical instruments, it is undesirable in music-reproducing instruments like audio equipment.
Ribbon Speaker: A type of speaker that uses a pleated conductor suspended between magnets. Most true ribbons are tweeters only. Sometimes confused with mmagnetic-planar speakers.
RMS (root-mean-square): The square root of the mean of the sum of the squares. Commonly used as the effective value of measuring a sine wave's electrical power. A standard in amplifier measurements.
Satellite: A satellite speaker is usually fairly small, and does not reproduce the lowest frequencies. Usually meant to be used with a woofer or subwoofer.
Sensitivity: A measurement of how much power is required for a loudspeaker to achieve a certain output level. The general standard used is on-axis SPL(Sound Pressure Level) at 1 watt input, 1 meter distance.
Signal-to-noise (SN) Ratio: The range or distance between the noise floor (the noise level of the equipment itself) and the music signal.
Single-ended: Type of amplification often, (but not always), using vacuum tubes. Typically low power output, low damping factor and relatively high distortion. Single-ended enthusiasts claim that the sound quality is more "real".
Sound Pressure Level (Spl): Given in decibels (DB) is an expression of loudness or volume. A 10db increase in SPL represents a doubling in volume. Live orchestral music reaches brief peaks in the 105db range and live rock easily goes over 120db.
Soundstage: A listening term the refers to the placement of a stereo image in a fashion that replicates the original performance. A realistic soundstage has proportional width, depth and height.
Sound Waves: Sound waves can be thought of like the waves in water. Frequency determines the length of the waves; amplitude or volume determines the height of the waves. At 20Hz, the wavelength is 56 feet long! These long waves give bass its penetrating ability, (why you can hear car boomers blocks away).
Speaker Level: Taken from the speaker terminals. This signal has already been amplified.
Spectral balance: Balance across the entire frequency spectrum of the audio range.
Stereo: From the Greek meaning solid. The purpose of stereo is not to give you separate right and left channels, but to provide the illusion of a three-dimensional, holographic image between the speakers.
Subwoofer: A speaker designed exclusively for low-frequency reproduction. A true subwoofer should be able to at least reach into the bottom octave (20-40Hz). There are many "subwoofers" on the market that would be more accurately termed "woofers".
THX: Refers to a series of specifications for surround sound systems. Professional THX is used in commercial movie theaters. Home THX specifications are not published and manufacturers must sign non-disclosure waivers before submitting their products for THX certification. Manufacturers that receive certification for their products must pay a royalty on units sold.
Timbre: The quality of a sound that distinguishes it from other sounds of the same pitch and volume. The distinctive tone of an instrument or a singing voice.
Timbral: Refers to the overall frequency balance of a system. In a perfect world, all systems would have complete tonal neutrality. With current technology, this ideal is approached but not met. Listening to many equally "good" speakers will reveal that some sound warmer than others, some sound brighter etc. In a surround sound system it is important that all speakers have a close timbral match for the highest degree of sonic realism.
Total harmonic distortion (THD): Refers to a device adding harmonics that were not in the original signal. For example: a device that is fed a 20Hz sine wave that is also putting out 40Hz, 80Hz etc. Not usually a factor in most modern electronics, but still a significant design problem in loudspeakers.
Transducer. A device that converts one form of energy to another. Playback transducers are the phono cartridge, which changes mechanical vibrations into electrical energy, and the loudspeakers, which change it back, from electrical energy coming from the amp to mechanical movement of the diaphragm, causing audible pressure changes in the air.
Transmission Line: Also referred to as a T-line. A type of bass cabinet in which the back wave follows a relatively long, usually damped path before being ported to the outside. T-lines are usually rather large and costly cabinets to manufacture. Opinions vary widely over the "best" type of bass cabinet, but much has to do with how well a given design, such as a transmission line is implemented.
Transient response: The ability of a component to respond quickly and accurately to transients. Transient response affects reproduction of the attack and decay characteristics of a sound.
Transparency: Listening term. An analog that can be best "pictured" in photography. The more "transparent" the sound, the clearer the auditory picture.
Transients: Instantaneous changes in dynamics, producing steep wave fronts.
Tri-wiring: The use of three pairs of speaker wire from the same amplifier to separate bass, midrange and treble inputs on the speakers.
Tuning Frequency: The helmholtz resonant frequency of a box. Also refers to the resonant frequency of other types of systems.
Tweeter: A speaker, (driver), used to reproduce the higher range of frequencies. To form a full-range system, a tweeter needs to be combined with a woofer, (2-way system), or a woofer and midrange, (3-way system).
Unity gain: A circuit with unity gain will not increase or decrease the volume level.
Warmth: A listening term. The opposite of cool or cold. In terms of frequency, generally considered the range from approx. 150Hz-400Hz. A system with the "proper" warmth will sound natural within this range.
Wattage: Is the unit of power used to rate the output of audio amplifiers. For a wattage number to have meaning the distortion level and impedance must also be specified.
Wavelength The distance the sound wave travels to complete one cycle. The distance between one peak or crest of a sine wave and the next corresponding peak or crest. The wavelength of any frequency may be found by dividing the speed of sound by the frequency. (Speed of sound at sea level is 331.4 meters/second or 1087.42 feet/second).
Woofer: A speaker, (driver), used for low-frequency reproduction. Usually larger and heavier than a midrange or tweeter.
XLR: A type of connector used for balanced lines. Used for microphones, balanced audio components and the AES/EBU digital connection.
Y-Adapter: Any type of connection that splits a signal into two parts. An example would be a connector with one male RCA jack on one end, and two female RCA jacks on the other end.
Zobel Filter: A series circuit consisting of a resitance and capacitance. This filter is placed in parallel with a speaker driver to flatten what would otherwise be a rising impedance with frequency.

GM General Midi.
Piano:
1 Acoustic piano
2 Bright piano
3 Grand piano
4 Honky-tonk piano
5 Rhodes piano 1
6 Chorused piano 2
7 Harpsichord
8 Clavinet
Chromatic Percussion:
9 Celesta
10 Glockenspiel
11 Music box
12 Vibraphone
13 Marimba
14 Xylophone
15 Tubular bell
16 Dulcimer
Organ:
17 Hammond organ
18 Percussive organ
19 Rock organ
20 Church organ
21 Reed organ
22 Accordion
23 Harmonica
24 Tango accordion
Guitar:
25 Acoustic nylon guitar
26 Acoustic steel guitar
27 Jazz guitar
28 Clean guitar
29 Muted guitar
30 Overdriven guitar
31 Distortion guitar
32 Guitar harmonics
Bass:
33 Acoustic bass
34 Finger bass
35 Picked bass
36 Fretless bass
37 Slap bass 1
38 Slap bass 2
39 Synth bass 1
40 Synth bass 2
Strings:
41 Violin
42 Viola
43 Cello
44 Double bass
45 Tremolo strings
46 Pizzicato strings
47 Orchestral harp
48 Timpani
Ensemble:
49 Strings 1
50 Strings 2
51 Synth strings 1
52 Synth strings 2
53 Voice aahs
54 Voice oohs
55 Synth voice
56 Orchestra hit
Brass:
57 Trumpet
58 Trombone
59 Tuba
60 Muted trumpet
61 French horn
62 Brass
63 Synth brass 1
64 Synth brass 2
Reed:
65 Soprano sax
66 Alto sax
67 Tenor sax
68 Baritone sax
69 Oboe
70 English horn
71 Bassoon
72 Clarinet
Pipe:
73 Piccolo
74 Flute
75 Recorder
76 Pan flute
77 Bottle blow
78 Shakuhachi
79 Whistle
80 Ocarina
Synth Lead:
81 Square wave
82 Sawtooth
83 Calliope
84 Chiff lead
85 Charang
86 Solo synth lead
87 Bright saw
88 Bass and lead
Synth Pad:
89 Fantasia
90 Warm pad
91 Poly synth
92 Space pad
93 Bowed glass
94 Metal
95 Halo pad
96 Sweep pad
Synth Effects:
97 Ice rain
98 Soundtrack
99 Crystal
100 Atmosphere
101 Brightness
102 Goblin
103 Echo drops
104 Star theme
Ethnic:
105 Sitar
106 Banjo
107 Shamisen
108 Koto
109 Kalimba
110 Bagpipe
111 Fiddle
112 Shanai
Percussive:
113 Tinkle bell
114 Agogô
115 Steel drums
116 Woodblock
117 Taiko drum
118 Melodic tom
119 Synth drum
120 Reverse cymbal
Sound effects:
121 Guitar fret
122 Breath
123 Seashore
124 Bird tweet
125 Telephone Ring
126 Helicopter
127 Applause
128 Gunshot
Percussion.
Channel 10 is reserved for percussion under General MIDI, this channel always sounds as percussion regardless of whatever program change numbers it may be sent, and different note numbers are interpreted as different instruments.
35 Bass Drum 2
36 Bass Drum 1
37 Side Stick
38 Snare Drum 1
39 Hand Clap
40 Snare Drum 2
41 Low Tom 2
42 Closed Hi-hat
43 Low Tom 1
44 Pedal Hi-hat
45 Mid Tom 2
46 Open Hi-hat
47 Mid Tom 1
48 High Tom 2
49 Crash Cymbal 1
50 High Tom 1
51 Ride Cymbal 1
52 Chinese Cymbal
53 Ride Bell
54 Tambourine
55 Splash Cymbal
56 Cowbell
57 Crash Cymbal 2
58 Vibra Slap
59 Ride Cymbal 2
60 High Bongo
61 Low Bongo
62 Mute High Conga
63 Open High Conga
64 Low Conga
65 High Timbale
66 Low Timbale
67 High Agogo
68 Low Agogo
69 Cabasa
70 Maracas
71 Short Whistle
72 Long Whistle
73 Short Guiro
74 Long Guiro
75 Claves
76 High Wood Block
77 Low Wood Block
78 Mute Cuica
79 Open Cuica
80 Mute Triangle
81 Open Triangle
Controllers.
GM also specifies which operations should be performed by several controllers.
1 Modulation
6 Data Entry MSB
7 Volume
10 Pan
11 Expression
38 Data Entry LSB
64 Sustain
100 RPN LSB
101 RPN MSB
121 Reset all controllers
123 All notes off
RPN.
Setting Registered Parameters requires sending (numbers are decimal):
1) two Control Change messages using Control Numbers 101 and 100 to select the parameter, followed by
2) any number of Data Entry messages of one or two bytes (MSB = Controller #6, LSB = Controller #38), and finally 3) an End of RPN message. The following global Registered Parameter Numbers (RPNs) are standardized [1] (the parameter is specified by RPN LSB/MSB pair and the value is set by Data Entry LSB/MSB pair).
0,0 Pitch bend range
1,0 Channel Fine tuning
2,0 Channel Coarse tuning
3,0 Tuning Program Change
4,0 Tuning Bank Select
5,0 Modulation Depth Range
127,127 RPN Null
For example: RPN control sequence to set coarse tuning to A440 (parm 2, value 64):
101:0, 100:2, 6:64, 101:127, 100:127.
System Exclusive messages.
Two GM System Exclusive ("SysEx") messages are defined: one to enable and disable General MIDI compatibility, on devices which also allow modes which are not GM-compatible; and the other to modify an instrument's master volume.
GS extensions.
The first GM synthesizer in Roland Sound Canvas line featured a set of extensions to General MIDI standard. The most apparent addition was the ability to address multiple banks of sounds by using additional pair of controllers, cc#0 (Bank Select MSB) and cc#32 (Bank Select LSB), to specify up to 65536 'variation' sounds. Other most notable features were 9 Drum kits with 14 additional drum sounds each, Control Change messages for controlling the send level of sound effect blocks (cc#91-94), entering additional parameters (cc#98-101), portamento, sostenuto, soft pedal (cc#65-67), and model-specific SysEx messages for setting various parameters of the synth engine.

General MIDI Level 2.
In 1999, the standard was once again updated to include more controllers, patches, RPNs and SysEx messages. Here's a quick overview of the changes in comparison to GM/GS:
Number of Notes - minimum 32 simultaneous notes
Simultaneous Percussion Kits - up to 2 (Channels 10/11)
Additional 128 melodic sounds are included in variation banks, for a total of 256
9 GS Drum kits are included
Additional Control Change messages
Filter Resonance (Timbre/Harmonic Intensity) (cc#71)
Release Time (cc#72)
Brightness/Cutoff Frequency (cc#74)
Decay Time (cc#75)
Vibrato Rate (cc#76)
Vibrato Depth (cc#77)
Vibrato Delay (cc#78)
Registered Parameter Numbers (RPNs)
Modulation Depth Range (Vibrato Depth Range)
Universal SysEx messages
Master Volume, Fine Tuning, Coarse Tuning
Reverb Type, Time
Chorus Type, Mod Rate, Mod Depth, Feedback, Send to Reverb
Controller Destination Setting
Scale/Octave Tuning Adjust
Key-Based Instrument Controllers
GM2 System On
Additional melodic instruments can be accessed by setting CC#32 to 121 and then using CC#0 to select the bank before a Program Change. The most expanded group is Acoustic Pianos.

Understanding ISRC Codes
When I first heard about ISRC codes and the importance of its implementation for the owners of recordings, I was excited to know that a system was in place to allow artists to track sales and radio playback. The confusing mass of information that I found led me to do a bit of research to see just how this system works and how it can be best used to one's advantage. The attempt here is to help save you some of your valuable time by providing the information you need to know in order get the most out of the ISRC system. The purpose of this page is to focus first on the 'need to know' information. The articles that follow will expand on that overview with the details that are necessary for a deeper understanding of how all this works. With this overview in mind, you should know what to expect and how to go about the process of acquiring and using your ISRCs.
In order to begin, we must start by giving some very basic facts about the ISRC system and what its purpose is:
1. ISRC stands for International Standard Recording Code
2. The system was designed as a way of uniquely identifying recordings.
3. Each recording or version of a recording must be assigned a unique code.
4. Each code is a unique 12 digit number.
5. Codes can be obtained from 3 basic sources, directly from the RIAA, from an ISRC Manager or from a music service provider.
6. The code must be burned into the recording.
7. It is your responsibility to provide the code information when distributing your recordings.
8. The code can be used to track sales and radio station play.
9. The code can be used by performing rights societies to track usage for paying performance royalties.
There is much more information that is necessary to know before you can begin to utilize this system, but that was a basic overview. The next step will get us a little deeper into the process. From there, you can use the links at the bottom of this page to get more detailed information about each step if you desire.
Utilizing ISRC Codes
The process for utilizing ISRC codes is made up of 3 basic steps:
1. Determine whether you need ISRC codes.
2. Learn how to acquire codes and assign them to your recordings
3. Learn how to use them to track sales and radio play.
Let's take a look each step one at a time:
Step one: Do I need ISRC codes for my recordings?
ISRC codes are not necessary for everyone. The only recordings that need ISRC codes are ones that will be released for public consumption. If you plan to distribute, sell, or use your recordings for radio play and promotional purposes, then the ISRC system will help you to track the sales and radio play of your recordings. The codes are only necessary for the final release version of your song. If the recording is primarily for personal use like a demo, rehearsal recording or a rough mix then getting a code will not be necessary. ISRCs are designed for tracking publicly released recordings. The technical definition of a recording is the final stereo, mono or surround release version of the song, not the multitrack recording. Only the final mixes (recordings) of a song would require the use of a code. One song may have many recordings associated with it. For example: the same song may have a mix for the CD release, a shortened version for radio play, a remix version, an unplugged version, an a-cappella version, an instrumental version, etc.. Each version of the song will require its own unique code so that the sales, radio play and usage can be tracked individually. A simple way to look at this is to ask one simple question, Is this being released for public consumption? If the answer is yes, then an ISRC code will be a helpful resource.
Step 2: How do I acquire ISRCs for my recordings?
ISRC codes can be purchased by 3 different methods. The number of recordings you need codes for and the amount of responsibility you are willing to take on for their management will determine what is the best method for you. As stated earlier, codes can be obtained from 3 basic sources: directly from the RIAA, from an ISRC Manager or from a music service provider.
Method 1: Purchase codes directly from your national ISRC Agency. In the United States that is the RIAA . For other countries click here . For $75 you can get 100,000 unique codes that can be assigned to your sound recordings. This can be a good choice for a music producer or record label who will need a large quantity of codes. Keep in mind that signing up to become an ISRC Registrant also has the responsibilities of detailed record keeping and reporting to the RIAA the codes you have assigned. Starting from the date you become an approved Registrant by the RIAA, you will be given the ability to assign ISRCs up until September 1st of each year. The ability to assign codes to your recordings will then expire and you will need to pay an additional fee for the right to continue assigning codes even if you have not used your allotment.
Method 2: Find an ISRC manager to assign codes for you. This may be a better choice for a songwriter or artist that does not want the responsibility of record keeping or reporting and has a limited amount of material that is produced on a yearly basis. music-production-guide.com provides ISRC management services, click here for more information. Otherwise, here is a list of ISRC Managers in the US provided by the RIAA. The benefit of using an ISRC manager is that they are responsible for keeping an accurate record of your codes. Once the codes are assigned, they are yours forever. If you are not good at keeping records and do not require the need for a large number of codes, this may be the best solution for you. Purchase codes only as you need them and avoid all the additional paperwork.
Method 3: Get codes through a mastering facility or distribution company. Many mastering facilities and digital music distribution companies provide ISRC codes as a courtesy for purchasing their services. If you plan to use the services of a company that offers 'free' ISRCs, then take advantage of the offer. Although many websites will tell you that ISRCs are free, remember that you will only get them if you buy the service they offer. ISRCs used to be a free service offered by the RIAA. In 2009, however, the RIAA started charging a fee to help pay for the administrative costs of maintaining the ISRC system. Somewhere down the line, somebody has to pay for them. Because the fees for purchasing them are relatively small for a big company, many music service providers will provide them as an incentive get you to buy their services. When you purchase codes through a Manager (Method 2), you are paying them to assign, maintain a record of, and report, your codes to the RIAA. music-production-guide.com also provides mastering services including the application of ISRC codes and their management.
One last note:
It is important to remember that the codes must be electronically burned into the files you are using for distribution. If you have a CD release this must be done in the mastering process before the discs are pressed. For internet release, the code must be added to your ID3 tag to be recognized. This is usually done by the distribution company that you hire and you will be required to supply the ISRC information when submitting your recordings for electronic distribution.
Step 3: How do I use the codes to track sales and radio play?
Now that you've gone through all the trouble of getting the codes and having them imprinted into your recordings, it's time to take advantage of the system. The ISRCs can work for you only if you get the code information to all the parties that are involved with tracking sales and radio play. Sales and radio play are further divided into 2 categories, physical and virtual. Let's take a quick look at both sales and radio play :
Sales
A sale occurs when somebody pays money to purchase or listen to your recordings. The sale can be in physical form such as the purchase of a CD or in virtual form as a download through iTunes or some other music outlet.
Physical sales are generally tracked through an agency like Nielsen's Soundscan. If you register your recordings there they will be registered and tracked in their database. You may also want to consider getting a UPC/EAN (Link Here) code before registering your songs with SoundScan.
Internet Sales tracking is very easy and should be provided when you sign up for a digital distribution service like CD Baby . Most of these companies will provide ISRC codes when you sign up for their services. You will be required to enter in the ISRC code when registering your songs. The rest should be taken care of by the distribution service.
Radio Play and Performance Royalties
There are 2 types of performance royalties. They are divided into physical venues like terrestrial radio stations and music venues like clubs and bars, and 'virtual' ones like internet radio, satellite radio, and audio transmission on cable TV.
Physical performance royalties are tracked by performing rights societies like ASCAP , BMI and SESAC . They collect royalties from venues that use music as a means to make money or enhance their ability to make money. This includes terrestrial radio stations, Music clubs, Bars, Stadiums etc… A venue that need to play music as a part of their business must pay for a license to do so. Those royalties are divided up and paid out to registered members.
The internet and digital radio was the wild, wild west until SoundExchange came along and provided the same performing rights services, but for internet radio, Satellite radio and the playback of music on Cable TV. Becoming a member of SoundExchange is free and allows you collect performance royalties from around the world.
The ISRC Code
The ISRC code is a unique 12 character alphanumeric code assigned to a given recording. The code must be assigned by qualified ISRC Manager, music service provider or by applying directly to the RIAA. The code, once acquired, is burned into the recording to allow for tracking of sales and usage both in CD format as well as on the internet. The following article details the individual elements of the ISRC code and what specific purpose each part has. Please note that the information below is for informational purposes only and does not authorize the reader to create their own codes. ISRC stands for International Standard Recording Code. It was developed by the international recording industry through the ISO (International Organization for Standardization) as a way to uniquely identify sound and music video recordings. The IFPI (International Federation of the Phonographic Industry) functions as the International ISRC agency. Since 1989, 49 national agencies have been appointed by the IFPI that implement these standards in individual countries. The US national agency is the RIAA (Recording Industry Association of America).
All formalities aside, let's take a closer look at the makeup of the ISRC code.
Breaking Down the ISRC Code
The actual ISRC code itself is a 12 character alphanumeric code that is broken down into 4 basic sections:
1. Country Code
2. Registrant Code
3. Year of reference
4. Designation Code
1. Country Code
The Country Code defines the country of origin for the recording. Each country has a unique 2 letter code that defines where the music is registered. Until late 2010 'US' was the country code for the United States but has since been changed to 'QM'. If a recording with a US or QM country code is sold or licensed to another country, the country code maintains its US or QM Country Code when used in the new country. It is important to note that when a recording is assigned an ISRC code, it remains with that recording forever. If the recording is changed, for example: rerecorded in another language, then a new code would need to be assigned. If the artist id from the US then it may be assigned with a US or QM Country Code even though it will be used in another country.
2. Registrant Code
The Registrant code makes up the next three alphanumeric characters and is uniquely assigned to the Registrant or ISRC Manager by the National ISRC Agency. These three alphanumeric characters allow the agency to track who has assigned the ISRC code to a given recording. It is used in conjunction with the Country Code to further aid in the tracking and origin of the assigned code. It is important to note here that the Country Code and Registrant Code are always used together and never changes based on the country that the song is being sold or licensed to.
3. Year of Reference
The Year of Reference defines the year in which the ISRC code was created and assigned. The two digits should not be confused with the year the recording was created. The Year of Reference represents the ISRC system and sets a reference point from which data can be tracked regarding the recording. For ISRCs assigned in 2011 you would have a Year of Reference of '11', for 2012 it would be '12' even if the recording was from 2003.
4. Designation Code
The Designation Code is the only number that is assigned at the discretion of the Registrant or ISRC Manager. The designation Code is made up of five digits ranging from 00001 to 99999. Roughly 100,000 codes can be uniquely assigned to a given Registrant Code in any given calendar year. Once the calendar year changes the Designation Code numbers can start over again from 00001 since the change in Year of Reference would define it differently from the previous year. The codes used in a given year must be reported to the RIAA by the Registrant or ISRC Manager for the purpose of maintain a database of assigned codes as well as for billing purposes.
Assigning a Designation Code
When assigning a code to a recording, the Registrant or ISRC manager must be responsible for keeping accurate records of the recording codes that have already been used. This helps to prevent the possibility of the same code being assigned to multiple songs. Good bookkeeping is a necessity! As an example, a CD with 10 recordings would likely have codes that assigned in consecutive order unless any one of the recordings already has a code assigned to it. Since a given recording can only have one code assigned to it, the original code would be used for that recording. The hyphens shown in the example below are not actually part of the code and are shown here for the sake of clarity. Each code is typically entered as a consecutive stream of letters and numbers for each song when encoded to a CD or an mp3 file.
My CD
• Track 1 US-XXX-11-00001
• Track 2 US-XXX-11-00002
• Track 3 US-XXX-11-00003
• Track 4 US-XXX-11-00004
• Track 5 US-XXX-11-00005
• Track 6 US-XXX-11-00006
• Track 7 US-XXX-11-00007
• Track 8 US-XXX-11-00008
• Track 9 US-XXX-11-00009
• Track 10 US-XXX-11-00010
In the example above, the code must be acquired before the mastering process and supplied to the mastering engineer so that the data can be burned into the Q data channel for each song on the disc. Once the CDs are manufactured the codes cannot be added afterwards so it is important to acquire them ahead of your mastering session. Keep in mind that the process of acquiring ISRC codes may take 3 or 4 days depending on how you get them.
Important Points to Remember
• A recording must only have one code assigned to it. Remember that a recording is not the song, it is a recorded version, or mix, of the song. A song may have many recordings associated with it including remixes, edited versions, A cappella versions, instrumentals etc… Each one requires a unique code.
• Never assign the same ISRC code to more than one recording.
• Maintain an accurate record of your assigned ISRC codes and what specific recordings they are associated with.
• Each ISRC must contain exactly 12 characters, no spaces or hyphens
• Always provide the codes for each recording to your distributor and any outlets that may be streaming your music. Most online distributors require this information when you submit your recordings.
• If sending music to a radio station, make sure that the codes are sent along in written form along with files. Don't assume that the ISRCs will automatically be read, call to verify.
• Provide the codes to the performing rights society you are a member of. Remember that radio play and usage in music venues requires licensing fees that get collected and distributed by performing rights societies to members whose usage can be tracked.
Remember, ISRCs are only valuable to you if you use them! To find out more about ISRCs and how to use them, click here. (LINK TO ISRC MAIN PAGE) The information provided above should help you to determine if the codes you have been provided were assigned correctly. It should also give you the necessary information to determine what is in error so that the problem may be corrected. Please look at the links below to find more articles about ISRCs. If you have a specific question, you may find an answer in the ISRC FAQs page. If your question is not answered there, you may submit your question directly to me through the Contact Us link. I hope you have found this article helpful…
Denis van der Velde
AAMS Auto Audio Mastering System
www.curioza.com
The Studio

Welcome to the infomation page about starting / beginning a recording studio.
The Home Recording Studio
The home recording market has grown exponentially in the last decade. Advancements in computer technology and the development of music recording software have brought professional quality recording capabilities to the home studio.
So why is it that most home recordings do not sound anything like those done in professional music production studios? The answer lies mostly in the lack of professional recording experience, understanding of professional recording techniques, and how to build and use a properly designed, acoustically treated recording environment. A professional recording engineer with a minimum of equipment and resources will create an infinitely better recording than the amateur would in a state of the art music production studio. Music production and engineering is an art form as much as the study of any instrument.
But don't dismay! There is a tremendous amount of help out there for you. In many ways, it is easier now than ever before to learn professional engineering skills. The goal of this section and the pages that follow, is to cut through all of the misinformation. This way you can focus on the most important and fundamental concepts you need to learn.
So How Does This Translate to My Studio?
The focus of the articles that follow is to help you to understand how professional recording studios are designed and used. Each concept will then be translated to the home recording environment. You will learn how to best implement these concepts into your own home studio setup.
Over the years, I have helped many songwriters, composers, and musicians design and build home studios that best suited their needs. Each studio was custom designed to fit their workflow habits, technological capabilities and budget . The primary focus was to make the studio as transparent as possible to the creative process. Every ounce of energy spent on technical problems takes away from the creative workflow. Simple is always best!
Where do I Begin?
If you are building a home recording studio, it is important to understand how you create music. Write it down on a piece of paper if necessary. Then design a logical step by step process that allows you to set up and work quickly when a creative idea strikes.
If you have little or no experience, this process can be overwhelming at first. There are countless recording software packages, microphones, interfaces and gear to wade through. What do you really need in your studio? The articles that follow will address these issues and many others.
It's important to embrace the recording process one step at a time. Starting simple is always the best advice. It's easy to learn and grow from simplicity. I would often create and laminate sheets with a step by step guide for clients that were computer phobic. Once they got used to the process, we could easily expand on their knowledge by adding solutions the problems that arose. If you want a more thorough explanation of professional music production studios. Click HERE to see how professionals do their thing. As always, there is no amount of knowledge that will take the place of experience. You must repeat the process over and over again to get it. Remember, there are no failures, only opportunities to learn how to make the next recording better than the previous one!
Select from the following links below to learn more about home recording and how to make your studio the best it can be.
Design
Home music production and home studio design are the largest growing areas of the recording industry. Advancements in computer technology coupled with a less profitable recording industry have led the pro audio manufacturers to go where the money is… Home.
For a relatively small amount of money, a home music production studio is now at the fingertips of the novice, enthusiast, and everybody who has a song and a dream. If you want to create the right home studio design for your needs, the following article will point you in the right direction. Each of the following questions will help to focus you toward the essentials for creating a home music production space that is best suited to the way you work. Every person is different and works and thinks in unique ways. You must honor that in the design and purchases you make.
What do you want to do with your studio?
Everybody has a different idea of what they want or need out of their studio. What you want will determine the home studio design, software, interfaces, microphones and gear that you buy. It is critically important to have a goal for your home studio. Before you set your goal, answer the following questions. The answers to these basic questions will help determine the design of your home studio
1. Are you musician, engineer or music producer?
2. What type of music do you want to record?
3. Will you be collaborating with others in your studio?
4. Do you need a live acoustic space for recording?
5. What is your budget for the studio?
As you answer each of the previous questions try to visualize what your home studio design might look like. After you have answered and visualized each of these basic questions, It's time to set a goal for your home studio design and what you hope to accomplish with it down the road.
Goals
Goals should always be set with two things in mind. What is my long term vision, and what is the first step I need to take. Basically this is a long term goal and a short term goal. Without the long term goal, your short term decisions may be ill-advised, unfocussed and lead to a less than satisfying outcome.
The long term goal helps to define where you want to be in 5 years or 10 years. Defining this goal clearly will allow you to make better decisions on how to design your home studio. The short term goal is the next step you need to take. What can you do right now to get one step closer to your long term goal?
Defining Your Goals
If you are unclear about your long term goal then answer these questions:
1. What drives your passion to create music?
2. Do you see yourself as a creator of music or as part of the process?
3. Do you see yourself making a career in the music industry?
4. Where do you see yourself fitting in or standing out in the music industry?
5. Do you want to create music solely for your own entertainment and fun?
By answering these questions, you are defining a role for yourself and your studio. This puts you one step closer to the home studio design that is best for you. Your home studio design may only need to be a temporary situation to help enable your long term vision. Keep this in mind when you make your short term decisions. Every decision you make with design, software and equipment purchases should be part of this larger picture. As you read on further to see what design and purchases you need to make, remember to keep your long term goal in mind.
Examples of Long-Term Goals
The following are five examples of what this process might look like for five unique situations. If you are still confused or unclear of your long term goal, maybe some of the following examples will help.
Example 1: I am a musician in a alt rock band, my long term goal is to get a record contract with a major label.
Example 2: I am a songwriter and my long term goal is to sign a deal with a publishing company that sells my songs to signed artists.
Example 3: I am a recording engineer and my long term goal is to build my own commercial recording studio for all my engineering work.
Example 4: I am a music producer and my long term goal is to create a record label and sign young talent that will be distributed through major record labels.
Example 5: I write hip hop beats and my long term goal is to write for top producers and artists in the music industry.
Examples of Short-Term Goals for a Home Studio Design
All of these examples express a long term goal. The design of each home music production studio will be different based on the long term goal. With a long term vision in mind, let's look at the short term goal for each:
Example 1: The musician needs a home studio to record their alt rock band for the purpose creating CDs and to promote live performances and sales online.
Example 2: The songwriter wants a home studio design that will be their primary workspace for writing and recording demos of their songs.
Example 3: The engineer is looking to create a quality home studio that can be used for recording, editing, mixing and mastering work.
Example 4: The music producer is looking to create a recording space that they can use to develop young artists.
Example 5: The beat writer needs a small production space that can be easily broken down and set up for work in other recording studios.
Studio Design
To give you an idea of how different each home studio design might be, let's take a closer look at the design recommendations for each of the examples. Of course each will be dependent on the budget, so I will give multiple examples for each. Because specific equipment purchases are so unique to each situation, I will discuss in general terms where the money will be primarily spent.
Example 1
In Example 1, the musician with the alt rock band is a classic garage or basement setup. Even if a garage or basement is not a possibility the basic recommendations will be the same. With a higher budget and available basement or garage space, I would recommend basic sound isolation and acoustic treatments for the studio space. Spend the majority of the money on a good multichannel interface, mics, and equipment related to recording a group of live musicians. With a lower budget, rather than skimping on quality, I might recommend that they buy a smaller but similar quality interface, fewer mics of similar quality. Rather than spending money on acoustic treatments for the basement or garage, keep the studio in the bedroom packaged to be mobile. This way the setup can be brought to any location for recording including a rehearsal space if necessary.
Example 2
In Example 2, the Songwriter is best suited to have a dedicated room for writing. Money will be focused on creating a comfortable and streamlined work environment since they will likely be there for long periods of time each day. With a higher budget the focus of the home studio design will be all about good acoustic treatments and quality, not quantity with equipment purchases. A good quality mic that matches the songwriters voice well is a must. If the songwriter needs extra sounds or samples, a good virtual instrument library may be in order with a good midi controller. On a lower budget, acoustic treatments will be selected for function more than aesthetic. A lesser quality mic that matches their voice well and a smaller midi controller. It may be necessary to go with good headphones over cheap speakers. Software like Logic, with a large sound library, may a good starting place over sample libraries.
Example 3
In Example 3, the engineer, with the goal of a commercial facility in the future may be inclined to build a larger recording space perhaps in a garage or large basement. The acoustic design, equipment and furniture purchases, will be focussed on a future vision of what the commercial space will look like. On a higher budget, I would suggest that as much of the home studio design, acoustic treatments and equipment purchases as possible be made with the idea of being used in the future commercial space. Acoustic treatments suspended in a way that can be easily removed without damage. Equipment racks designed and wired with the commercial space in mind. All equipment purchases of the highest quality affordable. Maximize every dollar spent as if purchased for the future facility. On a smaller budget, again the focus will be on quality, not quantity. No engineer that works in a professional facility will tolerate lots of low quality gear. Basically get less of everything, but make sure it will be useable in a commercial studio. You can add additional gear as needed.
Example 4
In Example 4, the music producer needs a home studio design that will serve as a development space for new artists. Depending on the musical styles and space available, the producer will need a variety of quality musical gear that will be readily available should the inspiration strike.
With a high budget, acoustic isolation and a comfortable space is a premium. Musical instruments, drum machines, keyboards, sample libraries and everything creative will be at a the ready. A good multichannel interface that allows all instruments to be simultaneously connected without looking for cables or patching will keep the space simple and productive. With a lower budget, more focus will be made on virtual, rather than real instruments. The plug and play capabilities are necessary here to allow for quick creative inspiration. Just enough acoustic treatments to keep the demo material sounding solid.
Example 5
In Example 5, the Beat Writer will need a mobile writing environment. It will be better to spend the money on quality of gear rather than acoustic treatments and studio furniture. With a high budget, I would have custom cases built for all gear much like a DJ setup. The road case will serve as the table from which the artist will work. High quality headphones are a must. When a studio gig arises, the setup can be unplugged quickly, case lid placed on, and out the door in 5 minutes. Maximize the quality and flexibility of all equipment purchases to suit the programming style of the beat writer. With a lower budget, money will be saved by using gig bags or a standard case. Spend the most money on the primary programming interface and less on peripheral items that are secondary to the work. Although this will involve more breakdown and setup time for gigs, custom cases and accessories can easily be added later as funds become available. In either case, the home studio design will be simple and focused on mobility.
Each scenario will vary greatly based on the person's technical abilities. The key for each home studio design is to maximize creative time over technical time. I have purposefully stayed away from specific equipment recommendations in this article because those choices are too dependent on the individual using the studio. Some can handle complex gear without issue, some need a plug and play setup that's simple and effective. By and large, my recommendations lean toward the most ergonomic and simple setup. possible. The more complex a setup, the more likely you are to be disrupted by technical issues. Simpler is always better.
An Overview of Home Music Production
For decades musicians, composers and songwriters have recorded home music productions. Many were recordings to cassette tape via the Tascam Portastudio released in the late 70's. Some of these recordings became commercially released records like Bruce Springsteen's Nebraska.
While other notable artists have released recordings from semi-professional or consumer recording devices, most had been made in professional recording studios. The quality standards of the pro studio dramatically outweighed those that could be achieved with the available home recording technology.
Home Music Production in the 80's
During the 80's, the advancements of MIDI, synthesizers, drum machines, sampling technology and the ability to sequence and record virtual performances changed the way we made music forever. No longer did you have to convene the band or spend weeks auditioning drummers and bass players to record your songs. Although it wasn't cheap, songwriters and artists that could afford these emerging technologies would be able to produce and create music from home. Recording audio at home, however, was still an issue. The synchronization technology for locking sequencers and audio tape recorders was still very limited.
A Home Audio Revolution
The home audio recording world got its most significant push toward affordable home music production with the introduction of the Alesis ADAT in 1991. With 8 tracks of digital recording capability and the ability to expand tracks by adding modular ADAT units, artists were free to record audio and easily synchronize with midi sequencers. With this new technology in hand, many artists began to pre-produce their records, make demos and even record their whole albums on ADAT. Alanis Morrisette, Lisa Loeb, Dr Dre and Outcast come to mind quickly. Although not known for sonic purity or stability, artists began to enjoy the freedom of making a home music production and having it commercially released. Artists were no longer subject to the pressures of recording studio budgets and the need to get work done quickly.
Home Music Production and Computers
The 90's also saw audio come to the personal computer with the evolution of Pro Tools. Though not the first to record audio in a computer, Pro Tools was the first to set the standard for the multitrack recording and editing of audio in computers. Many commercial recording studios still blame Pro Tools for the demise of the recording studio industry. I believe it may have done more to save the industry than destroy it. Record companies would have lowered studio budgets anyhow, due to piracy on the internet. They also waited too long to embrace the reality that CDs were not going to be the marketplace of the future and thus lost control of it. Lower studio budgets were inevitable. Pro Tools gave studios a less expensive option for recording digital audio that would allow them to absorb some of the hit of lower studio rates. Think of it this way, in the early 90's, a 48 track digital tape machine would cost a studio $250,000. A 48 track Pro Tools rig would be closer to $50,000. Large format analog recording consoles were as much as $750,000 for 96 channels. A Pro Tools rig would soon meet that capacity and with greater signal flow flexibility. While the sound quality would be nowhere close to that of the big analog desks, the convenience, the editing capabilities, the lower price point and future demand would force studios to buy in. Like it or not, computer recording technology changed the landscape and design of the recording studio industry forever. Those that didn't buy in have largely failed. Those that did have survived. Although the big studios have been hardest hit, the number of smaller commercial studios that opened far outweighed the number that closed. Many of those studios were opened by artists who felt that the budget for making their next record was better invested in themselves. By building their own studio instead of spending the budget in big studios, they could continue to record regardless of the success of their record. When not in use, the studio could be rented out to others or used to record and develop new artists as part of a management or record label deal.
Studio Design
To give you an idea of how different each home studio design might be, let's take a closer look at the design recommendations for each of the examples. Of course each will be dependent on the budget, so I will give multiple examples for each. Because specific equipment purchases are so unique to each situation, I will discuss in general terms where the money will be primarily spent.
Example 1
In Example 1, the musician with the alt rock band is a classic garage or basement setup. Even if a garage or basement is not a possibility the basic recommendations will be the same. With a higher budget and available basement or garage space, I would recommend basic sound isolation and acoustic treatments for the studio space. Spend the majority of the money on a good multichannel interface, mics, and equipment related to recording a group of live musicians. With a lower budget, rather than skimping on quality, I might recommend that they buy a smaller but similar quality interface, fewer mics of similar quality. Rather than spending money on acoustic treatments for the basement or garage, keep the studio in the bedroom packaged to be mobile. This way the setup can be brought to any location for recording including a rehearsal space if necessary.
Example 2
In Example 2, the Songwriter is best suited to have a dedicated room for writing. Money will be focused on creating a comfortable and streamlined work environment since they will likely be there for long periods of time each day. With a higher budget the focus of the home studio design will be all about good acoustic treatments and quality, not quantity with equipment purchases. A good quality mic that matches the songwriters voice well is a must. If the songwriter needs extra sounds or samples, a good virtual instrument library may be in order with a good midi controller. On a lower budget, acoustic treatments will be selected for function more than aesthetic. A lesser quality mic that matches their voice well and a smaller midi controller. It may be necessary to go with good headphones over cheap speakers. Software like Logic, with a large sound library, may a good starting place over sample libraries.
Example 3
In Example 3, the engineer, with the goal of a commercial facility in the future may be inclined to build a larger recording space perhaps in a garage or large basement. The acoustic design, equipment and furniture purchases, will be focussed on a future vision of what the commercial space will look like. On a higher budget, I would suggest that as much of the home studio design, acoustic treatments and equipment purchases as possible be made with the idea of being used in the future commercial space. Acoustic treatments suspended in a way that can be easily removed without damage. Equipment racks designed and wired with the commercial space in mind. All equipment purchases of the highest quality affordable. Maximize every dollar spent as if purchased for the future facility. On a smaller budget, again the focus will be on quality, not quantity. No engineer that works in a professional facility will tolerate lots of low quality gear. Basically get less of everything, but make sure it will be useable in a commercial studio. You can add additional gear as needed.
Example 4
In Example 4, the music producer needs a home studio design that will serve as a development space for new artists. Depending on the musical styles and space available, the producer will need a variety of quality musical gear that will be readily available should the inspiration strike.
With a high budget, acoustic isolation and a comfortable space is a premium. Musical instruments, drum machines, keyboards, sample libraries and everything creative will be at a the ready. A good multichannel interface that allows all instruments to be simultaneously connected without looking for cables or patching will keep the space simple and productive. With a lower budget, more focus will be made on virtual, rather than real instruments. The plug and play capabilities are necessary here to allow for quick creative inspiration. Just enough acoustic treatments to keep the demo material sounding solid.
Example 5
In Example 5, the Beat Writer will need a mobile writing environment. It will be better to spend the money on quality of gear rather than acoustic treatments and studio furniture. With a high budget, I would have custom cases built for all gear much like a DJ setup. The road case will serve as the table from which the artist will work. High quality headphones are a must. When a studio gig arises, the setup can be unplugged quickly, case lid placed on, and out the door in 5 minutes. Maximize the quality and flexibility of all equipment purchases to suit the programming style of the beat writer. With a lower budget, money will be saved by using gig bags or a standard case. Spend the most money on the primary programming interface and less on peripheral items that are secondary to the work. Although this will involve more breakdown and setup time for gigs, custom cases and accessories can easily be added later as funds become available. In either case, the home studio design will be simple and focused on mobility.
Each scenario will vary greatly based on the person's technical abilities. The key for each home studio design is to maximize creative time over technical time. I have purposefully stayed away from specific equipment recommendations in this article because those choices are too dependent on the individual using the studio. Some can handle complex gear without issue, some need a plug and play setup that's simple and effective. By and large, my recommendations lean toward the most ergonomic and simple setup. possible. The more complex a setup, the more likely you are to be disrupted by technical issues. Simpler is always better.
The Professional Music Production Studio
The music production studio is where the rubber hits the road in terms of music production. All of your skills come to the fore because this is the place where all of your ideas and visions of a music production will be realized.
Traditionally, recording studios were only available to signed recording artists. Record companies owned and controlled all the recording studios. Even as independent studios became a force in the music industry during the 60's and 70's, they were generally too expensive for the unsigned artist. Thankfully, today's recording artist does not need the help of a record company to create their own music productions. The iron grip control once held by the major labels, through ownership of the manufacturing and distribution of Vinyl and CDs, has largely disappeared. The evolution of the internet and widespread piracy through downloads has completely changed the scope of the recording industry and the music production studio. This reality has been least kind to big recording studios. If record company budgets are lower due to lower profit margins, so too are the recording studio budgets. This has led to the closing of many state of the art commercial recording studios. Smaller studios have fared a bit better due to their ability to accommodate those lower budgets. Additionally, unsigned artists also have access to affordable recording studio time.
The Modern Music Production Studio
What this means is that the commercial recording studio industry has had to adapt its business model to account for these changes. Professional recording equipment that was once too pricy even for established music producers has become affordable to the average musician. Computer music production has replaced recording consoles and tape machines that once cost studios hundreds of thousands of dollars. Although lower equipment costs have lessened the overhead of the commercial recording studios. It has also opened the floodgates for anyone to own and operate a recording facility. The result is a lot of competition. So what separates a quality music production facility from the crappy one?
Let's start by separating music productions studios into two basic categories:
• Commercial recording studios
• Home recording studios
It is a commonly held belief that commercial recording studios are always better. In my experience, that is not always the case. I have worked in many state of the art home recording studios. And I have also worked in many small, low budget, poorly built commercial recording studios.
Very simply, it's all about who owns and uses the studio. Commercial recording studios are typically designed to appeal to anyone and everyone who needs a recording space. Home studios are typically designed for the specific needs of the owner. What type of facility is best for your music production goals and needs ? The articles contained in the following links will cover what you need to know about professional recording studios. To learn more about home recording studios, click HERE to discover how to use professional design principles to get the most out of your home recording studio.
The Pro Studio Model
So what separates the pro studio from the home studio? In my article The Music Production Studio, I divided studios into two main categories, commercial and home studios.
Home studios are designed and built for the use of a specific person or group of people. Each detail is specifically crafted for the way that artist, producer or engineer works. Some commercial studios are designed for private use with staff engineers, producers and songwriters. Studios that specialize in TV and radio ads can fall into this category. The commercial studio, by comparison, is designed for artists, producers and engineers who have very different ways of working. In order to draw clients, a commercial studio design must offer some flexibility in the way the studio can be used. This way clients with differing music production methods can all be accommodated.
The Pro Studio, Designed With a Purpose.
Most pro studios are designed to accommodate a particular style or styles of music. For example, a jazz studio would invest more money into creating a natural sounding acoustic recording space. The reason is that a majority of recorded performances are live acoustic recordings with a minimum of overdubs. Depending on the size of the space, classical recordings may also be served well in this studio. By contrast a hip hop studio would typically have a smaller live recording space because most of the music is programmed and sequenced in a computer. The control room will be designed to accommodate more people and the equipment necessary to handle that type of work. The live room, by comparison, would be smaller, and primarily used for recording vocals and instrument overdubs. A commercial studio can also specialize in certain types of work and draw clients in by providing quality for that specific task. For example, a studio may focus all of their efforts into building great control rooms for mixing. By supplying a good selection of pro audio gear, well designed and acoustically treated control rooms and good quality monitoring systems. Producers and engineers will be drawn to rooms that give them the resources they need to make great mixes.
Another common business model for commercial studios is to offer all the facilities needed for an entire music production project. A large recording room, small overdub room, a programming and editing suite and a mix room. The idea of this model is to accommodate a client through all of the phases of a project. See my article on the Production Process to learn more about how projects are organized.
Commercial studio facilities can be further broken down into 3 additional categories.
1. State of the Art Studios
2. Mid-level studios
3. Small studios
Each one accommodates a particular client base regardless of the style of music. Let's take a look at each, starting with the State of the Art studio.
State of the Art Studio
The state of the art studio is built with two basic concepts in mind. Comfort and quality. A pro studio of this design will accommodate high quality clients that are looking for a recording space that befits their stature in the music industry. State of the art studios do not skimp on details. The quality of every aspect of the studio design is considered. Here are a few of those qualities
1. Highest quality Acoustic design
2. Great microphone selection
3. Extensive array of pro audio gear
4. High end monitoring systems
5. Large private lounge area
6. Attractive aesthetic
State of the art recording facilities offer the best of the best to their clients. Having had the luxury of spending many years recording, mixing and building these facilities, it is easy to get spoiled when you are stuck in a lessor studio. While many of these facilities have closed with the decline of the major record label budgets, the ones that remain are a testament to how pro studios should be built.
The Mid-Level Commercial Studio
The mid-level pro studio is designed to accommodate second tier clients who don't maintain the success and budget of the elite in the music industry. These studios are often better equipped than the state of the art studios but do not have the same look and feel. So what do you find in a mid-level studio?
Here is a short list:
1. Good to fair quality acoustic design
2. Good to great Microphone selection
3. Good to great selection of pro audio gear
4. Mid to high end monitoring systems
5. Small or semi-private lounge
6. Less attractive aesthetic
Occasionally, studios in this realm have questionable acoustic design issues. Proper acoustic design can be the most expensive part of a properly designed studio. To save money and cut corners, these compromises can sometimes lead to unexpected results when you leave the studio thinking you have a great recording or mix.
The Small Commercial Studio
The small commercial studio is typically, though not always, a private facility that accommodates clients who are working on a consistent basis. A small studio often appeal to producers who are developing new artists and working on a limited budget. Small commercial studios often require unique business models to stay open. These models vary from studio to studio. Many of these studios are partnership deals between two or more producers where the expenses and studio time are divided between the members. Members usually gather resources, audio gear, microphones and combine their skills to design and build the studio. Each member is responsible for covering their share of the expenses and each earns their own profit for everything above. Yet another small commercial studio model involves a single owner that rents small recording spaces on a monthly basis to producers. The rooms can be equipped or empty depending on the studio setup. When equipped, this gives a producer the advantage of a workspace without the expense of purchasing the equipment themselves. In house production facilities maintain office space for music production companies, managers and small record labels. Small studios are built and made available to these small companies to develop talent and produce demos. Depending on how well equipped these facilities are, even complete professional productions can be created for commercial sale or promotional purposes.
Other Types of Pro Studios
Commercial studio facilities cover a large variety of uses other than music. The whole post production studio world covers the vast needs of audio for video production. This includes everything from voice overs, sound effects and Foley work to music. Every movie, TV show and commercial ad requires a studio for the recording, editing, processing and mixing of the audio that is part of the final product. Pro studios come in an infinite number of shapes, sizes and purposes. Whether you are booking or building a studio, you must understand what the design and purpose of the studio is before you start spending money. In the links that follow, I will discuss, with more exacting detail, studio design, equipment and how quality pro studios are built.
Denis van der Velde
AAMS Auto Audio Mastering System
www.curioza.com
Speakers
Speakers
Everyone wants great, high-quality sound from their audio system.
Usually people want a sound that fills the room and has a deep bass, a clear treble, and a rich middle range.
The sound quality should not deteriorate when you crank up the volume.
And you certainly don’t want insane vibrations, static hiss, or smoke to come out of the speakers!
In your quest for quality sound, speaker watts are one figure to understand and consider.
Other important values are the speakers’ sensitivity and total harmonic distortion (THD).
This article will help you interpret the manufacturer’s specifications to understand what a sound system will deliver.
Loudness and Power Explained
Decibels are a measure of loudness.
This number is important when choosing speakers, especially if you like to listen at a high volume.
For every 10 decibel increase, the noise is twice as loud, so small increases in decibel levels mean big impact on your ears.
A watt is a measure of electrical power.
As an amplifier processes sound, the output is measured in watts.
All speakers have a maximum number of watts that they can cope with and the manufacturer will tell you what this is.
Make sure that the amp you use does not put out more power than your speakers can handle, or the speakers could be damaged.
Manufacturers provide two power figures for both amplifiers and loudspeakers :
Amplifiers RMS = the power an amplifier can put out over a long period
Amplifiers Peak = the power an amplifier can put out in short bursts.
Speakers Nominal Power = what a speaker can handle long term without being damaged
Speakers Peak Power = what a speaker can handle in short bursts without being damaged
Very good speakers are more sensitive than mid-quality speakers and can deliver a lot of sound with only a little power from the amplifier.
Mid-priced speakers need more power to provide the same volume.
Speaker sensitivity is expressed in terms of the number of decibels (dB) of sound pressure level (SPL) per watt of amplifier power measured at one meter from the speaker.
To simplify this, manufacturers usually drop the SPL/W/M and just say dB.
Most speaker sensitivities are in the 85 to 91 dB range, so anything less than 85dB is not so hot.
Translate Watts to Decibels
Watts Decibels
2 93
4 96
8 99
16 102
32 105
64 108
128 111
256 114
512 117
1,024 120
Total Harmonic Distortion
TDH is a measure of how faithfully speakers translate what is on a disc or hard drive into sound.
The lower the figure, the less distortion, so lower numbers are better.
Usually values between 0.05% and 0.08% THD mean a quality "clean" system, but any figure below 0.1% THD is pretty good.
Speaker Impedance
This number tells you how much current a speaker will draw.
Eight ohms is standard. Four ohms is very good but usually a lot more expensive.
If you are buying four-ohms speakers you will need a very good amplifier to get the most out of them.
Headroom
This figure is a measure of what a system can deliver in short bursts.
A large headroom figure is important if you have a home cinema system and want to get a jolt from the explosions in action movies.
Audio Formats
Audio Formats
The list below showcases audio formats that are able to encode audio and compress it in a lossless way ensuring your music is perfectly preserved in digital form.
WAV (WAVeform Audio Format)
The main format for AAMS is WAV format audio files, basically internally AAMS is build with it´s 16 bit 32 Bit audio drivers and 64 Bit internal processing, so WAV format is very compatible.
And musically 16 bit wav is great for normal audio and will achive good sound, the 32 bit wav floating point is really exact and is the main format for more demanding users.
For audio files to be written in a lossless fashion, wav is a good choise, wav can handle also different types of samplerates, like 44.1 Khz or higher.
The WAV format isn't thought of as the ideal choice when choosing a digital audio system for preserving your audio CDs, but still remains a lossless option. However, the files produced will be larger than the other formats in this article because there isn't any compression involved. That said, if storage space isn't an issue then the WAV format has some clear advantages. It has widespread support with both hardware and software. Much lower CPU processing time is required when converting to other formats because WAV files are already uncompressed -- they don't need to be uncompressed before conversion. You can also directly manipulating WAV files (using audio editing software for instance) without having to wait for a de-compression/re-compression cycle in order to update your changes. Short for WAVeform Audio Format, it is normally used in an uncompressed format on the Microsoft Windows platform. This raw audio format, which was developed jointly by IBM and Microsoft, stores audio data in blocks. On the digital music scene, its usefulness has diminished over time with the development of better lossless audio formats, such as FLAC and Apple lossless. It is a standard that will probably be used for some time yet due to its widespread use in professional music recording and is still a very popular format for audio/video applications. The file extension associated with WAV is: .WAV
FLAC (Free Lossless Audio Codec)
The FLAC format (short for Free Lossless Audio Codec) is probably the most popular lossless encoding system which is becoming more widely supported on hardware devices such as MP3 players, smartphones, tablets, and home entertainment systems. It is developed by the non-profit Xiph.Org Foundation and is also open source. Music stored in this format is typically reduced between 30 to 50% of its original size. Common routes to rip audio CDs to FLAC include software media players (like Winamp for Windows) or dedicated utilities Max for example is a good one for Mac OS X.
ALAC (Apple Lossless Audio Codec)
Apple initially developed their ALAC format as a proprietary project, but since 2011 has made it open source. Audio is encoded using a lossless algorithm which is stored in an MP4 container. Incidentally, ALAC files have the same .m4a file extension as AAC, so this naming convention can lead to confusion. ALAC isn't as popular as FLAC, but could be the ideal choice if your preferred software media player is iTunes and you use Apple hardware such as the iPhone, iPod, iPad, etc.
Monkey's Audio
The Monkey's Audio format isn't as well supported as other competing lossless systems such as FLAC and ALAC, but on average has better compression resulting in smaller file sizes. It isn't an open source project, but is still free to use. Files that are encoded in the Monkey's Audio format have the humorous .ape extension! Methods used to rip CDs to Ape files include: downloading the Windows program from the official Monkey's Audio website, or using standalone CD ripping software that outputs to this format. Even though most software media players don't have out-of-the-box support for playing files in the Monkey's Audio format, there is a good selection of plug-ins now available for: Windows Media Player, Foobar2000, Winamp, Media Player Classic, and others. More »
WMA Lossless (Windows Media Audio Lossless) WMA Lossless which is developed by Microsoft is a propriety format that can be used to rip your original music CDs without any loss of audio definition. Depending on various factors, a typical audio CD will be compressed between 206 - 411 MB using a spread of bit rates in the range of 470 - 940 kbps. The resultant file that is produced confusingly has the .WMA extension which is identical to files that are also in the standard (lossy) WMA format. WMA Lossless is probably the least well supported of the formats in this toplist, but could still be the one you choose especially if you use Windows Media Player and have a hardware device that supports it such as a Windows phone for example.
Uncompressed Formats
WAV and AIFF: Both WAV and AIFF are uncompressed formats, which means they are exact copies of the original source audio. The two formats are essentially the same quality; they just store the data a bit differently. AIFF is made by Apple, so you may see it a bit more often in Apple products, but WAV is pretty much universal. However, since they're uncompressed, they take up a lot of unnecessary space. Unless you're editing the audio, you don't need to store the audio in these formats.
Lossless Formats
FLAC: The Free Lossless Audio Codec (FLAC) is the most popular lossless format, making it a good choice if you want to store your music in lossless. Unlike WAV and AIFF, it's been compressed, so it takes up a lot less space. However, it's still a lossless format, which means the audio quality is still the same as the original source, so it's much better for listening than WAV and AIFF. It's also free and open source, which is handy if you're into that sort of thing.
Apple Lossless: Also known as ALAC, Apple Lossless is similar to FLAC. It's a compressed lossless file, although it's made by Apple. Its compression isn't quite as efficient as FLAC, so your files may be a bit bigger, but it's fully supported by iTunes and iOS (while FLAC is not). Thus, you'd want to use this if you use iTunes and iOS as your primary music listening software.
Lossy Formats
APE: APE is a very highly compressed lossless file, meaning you'll get the most space savings. Its audio quality is the same as FLAC, ALAC, and other lossless files, but it isn't compatible with nearly as many players. They also work your processor harder to decode, since they're so highly compressed. Generally, I wouldn't recommend using this unless you're very starved for space and have a player that supports it.
For regular listening, it's more likely that you'll be using a lossy format. They save a ton of space, leaving you with more room for songs on your portable player, and—if they're high enough bitrate—they'll be indistinguishable from the original source. Here are the formats you'll probably run into:
MP3: MPEG Audio Layer III, or MP3 for short, is the most common lossy format around. So much so that it's become synonymous with downloaded music. MP3 isn't the most efficient format of them all, but its definitely the most well-supported, making it our #1 choice for lossy audio. You really can't go wrong with MP3.
AAC: Advanced Audio Coding, also known as AAC, is similar to MP3, although it's a bit more efficient. That means that you can have files that take up less space, but with the same sound quality as MP3. And, with Apple's iTunes making AAC so popular, it's almost as widely compatible with MP3. I've only ever had one device that couldn't play AACs properly, and that was a few years ago, so it's pretty hard to go wrong with AAC either.
Ogg Vorbis: The Vorbis format, often known as Ogg Vorbis due to its use of the Ogg container, is a free and open source alternative to MP3 and AAC. Its main draw is that it isn't restricted by patents, but that doesn't affect you as a user—in fact, despite its open nature and similar quality, it's much less popular than MP3 and AAC, meaning fewer players are going to support it. As such, we don't really recommend it unless you feel very strongly about open source.
WMA: Windows Media Audio is Microsoft's own proprietary format, similar to MP3 or AAC. It doesn't really offer any advantages over the other formats, and it's also not as well supported. There's very little reason to rip your CDs into this format.
Alfabetical Order
3gp = multimedia container format can contain proprietary formats as AMR, AMR-WB or AMR-WB+, but also some open formats.
act = ACT is a lossy ADPCM 8 kbit/s compressed audio format recorded by most Chinese MP3 and MP4 players with a recording function, and voice recorders.
aiff = Apple standard audio file format used by Apple. It could be considered the Apple equivalent of wav.
aac the Advanced Audio Coding format is based on the MPEG-2 and MPEG-4 standards. Are usually ADTS or ADIF containers amr AMR-NB audio, used primarily for speech.
au = Sun Microsystems the standard audio file format used by Sun, Unix and Java. The audio in au files can be PCM or compressed with the µ-law, a-law or G729 codecs.
awb = AMR-WB audio, used primarily for speech, same as the ITU-T's G.722.2 specification.
dct = NCH Software. A variable codec format designed for dictation. It has dictation header information and can be encrypted (as may be required by medical confidentiality laws). A proprietary format of NCH Software.
dss = Olympus. Files are an Olympus proprietary format. It is a fairly old and poor codec. Gsm or mp3 are generally preferred where the recorder allows. It allows additional data to be held in the file header.
dvf = A Sony proprietary format for compressed voice files; commonly used by Sony dictation recorders.
flac = File format for the Free Lossless Audio Codec, a lossless compression codec.
gsm = Designed for telephony use in Europe. Is a very practical format for telephone quality voice. It makes a good compromise between file size and quality. Note that wav files can also be encoded with the gsm codec.
iklax = An iKlax Media proprietary format, the iKlax format is a multi-track digital audio format allowing various actions on musical data, for instance on mixing and volumes arrangements.
ivs = 3D Solar UK Ltd. A proprietary version with Digital Rights Management developed by 3D Solar UK Ltd for use in music downloaded from their Tronme Music Store and interactive music and video player.
m4a = An audio only MPEG4 file. Used by Apple for unprotected music downloaded from their iTunes Music Store. Audio within the m4a file is typically encoded with AAC, although lossless ALAC may also be used.
m4p = Apple. A version of AAC with proprietary Digital Rights Management developed by Apple for use in music downloaded from their iTunes Music Store.
mmf = Samsung. a Samsung audio format that is used in ringtones.
mp3 = MPEG Layer III Audio. Is the most common sound file format used today.
mpc = Musepack or MPC. Formerly known as MPEGplus, MPEG+ or MP+. Is an open source lossy audio codec, specifically optimized for transparent compression of stereo audio at bitrates of 160–180 kbits.
msv = Sony. A Sony proprietary format for Memory Stick compressed voice files.
ogg / oga = Xiph.Org Foundation. A free, open source container format supporting a variety of formats, the most popular of which is the audio format Vorbis. Vorbis offers compression similar to MP3 but is less popular.
opus = Internet Engineering Task Force. A lossy audio compression format developed by the Internet Engineering Task Force (IETF) and made especially suitable for interactive real-time applications over the Internet. As an open format standardised through RFC 6716, a reference implementation is provided under the 3-clause BSD license.
ra/rm = RealNetworks. A RealAudio format designed for streaming audio over the Internet. The ra format allows files to be stored in a self contained fashion on a computer, with all of the audio data contained inside the file itself.
raw = a raw file can contain audio in any format but is usually used with PCM audio data. It is rarely used except for technical tests.
sln = S Linear format used by Asterisk.
tta = The True Audio, real-time lossless audio codec.
vox = The vox format most commonly uses the Dialogic ADPCM (Adaptive Differential Pulse Code Modulation) codec. Similar to other ADPCM formats, it compresses to 4-bits. Vox format files are similar to wave files except that the vox files contain no information about the file itself so the codec sample rate and number of channels must first be specified in order to play a vox file.
wav = Standard audio file container format used mainly in Windows PCs. Commonly used for storing uncompressed (PCM), CD-quality sound files, which means that they can be large in size—around 10 MB per minute. Wave files can also contain data encoded with a variety of (lossy) codecs to reduce the file size (for example the GSM or MP3 formats). Wav files use a RIFF structure.
wma = Microsoft. Windows Media Audio format, created by Microsoft. Designed with Digital Rights Management (DRM) abilities for copy protection.
wv = Format for wavpack file.


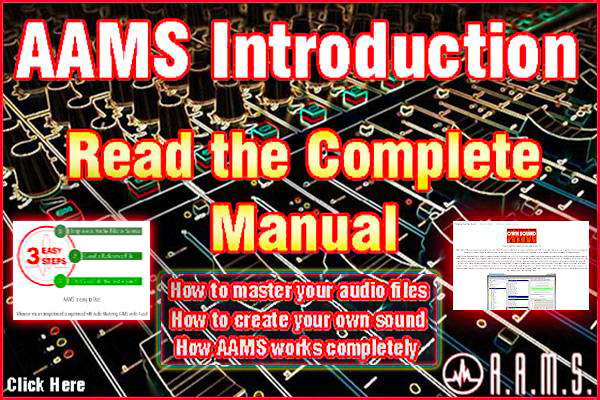
The users that do want their music mixed or mastered by Aplus Audio Mastering Services should consider to use AAMS first. When you are in need of Aplus Audio Mastering Services by our Professionals, you can read about our excellent audio mixing and mastering services further here.
Aplus Audio Mastering Services
Welcome to APlus Audio Mastering Services!
High quality audio mastering services with low prices.
The users that do want their music mixed or mastered with more needs then the AAMS program supplies directly, or users that want their mastering done by a human ear or just want more equipment or mastering tricks to be used, can visit our mastering services. But also be sure to rty out AAMS V3 first and only when your needs are not met, maybe consider your masterings to be done with the human factor in place, and you can supply us with the information about you want your sound to be like. You can consider mastering your audio by Aplus! When you are in need of Aplus Audio Mastering Services by our Professionals, you can read about our excellent audio mixing and mastering services further here.
AAMS Auto Audio Mastering System For windows users we provide AAMS complete audio mastering software package for Audio Mastering, free of use. Process your Mix to a commercial great sounding Master.
AAMS Auto Audio Mastering System
For windows users we provide AAMS complete audio mastering software package for Audio Mastering, free of use. Process your Mix to a commercial great sounding Master. With AAMS you get a clean transfer of your mix to a good sounding master. AAMS will do this lifting up the mix, but trying to preserve the same sound. Therefore when your mix has a particular sound, AAMS will not hurt it but will only try to compare source and reference and apply that with mastering techniques available. That is great for most users who do their own mixing and creating the sound is mostly done at the mixing stage. AAMS improves the mix towards quality commercial levels for al kinds of musical styles.
Audio Mastering
Mastering is audio post production, is the process of preparing and transferring recorded audio containing the final mix towards a data storage device the master. From which all copies will be produced via methods such as pressing, duplication or replication. Mastering is a crucial gateway between production and consumption and. It involves technical knowledge as well as specific aesthetics.Results still depend upon the accuracy of speaker monitors and the listening environment. Mastering engineers may also need to apply corrective equalization and dynamic compression in order to optimise sound translation on all playback systems. It is standard practice to make a copy of a master recording, known as a safety copy, in case the master is lost, damaged or stolen.
Welcome to APlus Audio Mastering Services!
High quality audio mastering services with low prices.
We maximize your audio material to clear crisp audio mastered versions. Giving detail, clarity, definition, warm low end punch, stereo depth and prisitine sound using Analog and Digital equipment. Audio Mastering is most important part of the audio chain and we give your sound high definition and clarity. Every single track and every song of your album collection wil sound complete next to each other, with taking care from start to end. Ready for distribution and radio. That is what Aplus Audio Mastering Services stands for, excellence! Your audio material or mixes will become an adequate to commercial radio, CD or MP4/MP3 streaming services, just to fit in correctly. We do not attend the Loudness War, you need appropiate levels and professional quality!
Aplus Mastering will make single tracks or songs stand out in excellence.
Aplus Mastering will make your whole Album Sound perfect and give it togetherness.
Aplus Mastering will create a professional sound for all of you.
We make your music shine!

Supply us with your audio material, mixed down to stereo in one of the formats below.
We prefer to accept the following formats:
![]()
![]()
![]()
![]()
![]()
![]()
- Uncompressed Audio : Wav, Aiff.
- Lossless Audio : MP4, Flac, WAVpack, Monkey Audio, ALAC, etc.
- Lossy Audio : MP3, AAC, WMA (> 192 Kbps).
Sending or submit your mixes to Aplus Mastering over the Internet or post, from yours to us and get it back in no time.
Upload your final mix with our easy to use upload system.
Goto the 'Shop' and decide what option you need :
- For single audio track mastering, choose Single Track.
- For multiple tracks that need mastered as single tracks, choose Multiple Tracks.
- Finally when you have multiple tracks that need to be sounding as an album, choose Full Album.
Instructions will follow afther you have chosen.
On your own User Account page, you can sign up for your account. Or go directly to our Shop and chose. Then Upload your songs / tracks with our easy webbased upload system. We will send you back a mastered sample of your song, if you do not pay upfront. When you have paid and accept the our high quality masterings when we are finished with your content, we will send you an email and place all mastered song / tracks on your personal w web account. And you can download the finished product from your own user directory!

Before you send off all your Stereo Mixes to Aplus Mastering Engineers to get Mastered, Check the Mix!
There are a number of audio mixing and editting tips that will help you prepare your mixes before submitting to Aplus Audio Mastering studio.
It is important to know how to prepare your mix, so you can get the best sound for your songs!
When quality is at stake, be sure to read this page and spend some time to get your mixes right.

Audio mastering is a process that stands far from mixing, it is the next stage afther mixing and it is the final stage for sound quality. Actually while mixing we do not attend the loudness much, we mix. What everybody is thinking of 'How to get our mix sound loud'! That is what Aplus Audio Mastering stands for, most likely preferred that your mix will become an adequate to commercial radio, CD or MP3 streaming levels, just to fit in correctly. We do not attend the Loudness War, but we need appropiate levels and professional quality. Also when Mastering a Full Album, Aplus Mastering will make the whole Album Sound as an Album. We name it 'the album sound'. So Aplus Mastering can do single tracks as well as full albums, and create a good quality professional sound for you. But however, mixing is an important stage before Aplus Mastering can be done. So we ask you to attend some time and thought before sending your mixes to Aplus Mastering Engineers.

Check, Check, Double Check!
0. You should do these mix check steps before you plan to hand your project to our Aplus Mastering Engineer.
1. Eliminate any noise or pops that may be in each single track. Apply fades or cuts or mutes to spots containing recorded noise, pops or clicks.
2. Keep Your Mix Clean And Dynamic. Unless there is a specific sound you need, do not put compressing or processing on the master out of the mixing bus. It is best to keep the master buss free of outboard processing or plugins. Dont add any processing to the overall mix, just to individual channels.There should never be a limiter or loudness maximiser set on the master out mix bus!
3. The loudest part in a mix should peak at no more that -3db on the master bus, leaving headroom. It does not matter How Loud your mix sounds at this time, mixing means mixing.
4. Does your mix Work In Mono? As a final reality check, switch the master buss output to mono and make sure that there is no weakening or thinning out of the sound. In any event, do not forget to switch the bussing back to stereo afther this check.
5. Only when a mix is completed and finished off, and your are happy with the overall mixing sound and quality, then the next fase is Aplus Mastering to do their work.
6. Normalising a track is not necessarily a good idea.
7. Dont add any fades or crossfades, anywhere. Dont fade beginning or end.
8. Do not dither individual mixes.
9. You can output the mix on a stereo track before sending to Aplus Mastering, save your mix in Stereo. Use a lossless format! Using digital equipment Wav 32Bit Float Stereo is a good output format.
10. Do not try to output your mix to a mp3 file, this can mean loss of information! If you do want to send in MP3 files, be sure they are of quality, prefer a bitrate higher than > 192kbps, 320kbps is quite good.
11. Export your mix out of your sequencer or audio setup in a correct and quality unharming format;
12. Finally, always back up your original mixed files! If the song is later remastered for any reason for a re-release, a compilation or for use in any other context you will want a mix thats as easy to remaster as possible.
13. Submitting reference tracks or example songs alongside your mix submission that have a similar sound desired is for a good point of view how your music must sound. Giving Aplus Audio Mastering Engineers an idea of your musical vision. This could be a reference to bands who inspire you or have a similar sound that you like.
14. Put all your files of a single mix (the stereo file, reference songs, text documents or pictures or any file that you need to send) in one single directory.
15. Use a packing program like ZIP, RAR, 7z and pack all files in that directory to one single packed file. Name this file correctly, preferably the track number and name of the track.
16. Now you can send your mix files to Aplus Audio Mastering Services!

Mastering Stems
Mastering from stems is becoming little by little more common practice. This is where the mix is consolidated into a number of stereo stems subgroups to be submitted individually. Instead of submitting a Stereo output of your mix, you can send the mixing tracks seperately. For example you might have different tracks for Drums, Bass, Keys, Guitars, Vocal, and Background Vocals. This will give Aplus Mastering more control over the mix and master. If a master from stems is desired, following the same steps listed above is best for each stem. When submitting stems each file track must start at the beginning and must durate though the end, most mixing sequencers will output this way exactly to the sample. Each stem file should be exactly the same length.
We master all Musical Styles :
- Accoustic
- Amine
- Blues
- Commercials
- Classical Music
- Chrildrens Music
- Holiday, Christmass
- Conferences
- Country Music
- Disco
- Dubstep
- Easy Listening
- Electronic Music
- Fusion
- Folk Music
- Funk
- Gospel, Inspirational
- Hardrock
- Heavy Metal
- House, EDM, Electro, Trance, etc.
- Industrial
- Instrumental
- Karaoke
- Live Performances
- New Wave, New Age
- Rap
- Opera
- Pop Music
- Reggae
- R&B
- Rock
- Singer Songwriter
- Soundtrack
- Soul
- Latin, Spanish
- Trance Music
- TV Themes
- Vocal
- World Music
Preview is not available for this module