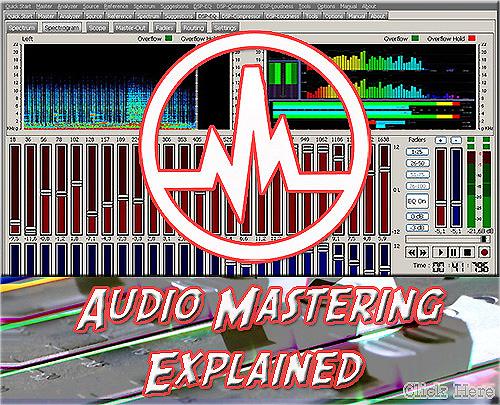

AAMS Auto Audio Mastering System V4
As a musician or technician working on music sound material, you need the best sound possible when releasing material to the public. How do you know when audio material is equalized, compressed and maximized correctly and plays loud and evenly on all audio systems when it has been mastered ? To master a mix in general takes a lot of time and the procedure is mostly done after the mix is polished enough to go through the mastering process. To make a master that sounds alike on all speaker systems and also sounds like a real professional commercial recording is a difficult and time consuming task.
This is were AAMS steps in and takes control!
AAMS is a Limited Freeware software package that provides suggestions for Equalizer, Multi-Band Compression and Loudness settings with internal DSP Processing to make all such audio corrections within the AAMS Program and creates a final mastered audio file. This makes the Audio Mastering Process easy and by far less time consuming and turns your mix into a great sounding commercial quality Audio Master.
Now you can listen to what you expect!
AAMS Auto Audio Mastering System is an all-in-one solution for mastering and a good learning tool for mixing and mastering audio in general. If you need a great sounding master with a minimum of effort, AAMS does automatically create a master out of your stereo mixes in minutes of time! With easy to learn automatic features the end result is a good sounding master fit for commercial release. AAMS V4 is a software program that inputs audio files, masters the audio file according to a reference style with its own processing tools and outputs the mastered audio file to disk. The easy part is that the user does not have to know about audio mastering but can master an audio file by just supplying a reference sound. With only a few button clicks, the user can master any audio file with AAMS!
The user interface is quite simple, once you understand the main functions of AAMS, it is allways very easy.
Your own music audio files are called ‘Source’. As Source Material, these files you will deliver and import to AAMS as your own made music / audio / stereo mixes, these files are placed into a directory. The AAMS V4 database of reference styles is supplied with AAMS software to give the user a great starting point for a good sound. But also the user can create their own sound with reference styles or by analyzing and combining reference files and re-use them for audio mastering projects. You can copy and create styles from other sources like other artists, bands or any other audio material that compares to the sound you need! With the source file and reference audio file selected and loaded, AAMS will process the mastering for you automaticly. Your mastered audio is processed to a stereo WAV file inside the same directory.

Use the Contact Form
For questions, reviews, registration requests or about music, mixing and mastering.
We put a lot of effort into programming testing and are allways developing AAMS V4.
AAMS V4 is freeware, you can download AAMS for free!
Support us by registering and having a AAMS V4Full Professional license.
Thank you!
AAMS Auto Audio Mastering System V4 is intended to assist musicians and sound technicians in creating the final version of their mixes, ready to be released to the public. The audio mastering process enables you to prepare a mix for being distributed by fixing distractions in tonality, volume, noises or distortion. A handy utility which supplies you with suggestions for equalizer or multiband compression, providing a useful audio mastering tool
Getting accustomed to the application doesn't require you to be a professional mastering engineer, although some basic knowledge and some time is required to find out what each function does. The interface is definitely note the best we've seen, but it provides one-click access to all the options. It takes some time to set up your own reference master and this is done by allowing the program to analyze sets of songs with characteristics similar to what you plan on obtaining. Practically, you can give all your mixes the feel of your best song. AAMS Auto Audio Mastering System aims to help you test the sound quality of your audio materials. It analyzes MP3 or WAV source files and then uses them as a reference system for further input sounds. Alternatively, you can use one of the many reference files that the application comes with. The collection includes reference systems for a wide range of genres, from classic music and ballads to disco, funk, electronic and rock. AAMS Auto Audio Mastering System enables you to view the waveform display and the spectrum graph of the loaded songs and provides suggestions for the equalizer, compression and volume settings. Also, it can be used for digital signal processing, applying the necessary corrections to your mix in order to make it sound great. Thus, you can adjust fading and get better results by using a multiband compressor or a parametric EQ, change the master balance, normalize WAV files and more.
AAMS Auto Audio Mastering System comes with a set of tools that can help you create your final audio or music, even if you don't know much about mastering. It allows you to correct obvious differences between songs and create a recording that can captivate the audience.
AAMS V4 Author
Denis van der Velde
Sined Supplies Inc.
www.curioza.com
Evaluate your Mix and Learn
AAMS is mainly a mastering tool, but the outcome (a mastered mix or track) can help you to listen and evaluate your mix better. This helps most users to understand their mix problems better and most users therefore can handle the mastering process better. You might go back to your mix and do single tracks adjustments and the re-evaluate again with AAMS. The main focus of AAMS is automatic and easy, but AAMS can be setup for Full Automatic Mastering for Single Files, as well as Albums or Collections. AAMS also can be setup for Semi-Automatic Mastering and Manual Mastering. So for every user there is a way to master with AAMS. AAMS offers endless possibilities for analyzing, mixing and mastering audio, all functions are included and made simple with ease in mind. For the amateur the Automatic features are easy as clicking a few buttons. For the more professional users AAMS can be a helpful learning and viewing tool. Previously mastered material can be re-analyzed, viewed, processed and re-processed.

Though the PDF manual has been updated, the website manual is updated even more!
Download AAMS V4 Manual in PDF
AAMS is easy to Use!
Whenever you are inexperienced or experienced with Audio Mastering, AAMS works 4 you!
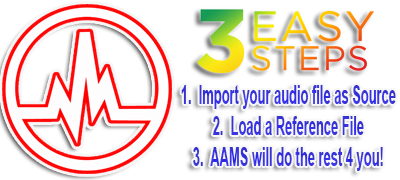
3 Easy steps! The most common way to use AAMS is with all options (by default set on installation) directed to Full Automatic Mastering.

Step 1:
You have your own Source audio material ready to import into AAMS (Pop Song). Load a Source File On the Quick Start Tab click the button 'Auto Master Audio File'. A pop-up window will ask for an Audio File (or *.aam or *.afd file). You can select an Audio file for import now (.aiff, .flac, .mp2, .mp3, .mp4, .m4a, .ogg, .voc, .vorbis, .w64, .wav, .waveaudio, .wavpcm, .wv.). This Audio file represents your own audio or music material you need to be mastered.
Step 2:
You have made a decision on what this source represents (as what style) and you can select @PopRMS.aam out of the database. Load a Reference File Then you will be asked to load a Reference *.aam file. The reference files are found in the AAMS Database of more than 200 Style Presets provided with the AAMS installation (AAMS will redirect you to this directory). The reference file you choose is important, because the reference will reflect the style your music will be mastered against. You can select a reference file out of AAMS Reference Database or create your own references.
For starters select a reference file from AAMS Database. If you are a beginner select ‘Mastering_RMS.aam’.
Step 3 :
You are then ready to start AAMS Mastering! Wait until AAMS is finished mastering! That is basically all you have to do, Load a Source Audio File and Load a Reference. The status bar below will show the progression status of AAMS Analysis, calculations and processing. Do not use AAMS until analyzing and processing is finished! After processing is complete, a Stereo file is mastered and written with the extension 'Master_wav' inside the same directory as your own source file is placed. Your audio master from is finished! Now go to that directory and double click the AAMS mastered file and listen.
That is all!
Now you can listen what you expect!
The most common way to use AAMS is with all options (by default set on installation)directed to Full Automatic Mastering (Single Files). Basically the mentioned 3 steps of Auto Mastering are the main use of AAMS, to make audio mastering easy for all users. For users who like more freedom when mastering, a mix of automatic and manual functions can help you get used to get the desired result. The rest of this manual will explain more professional and edit features of AAMS. How you can use AAMS to master and to have a better mix.
How to learn more about AAMS easy mastering ?
Most likely you will be using an audio sequencer or computer software to create, compose, mix, edit and make your own music. You can import or use any music track as source. As you are using a multitrack software sequencer, you must output your song or audio track to one stereo file (2 channels, 1 left and 1 Right), before mastering. Or you can have recordings you already have on your computer, just like MP3 or WAVE (WAV) files that you need to master. Anyway a finished track that is outputted as stereo will do. This is your Source Material. Inside the AAMS software the Source is always your own audio material that you have imported into AAMS. Let’s say you have your own Source material ready for AAMS Mastering. Let’s say this audio material refers to a standard pop song. Then your Source Pop Song needs to be mastered as a Pop Song Track. So you need a Reference Style out of AAMS Reference Database that represents Pop Songs! Lucky for you we have pre-made an AAMS Reference Style Database with 200 Styles that refers to all kinds of musical styles. And @Pop RMS.aam is one of those database files! So selecting @Pop RMS.aam as a reference against your own source material would be very wise.
Batch Audio Mastering
![]()
When you have an album or multiple audio files to be mastered in on single go (a batch), you can use the Master Batch Tab. Fill the Grid with Mastering Jobs(Items). This is called a Batch Job. Items are Audio Files or Sources that can be mastered against a Reference. For every track inside the album or audio file choose the right reference style. You choose the reference style according to the track of the album style (like explained above). Every track must have it's own reference.
Fill the Grid with Items (5 Steps)
1. Load File as Item (Import, Source Or AAMS Full Data). The Item will be shown above the Grid.

2. Add Item to the Mastering Grid List.
3. Repeat steps 1 and 2 until finished.
Or

4. Add Multiple Items to Mastering List, use this option if you use a single Reference File to Master multiple Source Items.
Start Mastering
5. Click 'Auto Audio Master - Batch All Items in Mastering List'. Then -> Wait until all Items are
finished!

You can see the Status of the mastered file in the Master Tab.
When all items are finished mastering, the batch job is done!
Tip for more coherence on a full album of tracks!
First you must have mastered every single track of the album with its own reference style (like explained above).
After you have done a full album mastering with batch mastering like described above, you can analyze all finished tracks with AAMS Analyzer.
What we want is an overall reference that consists of all tracks from the mastered individual tracks, the whole album sound from begin track to last track.
We analyze all tracks and batch then into one single reference. That will be the combined mastered sound of the album.
We are gonna use this reference (overall album sound) to correct the whole album sound (all tracks).
This will make the whole album sound more close together and more coherend.
Goto AAMS Analyzer Tab, select or goto the directory where all the mastered audio files of the album are, and choose select all mastered files from the album.
Select -> Analyze Batch Audio File Selection. This will batch all tracks selected and creates for eacht track an AAMS Analyzer file (source file).
![]()
Goto AAMS Sources Tab and then combine all newly analyzed files with - > Batch Selected Files into One Singel Source File

The result will be one source file that AAMS Analyzer saved by combining all mastered album tracks. Let's call and save this file as 'Album.aam'. This file 'Album.aam' can now be used as a reference file for the whole album sound! So we are gonna remaster all tracks again with this 'Album.aam' as the only reference. Now fill the batch mastering again with all mastered tracks from the album but this time only use 'Album.aam' as the reference for each track. That means all tracks will be for the second time mastered (remastered towards an whole album coherend sound). So we use Batch Audio Mastering again with the 'Album.aam' as the only reference.
![]()

Fill the Grid with Items (5 Steps)
1. Add Multiple Items to Mastering List => Select Referenceas explained above ('Album.aam').
Start Mastering
2. Click 'Auto Audio Master - Batch All Items in Mastering List'. Then -> Wait until all Items are finished!
Now you have a more coherend sound for you whole album for all album tracks!
This can be a big difference for listeners and gives a more completed feeling for the whole Album sound.
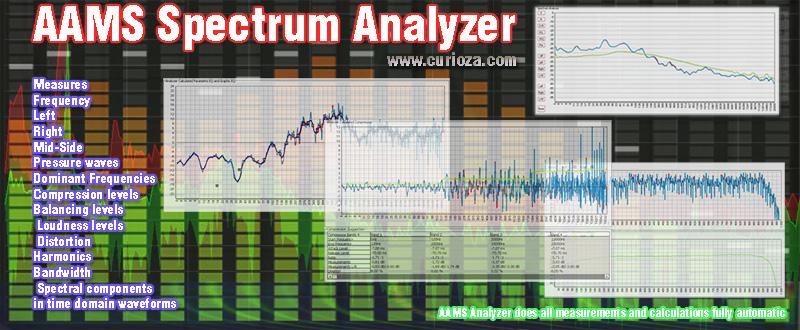
AAMS Spectrum analyzer measures the power magnitude of stereo input signals (left and right) versus frequency within the full frequency range. AAMS Analyzer measures also spectral compositions signals, mid side, long or short pressure waves, dominant frequencies, compression levels, balancing levels, loudness levels. By analyzing the whole spectra, dominant frequency, power, distortion, harmonics, bandwidth, and other spectral components, in time domain waveforms. AAMS Analyzer Parameters are very useful in the characterization whole audio files. To the casual observer this maybe all too much info, but AAMS Analyzer does all measurements and calculations fully automatic.
The Analyzer is the starting point for inputting and analyse audio files into AAMS file format to source or reference file (the file format for AAMS Analyzer is *.aam and is representing a source audio file or reference file. By default as audio has been Analyzed by AAMS, the *.aam file most likely has an audio file (source) with the same name next to it on the hard drive with allmost the same name. The main function of AAMS Analyzer is to convert the WAV file of Source or Reference material towards a file that AAMS understands as an analyzer file. Named *.aam. The build in Analyzer automatically analyzes audio data, calculates the differences between your music and selected musical styles (references) and shows you were the differences are. The Source and Reference spectrum function is the key element of AAMS.

AAMS can read / import the following Audio File Formats (not all are tested) : .aiff, .flac, .mp2, .mp3, .mp4, .m4a, .ogg, .voc, .vorbis, .w64, .wav, .waveaudio, .wavpcm, .wv.

How does AAMS use Audio Files?
AAMS can now import and read / write different audio formats. For users who are new, AAMS reads all common audio formats, with 2 channels (stereo), 16 / 24 / 34 and 64 bit and their sample rates. AAMS can read mono files with 1 channel, but these will be converted to 2 channels by import. The main functions of AAMS is to master you’re input audio file, analyze this audio file, read the audio file and write mastered and between versions of the audio file.
AAMS most important Audio File Formats
Uncompressed audio formats: such as WAV, AIFF, AU (PCM Based). Formats with lossless compression : such as FLAC, Monkey's Audio, WavPack , TTA, ATRAC Advanced Lossless, Apple Lossless, MP4, WMA Windows Media Audio Lossless. Formats with lossy compression : such as MP3, MP2, Ogg, Vorbis, Musepack, AAC, ATRAC and Windows Media Audio Lossy.
Source Analyzer files reflects mostly your own audio material you have imported into AAMS. Reference Analyzer files reflects mostly the style parameters as a result, AAMS will compare Source and Reference and the will calculate the suggestions. The suggestions are processed by AAMS automatically towards an end result Mastered Audio file.
AAMS Analyzer is responsible for many tasks that go in front of the audio mastering chain, as well as for in between setting an calculations done for the different processors (DSP-EQ,DSP-Compressor, DSPLoudness). The first and most important task is to analyze audio files. Spectrum behavior and frequency behavior as well as loudness is measured very accurately and calculated into suggestions. These suggestions or settings for the processors are done by comparing and calculations from source to reference and backwards. The AAMS Mastering system is based on pure calculations and suggestions, meaning source and reference are calculated to be the same. But in its basic function it is not a mere copy between them, but the needed differences that are measured and calculated into suggestions, presets and settings for further processing. So that the best results will count and be kept for audio mastering to be possible. The AAMS Analyzer is specially designed to investigate and search through the audio material and convert it to an AAMS Analyzer File. The time that it takes to analyze your Audio Material will vary depending on the length of the audio material and the processor speed of the computer. AAMS Analyzer is designed to produce the best audio mastering results so there are a lot of calculations taking place and your processor will be pushed. But it’s worth the wait for the very accurate analysis AAMS produces.

Analyzer File Directory
The directories listed are AAMS standard directories to find and place audio files within. You can select an Audio file for import now (.aiff, .flac, .mp2, .mp3, .mp4, .m4a, .ogg, .voc, .vorbis, .w64, .wav, .waveaudio, .wavpcm, .wv.). These Audio file represents your own audio or music material you need to be analyzed or mastered. The Source and Reference files can also be found in the standard AAMS file directory, as well as the complete Reference Database directory. It is possible to select multiple files (when needed) with holding Shift or CTRL keys. The drive list selects a hard drive, the directory list selects a directory and the file list selects file(s).
![]()
Analyze Single Audio File
The most common way to analyze audio files (your own audio that you need to import and have analyzed by AAMS Analyzer) is this function. A popup window will appear with the standard AAMS directory, asking for an audio file to be imported and analyzed. You can select an Audio file for import / analyzing (.aiff, .flac, .mp2, .mp3, .mp4, .m4a, .ogg, .voc, .vorbis, .w64, .wav, .waveaudio, .wavpcm, .wv.). The rest of processing will be done by AAMS Analyzer and father finishing, a popup Save window will appear asking to Save the just analyzed file. The extension for that file is *.aam. This saved Source file that has been analyzed from the audio file you imported, is important for the rest of processing internally inside AAMS.

Analyze Single Audio File and Load as Source
This function is the same function as Analyze Single Audio File, but after saving the source file is also directly loaded into AAMS as a source. A popup window will appear with the standard AAMS directory, asking for an audio file to be imported and analyzed. You can select an Audio file for import / analyzing (.aiff, .flac, .mp2, .mp3, .mp4, .m4a, .ogg, .voc, .vorbis, .w64, .wav, .waveaudio, .wavpcm, .wv.). The extension for that file is *.aam.

Analyze Single Audio File Selected
This function is the same function as Analyze Single Audio File, but it will use the file you have selected in the Files Window on the Left. You can select an Audio file for import / analyzing (.aiff, .flac, .mp2, .mp3, .mp4, .m4a, .ogg, .voc, .vorbis, .w64, .wav, .waveaudio, .wavpcm, .wv.). A popup window will appear with the standard AAMS directory, asking for an audio file to be imported and analyzed. The extension for that file is *.aam.

Analyze Batch Audio File Selection
This function is the same function as Analyze Single Audio File, but it will use the file(s) you have selected in the Files Window on the Left. You can now select multiple audio files from the Left Files Window, and they will be processed one by one, as a batch. You can select an Audio file for import / analyzing (.aiff, .flac, .mp2, .mp3, .mp4, .m4a, .ogg, .voc, .vorbis, .w64, .wav, .waveaudio, .wavpcm, .wv.). A popup window will appear with the standard AAMS directory, asking for an audio file to be imported and analyzed. The extension for the file(s) is *.aam. This function can be of importance when you analyze audio sources from other artists or bands, in combination with Source Batch or Reference Batch, this is a good way to create your own sound (read about creating your own sound).
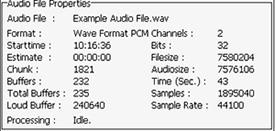
Audio File Properties
Audio File - The name of the audio file that has been processed by AAMS Analyzer
Format - Audio Format of processing
Channels - 2 Channel Audio (Stereo)
Bits - 32 Bits of Audio is loaded and processed into float format
Filesize - Size of the audio in bytes
Audiosize - Size of the audio in the file in bytes
Time (sec) - Audio playtime of the file in processing
Samples - Amount of samples of the file in processing
Sample Rate - 44.100 Hz (44100 Samples per second)
Starttime - The time analyzing started
Estimate - The time it will take analyzing to be finished (estimated)
Chunk - chunks of stereo audio into the analyzer
Buffers - Buffer count that has been processed
Total Buffers - The total amount of buffers of the audio file
loud Buffer - The maximum available amount of buffers
Load Full Data
This function is only needed when you have loaded a Source and Reference and Saved a Full Data File before. If reloads the Source and Reference directly into AAMS Analyzer. For containing and keeping Source and Reference together, can be handy to store alongside mastered files. See it as a backup system. The extension for the file(s) is *.afd.
Save Full Data
When you have loaded a Source file and a Reference file, this function will store both in a single backup file. The extension for the file(s) is *.afd. For containing and keeping Source and Reference together, can be handy to store alongside mastered files. See it as a backup system.
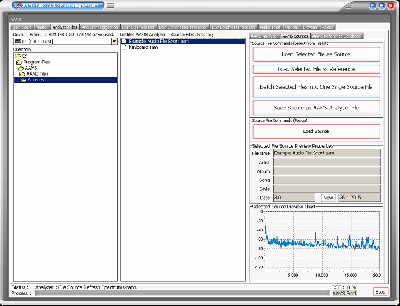
Source
Mostly the source is a track, a song, a single track of an album or any audio part. The Source is your inputted and (to be) analyzed audio file. This is the file you import into AAMS as Source Material. Your audio material needs to be imported into AAMS, therefore we have created AAMS Analyzer. The job of AAMS Analyzer is to import audio files and convert them to a format that AAMS can understand and calculate with. Importing audio is simple and mostly is done without any user intervention, automaticly.

Source File Directory
A Source file is an allready AAMS Analyzed file (read about AAMS Analyzer). The directories listed are AAMS standard directories to find and place audio files within. You can select a Source File for import now. The Source and Reference files can also be found in the standard AAMS file directory, as well as the complete Reference Database directory. It is possible to select multiple files (when needed) with holding Shift or CTRL keys. The drive list selects a hard drive, the directory list selects a directory and the file list selects file(s). You can load a Source file as well as a Reference file, but remeber the source file is for your own audio representation inside AAMS, the reference file is the representation of the targeted master (to be mastered against).

Load Selected File as Source
Load the selected file in the window left into AAMS Analyzer as Source. You can load a Source file as well as a Reference file, but remeber the source file is for your own audio representation inside AAMS, the reference file is the representation of the targeted master (to be mastered against). So it's best to load a Source file here.

Load Selected File as Reference
Load the selected file in the window left into AAMS Analyzer as Reference. You can load a Source file as well as a Reference file, but remeber the source file is for your own audio representation inside AAMS, the reference file is the representation of the targeted master (to be mastered against). So it's best to load a Reference file here.
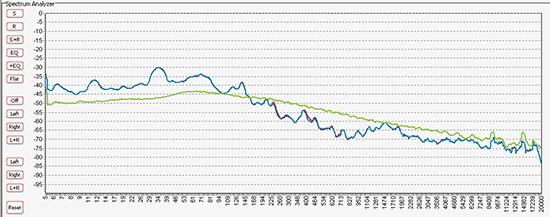
Source and Reference file are Loaded (AAMS Suggestions)
When a Source file and a Reference File are loaded, AAMS will directly calculatie Suggestions by comparing source and reference, to calculate between them the best settings for processing the source file in a mastered audio file. You can load Source and Reference data at any time and AAMS will recalculate its suggestions instantly. The suggestions are displayed on the Suggestion Tab in Charts and Text, so that you can also use any hardware outboard equipment and software plugins that you already own. Also for the visual aspect Charts and Graphs are created to make the user understand more and learn, even adjusting the Reference or the DSP-EQ Suggestion is possible. Based on the Analyzer results AAMS presents suggested Mastering, Equalizer, Compressor and Loudness settings. AAMS uses these suggested calculations for further processing towards the end result, a fully automatic mastering chain. These can be reviewed and edited by the user in many ways. All you need to master your mix to a perfect result. Simply spending the time to listen and understand AAMS suggestions can help you to improve your mixing and mastering. The suggestions based on Analyzer results are displayed here. Each time the state of the AAMS program changes due loading a file or user changes, AAMS will recalculate. The outcome of these calculations will display on the Suggestion Tab and related pages. AAMS does calculated suggestions on basis of the loaded Source compared to the Loaded Reference. Therefore if we can adjust the reference we can adjust the outcome (or have influence) on the source results. If quite often happens that AAMS is almost correct, but maybe the Vocals just are mixed a little bit high (harder) then the mix itself. Mostly it is better to fix the mix, by adjusting the mix. But when this cannot be undone or done, you can now correct the Spectrum of the Reference that has been loaded and save edited reference as a new reference for later use. Later on we will address the same procedure on adjusting the DSP-EQ that will work just about the same way. But however adjusting the Spectrum Reference might be a better more compatible way.

Batch Selected Files info One Single Source File
This function will batch all selected files in one single source file. This function can be of importance when you have allready analyzed audio sources from other artists or bands, in combination with Source Batch or Reference Batch, this is a good way to create your own sound (read about creating your own sound). It will use the source file(s) you have selected in the Files Window on the Left. You can now select multiple source files from the Left Files Window, and they will be processed one by one, as a batch. A popup window will appear with the all the files listed, press OK. Then the standard AAMS directory will popup and asks you to save the batch as one single source file. The extension for the file(s) is *.aam.

Save Source as AAMS Analyzer File
The loaded source file stored into AAMS Analyzer can be Saved to disk. This can be a handy feature when you have changed or edited the source file in AAMS Analyzer.

Load Source
Loads a Source file into AAMS Analyzer, you are prompted by a popup window to import a source into memory. It is best to really choose a Source file here, but as the format of a source or reference is the same, you could load a reference file instead.
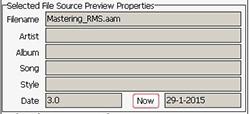
Source Properties
Shows Filename, Artist, Album, Song, Style and Date of the Source file. The text of these properties can be editted and saved, goto the tab Analyzer Suggestion - Frequency Spectrum - Source or Reference File (Tabs).
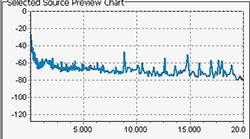
Source Chart
A preview of the file source spectrum will be shown here.
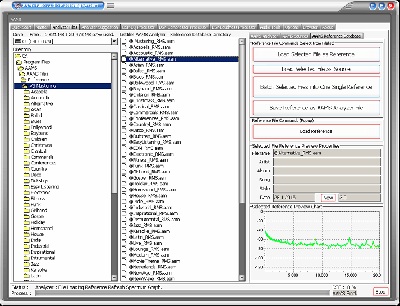
References
The references in the database of AAMS are specially crafted to match a source file with a reference database file and master your material accordingly and automatically. You can also generate a new reference style from scratch with AAMS. The reference is an comparison style or sound, prefered settings that were analyzed, combined or adjusted to have a good sound or at least a comparison sound. Reference Material is mostly the AAMS Database with Styles. You can choose a preset reference file out of the Reference Database. AAMS will redirect you to the directory were all reference files are placed. Choose a reference that reflects your music (source) the most. See the Reference Database for all reference files installed with AAMS. The other possibility is that you can create your own Reference File(s) out of Analyzed Audio. In this way you can import your own music or reference music track into AAMS, analyze them and use them as Reference File.
Check your music mixes, masters and even single tracks or collections / albums against different musical styles. If you want to make your own Reference Styles, this is called batched reference analyzing. It is possible to mix and match different reference styles together, like Pop with Rock or RNB with Rap etc. Or create your own specialized sound by combining your own analyzed masters and the reference styles found in the AAMS Database. Single audio tracks (vocals, guitar, bass etc.) can be analyzed so that your mix can be enhanced before it reaches the mastering stage. You can process a batch of source files together and get an overall sound for a compilation / collection or album (making your whole album sound equal of quality) and turn them into one single reference style of your own. There are many different ways to do this. In a few simple steps you can see what differences there are between the source audio material and a Reference Style chosen from a database of over 200 reference styles provided. Even it is possible to create your own References. Just load a Source and Reference and see what happens!

Reference File Directory
A Reference file is an already AAMS Analyzed file (read about AAMS Analyzer) or it is a file out of the AAMS Database of Musical Styles ( 200). The directories listed are AAMS standard directories of the AAMS Database of Musical Styles. You can select a Reference File for import now. The Reference and Source files can also be found in the standard AAMS file directory, as well as the complete Reference Database directory. It is possible to select multiple files (when needed) with holding Shift or CTRL keys. The drive list selects a hard drive, the directory list selects a directory and the file list selects file(s). You can load a Reference file as well as a Source file, but remember the source file is for your own audio representation inside AAMS, the reference file is the representation of the targeted master (to be mastered against).

Load Selected File as Reference
Load the selected file in the window left into AAMS Analyzer as Reference. You can load a Reference file as well as a Source file, but remember the source file is for your own audio representation inside AAMS, the reference file is the representation of the targeted master (to be mastered against). So it's best to load a Reference file here.

Load Selected File as Source
Load the selected file in the window left into AAMS Analyzer as Reference. You can load a Source file as well as a Reference file, but remember the source file is for your own audio representation inside AAMS, the reference file is the representation of the targeted master (to be mastered against). So it's best to load a Reference file here.

Source and Reference file are Loaded (AAMS Suggestions)
When a Source file and a Reference File are loaded, AAMS will directly calculate Suggestions by comparing source and reference, to calculate between them the best settings for processing the source file in a mastered audio file. You can load Source and Reference data at any time and AAMS will recalculate its suggestions instantly. The suggestions are displayed on the Suggestion Tab in Charts and Text, so that you can also use any hardware outboard equipment and software plugins that you already own. Also for the visual aspect Charts and Graphs are created to make the user understand more and learn, even adjusting the Reference or the DSP-EQ Suggestion is possible. Based on the Analyzer results AAMS presents suggested Mastering, Equalizer, Compressor and Loudness settings. AAMS uses these suggested calculations for further processing towards the end result, a fully automatic mastering chain. These can be reviewed and edited by the user in many ways. All you need to master your mix to a perfect result. Simply spending the time to listen and understand AAMS suggestions can help you to improve your mixing and mastering. The suggestions based on Analyzer results are displayed here. Each time the state of the AAMS program changes due loading a file or user changes, AAMS will recalculate. The outcome of these calculations will display on the Suggestion Tab and related pages. AAMS does calculated suggestions on basis of the loaded Source compared to the Loaded Reference. Therefore if we can adjust the reference we can adjust the outcome (or have influence) on the source results. If quite often happens that AAMS is almost correct, but maybe the Vocals just are mixed a little bit high (harder) then the mix itself. Mostly it is better to fix the mix, by adjusting the mix. But when this cannot be undone or done, you can now correct the Spectrum of the Reference that has been loaded and save edited reference as a new reference for later use. Later on we will address the same procedure on adjusting the DSP-EQ that will work just about the same way. But however adjusting the Spectrum Reference might be a better more compatible way.

Batch Selected Files info One Single Reference File
This function will batch all selected files in one single Reference file. In combination with Source Batch or Reference Batch, this is a good way to create your own sound (read about creating your own sound). You can even select multiple files out of AAMS Database. It will use the reference file(s) you have selected in the Files Window on the Left. You can now select multiple reference files from the Left Files Window, and they will be processed one by one, as a batch. A popup window will appear with the all the files listed, press OK. Then the standard AAMS directory will pop up and asks you to save the batch as one single source file. The extension for the file(s) is *.aam.
Save Reference as AAMS Analyzer File
The loaded reference file stored into AAMS Analyzer can be Saved to disk. This can be a handy feature when you have changed or edited the source file in AAMS Analyzer.

Load Reference
Loads a Reference file into AAMS Analyzer, you are prompted by a popup window to import a source into memory. It is best to really choose a Reference file here, but as the format of a source or reference is the same, you could load a source file instead.
Reference Properties
Shows Filename, Artist, Album, Song, Style and Date of the Reference file. The text of these properties can be edited and saved, Goto the tab Analyzer Suggestion - Frequency Spectrum - Source or Reference File (Tabs).
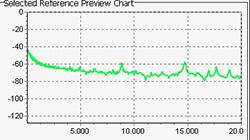
Reference Chart
A preview of the file source spectrum will be shown here.
The AAMS V4 Reference Database is an important part of AAMS software.
The reference style a user can choose is the way you want your tracks to sound alike.
AAMS works with a Source file (your audio) and a Reference File (out of the Database of Reference Styles).
AAMS does compare source against reference. You can also create new references out of the database or out of analyzed tracks, albums and other audio. The reference database is updated and contains most of successful and many more quality music references styles. The older AAMS V2 database is also installed with AAMS V4. Watch the video for instructions how to use the Reference's and also to create your own presets.
The AAMS V4 Reference Style Database
The Reference Style Database of AAMS version 3 is completely and newly written. We have AAMS Analyzed about 28.000 Tracks of Music from different Genres and Styles. From everywere over the world, for you to compare your music against. Your own audio material is called a Source. What you compare your source with is called a Reference. So what AAMS Software Analyzer does is compare your music and creates Suggestions from making it sound as good. Then AAMS will master your music accordingly!
Directories and Files
The main function of the Reference Style Database is to give the user a readymade preset database of musical styles to compare and choose from. These References are specially crafted analysis made by interpreting musical styles and contain spectrum and loudness functions that AAMS Software can understand. As a Source is an *.aam file. A Reference is also an *.aam file (mostly an @ is used in the filename for references). The Style or Reference Database is installed with AAMS, usually in C:Program FilesAAMSAAMS FilesReferences or C:Program Files (x86)AAMSAAMS FilesReferences. Inside this directory are all RMS files and they are suitable for most mastering purposes. The full database is in the following directory C:Program FilesAAMSAAMS FilesReferencesReference Database.
OLD : Directory with AAMS V2.0 and AAMS V1.0 Reference Database files
V4 Mastering : Directory with AAMS V4.0 Reference Database files (for AAMS Mastering).
V4 Mixing : Directory with AAMS V4.0 Reference Mixing Files (for Mixing etc).
The AAMS V4 Main Mastering Reference Database Files
RMS files explained : The main starting References for Beginners and for All Mastering functions that are general. If you do not know what reference to choose but know the gerne. RMS means **root mean square**
Found in the directory : V4 Mastering/1 RMS Mastering
@AAMS Mastering_RMS – The main starting reference for all beginners and lazy users.
Different Gernes RMS Styles :
@Acapella_RMS.aam
@Accoustic_RMS.aam
@Alternative_RMS.aam
@Asian_RMS.aam
@Ballad_RMS.aam
@Blues_RMS.aam
@Bollywood_RMS.aam
@Boyband_RMS.aam
@@Children_RMS.aam
@Christmass_RMS.aam
@Classical_RMS.aam
@Commercials_RMS.aam
@Conferences_RMS.aam
@Countryl_RMS.aam
@Disco_RMS.aam
@Dubstep_RMS.aam
@EasyListening_RMS.aam
@EDM_RMS.aam
@Electronic_RMS.aam
@Fitness_RMS.aam
@Funk_RMS.aam
@Girlband_RMS.aam
@Gospel_RMS.aam
@Holiday_RMS.aam
@Hornsband_RMS.aam
@House_RMS.aam
@Indie_RMS.aam
@Industrial_RMS.aam
@Inspirational_RMS.aam
@Instrumental_RMS.aam
@Jazz_RMS.aam
@Karaoke_RMS.aam
@Latin_RMS.aam
@Live_RMS.aam
@Lounge_RMS.aam
@Modern_RMS.aam
@MovieTheme_RMS.aam
@Nederlands_RMS.aam
@NewAge_RMS.aam
@NewWave_RMS.aam
@Opera_RMS.aam
@Pop_RMS.aam
@Rap_RMS.aam
@Reggae_RMS.aam
@RNB_RMS.aam
@Rock_RMS.aam
@SingerSongwriter_RMS.aam
@Sinterklaas_RMS.aam
@Slow_RMS.aam
@Soul_RMS.aam
@Soundtrack_RMS.aam
@Spanish_RMS.aam
@SpokenWord_RMS.aam
@StandupComedy_RMS.aam
@Vegas_RMS.aam
@World_RMS.aam
The AAMS V4 Mastering Reference Database Files with differences
Reference files found in subdirectories : V4 Mastering
@Acapella_Female.aam
@Acapella_House_Female.aam
@Acapella_House_Male.aam
@Acapella_Male.aam
@Acapella_Ragga_Male.aam
@Acapella_Rap.aam
@Acapella_RMS.aam
@Accoustic.aam
@Accoustic_Female.aam
@Accoustic_Male.aam
@Accoustic_RMS.aam
@Alternative.aam
@Alternative_RMS.aam
@Asian_Female.aam
@Asian_Male.aam
@Asian_Old.aam
@Asian_Pop.aam
@Asian_RMS.aam
@Asian_Rock.aam
@Ballad_Female.aam
@Ballad_Male.aam
@Ballad_RMS.aam
@Blues_Female.aam
@Blues_Male.aam
@Blues_Old.aam
@Blues_RMS.aam
@Blues_Slow.aam
@Bollywood.aam
@Bollywood_Dance.aam
@Bollywood_Female.aam
@Bollywood_Female_Slow.aam
@Bollywood_Male.aam
@Bollywood_Male_Slow.aam
@Bollywood_Old.aam
@Bollywood_RMS.aam
@Boyband.aam
@Boyband_RMS.aam
@Boyband_Slow.aam
@Children.aam
@Children_Dance.aam
@Children_RMS.aam
@Children_Slow.aam
@Christmass.aam
@Christmass_Female.aam
@Christmass_Male.aam
@Christmass_Old.aam
@Christmass_RMS.aam
@Classical.aam
@Classical_RMS.aam
@Commercials_Female.aam
@Commercials_Male.aam
@Commercials_RMS.aam
@Conferences.aam
@Conferences_RMS.aam
@Countryl_RMS.aam
@Country_Female.aam
@Country_Female_Slow.aam
@Country_Male.aam
@Country_Male_Slow.aam
@Disco_Female.aam
@Disco_Male.aam
@Disco_RMS.aam
@Dubstep.aam
@Dubstep_Hard.aam
@Dubstep_RMS.aam
@Dubstep_Slow.aam
@EasyListening_RMS.aam
@Easy_Listening.aam
@Easy_Listening_Female.aam
@Easy_Listening_Male.aam
@Electronic_Industrial.aam
@Electronic_Industrial_Slow.aam
@Electronic_Orchestra.aam
@Electronic_Pop_Female.aam
@Electronic_Pop_Instrumental.aam
@Electronic_RMS.aam
@Electronic_Rock.aam
@Fitness.aam
@Fitness_RMS.aam
@Funk_Pop.aam
@Funk_RMS.aam
@Funk_Slow.aam
@Girlband.aam
@Girlband_RMS.aam
@Girlband_Slow.aam
@Gospel.aam
@Gospel_Choirs.aam
@Gospel_Dance.aam
@Gospel_Female.aam
@Gospel_Live.aam
@Gospel_Male.aam
@Gospel_RMS.aam
@Gospel_Slow.aam
@Holiday.aam
@Holiday_RMS.aam
@Hornsband.aam
@Hornsband_RMS.aam
@House_Atmosphere.aam
@House_Breakbeat.aam
@House_Club.aam
@House_Deep.aam
@House_DJ.aam
@House_Easy.aam
@House_EDM.aam
@House_Electro.aam
@House_Female.aam
@House_Garage.aam
@House_Hardcore_Female.aam
@House_Hardcore_Male.aam
@House_HiNRG.aam
@House_Jungle.aam
@House_Male.aam
@House_Rave.aam
@House_RMS.aam
@House_Techno.aam
@House_Trance.aam
@Indie.aam
@Indie_RMS.aam
@Indie_Slow.aam
@Industrial.aam
@Industrial_RMS.aam
@Inspirational.aam
@Inspirational_Dance.aam
@Inspirational_RMS.aam
@Instrumental.aam
@Instrumental_RMS.aam
@Jazz.aam
@Jazz_Best.aam
@Jazz_BlueNote.aam
@Jazz_Lovers.aam
@Jazz_Miles.aam
@Jazz_RMS.aam
@Jazz_Sax.aam
@Jazz_Soul.aam
@Karaoke.aam
@Karaoke_RMS.aam
@Latin.aam
@Latin_Dance.aam
@Latin_RMS.aam
@Latin_Slow.aam
@Live_Pop_Rock.aam
@Live_RMS.aam
@Live_Rock.aam
@Live_Rock_Ballad.aam
@Lounge.aam
@Lounge_Atmosphere.aam
@Lounge_RMS.aam
@Lounge_Sax.aam
@Modern.aam
@Modern_RMS.aam
@MovieTheme_RMS.aam
@Movie_Orchestra.aam
@Movie_Theme.aam
@Nederlands.aam
@Nederlands_RMS.aam
@NewAge_Female.aam
@NewAge_Female_Slow.aam
@NewAge_Male.aam
@NewAge_Male_Slow.aam
@NewAge_RMS.aam
@NewWave_Female.aam
@NewWave_Female_Slow.aam
@NewWave_GuitarBand.aam
@NewWave_Male.aam
@NewWave_Male_Slow.aam
@NewWave_RMS.aam
@NewWave_Slow.aam
@Opera.aam
@Opera_RMS.aam
@Pop_Female.aam
@Pop_Female_Slow.aam
@Pop_Male.aam
@Pop_Male_Slow.aam
@Pop_RMS.aam
@Pop_Rock.aam
@Rap_Biggie.aam
@Rap_Club.aam
@Rap_Disco.aam
@Rap_Dutch.aam
@Rap_Emi.aam
@Rap_Female.aam
@Rap_Female_Slow.aam
@Rap_Hardstyle.aam
@Rap_Male.aam
@Rap_Male_Slow.aam
@Rap_OldSkool.aam
@Rap_Pop.aam
@Rap_RidingCar.aam
@Rap_RMS.aam
@Rap_RNB.aam
@Rap_Snoop.aam
@Rap_Soul.aam
@Rap_White.aam
@Reggae.aam
@Reggae_Acapella_Male.aam
@Reggae_Dancehall.aam
@Reggae_Dub.aam
@Reggae_Female.aam
@Reggae_Live.aam
@Reggae_Male.aam
@Reggae_RMS.aam
@Reggae_Slow.aam
@RNB_Female.aam
@RNB_Male.aam
@RNB_RMS.aam
@RNB_Slow.aam
@RNB_White.aam
@Rock_1950_1960.aam
@Rock_1960_1970.aam
@Rock_1970_1990.aam
@Rock_1990_2015.aam
@Rock_Alternative.aam
@Rock_Female.aam
@Rock_Female_Slow.aam
@Rock_Grunge.aam
@Rock_Indie.aam
@Rock_Indie_Slow.aam
@Rock_Instrumental.aam
@Rock_Live.aam
@Rock_Male.aam
@Rock_Male_Slow.aam
@Rock_Metal_Hard.aam
@Rock_Metal_Medium.aam
@Rock_Metal_Slow.aam
@Rock_Pop.aam
@Rock_Progressive.aam
@Rock_Punk.aam
@Rock_RMS.aam
@Rock_Slow.aam
@Rock_Voodoo.aam
@Rock_Voodoo_Slow.aam
@Rock_Zion.aam
@Sinterklaas.aam
@Sinterklaas_RMS.aam
@Slow_Female.aam
@Slow_Male.aam
@Slow_RMS.aam
@SingerSongwriter_Female.aam
@SingerSongwriter_Female_Slow.aam
@SingerSongwriter_Male.aam
@SingerSongwriter_Male_Slow.aam
@SingerSongwriter_RMS.aam
@Soul_Female.aam
@Soul_Male.aam
@Soul_Motown_Female.aam
@Soul_Motown_Female_Slow.aam
@Soul_Motown_Male.aam
@Soul_Motown_Male_Slow.aam
@Soul_Motown_Slow.aam
@Soul_Pop_Female.aam
@Soul_Pop_Male.aam
@Soul_RMS.aam
@Soul_White_Female.aam
@Soul_White_Male.aam
@Soundtrack.aam
@Soundtrack_RMS.aam
@Spanish_Female.aam
@Spanish_Love_International.aam
@Spanish_Male.aam
@Spanish_Male_Slow.aam
@Spanish_RMS.aam
@Spokenword_Female.aam
@Spokenword_Male.aam
@SpokenWord_RMS.aam
@StandupComedy_Female.aam
@StandupComedy_Male.aam
@StandupComedy_RMS.aam
@Vegas.aam
@Vegas_RMS.aam
@World_Female.aam
@World_Male.aam
@World_Male_Slow.aam
@World_RMS.aam
The AAMS V4 Mixing Reference Database Files with differences
Reference files found in subdirectories : V4 Mixing
BASS
DRUMS
GUITAR
PIANO
VOCALS
The Mixing database is highly experimental, because Mixing Tracks with AAMS Mastering Software is kind of under construction. But we like to give our users a hint what is coming up in later versions of aams and we would not underestimate our users for experimenting with this Mixing Database. This database is not generally used for Mastering purposes with AAMS.
As a Source is an *.aam file. A Reference is also an *.aam file (mostly an @ is used in the filename for references). The Style or Reference Database is installed with AAMS V4, usually in C:Program FilesAAMSAAMS FilesReferences or C:Program Files (x86)AAMSAAMS FilesReferences. Inside this directory are all RMS files and they are suitable for most mastering purposes. The full database is in the following directory C:Program FilesAAMSAAMS FilesReferencesReference Database.
The database was rewritten 28-01-2015.
All Files are copyrighted (C) 2004-2015, Sined Supplies Inc.
(Read the license agreement for details about copyrights etc).

AAMS DSP-Analyzer and AAMS Suggestions

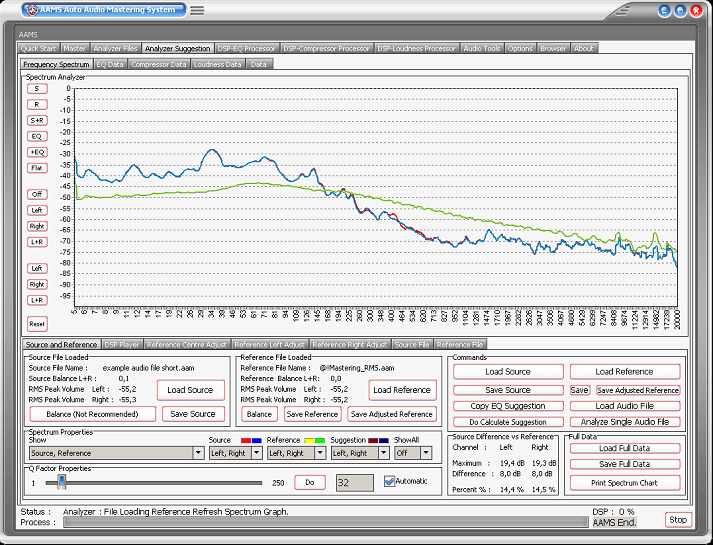
Frequency Spectrum - Chart Tab
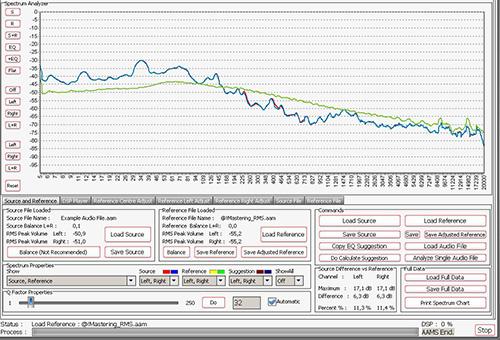
Analyzer Suggestion - Frequency Spectrum
When a Source file and a Reference File are loaded, AAMS will directly calculatie Suggestions by comparing source and reference, to calculate between them the best settings for processing the source file in a mastered audio file. You can load Source and Reference data at any time and AAMS will recalculate its suggestions instantly. The suggestions are displayed on the Suggestion Tab in Charts and Text, so that you can also use any hardware outboard equipment and software plugins that you already own. Also for the visual aspect Charts and Graphs are created to make the user understand more and learn, even adjusting the Reference or the DSP-EQ Suggestion is possible. Based on the Analyzer results AAMS presents suggested Mastering, Equalizer, Compressor and Loudness settings. AAMS uses these suggested calculations for further processing towards the end result, a fully automatic mastering chain. These can be reviewed and edited by the user in many ways. All you need to master your mix to a perfect result. Simply spending the time to listen and understand AAMS suggestions can help you to improve your mixing and mastering. The suggestions based on Analyzer results are displayed here. Each time the state of the AAMS program changes due loading a file or user changes, AAMS will recalculate. The outcome of these calculations will display on the Suggestion Tab and related pages. AAMS does calculated suggestions on basis of the loaded Source compared to the Loaded Reference. Therefore if we can adjust the reference we can adjust the outcome (or have influence) on the source results. If quite often happens that AAMS is almost correct, but maybe the Vocals just are mixed a little bit high (harder) then the mix itself. Mostly it is better to fix the mix, by adjusting the mix. But when this cannot be undone or done, you can now correct the Spectrum of the Reference that has been loaded and save edited reference as a new reference for later use. Later on we will address the same procedure on adjusting the DSP-EQ that will work just about the same way. But however adjusting the Spectrum Reference might be a better more compatible way.
Spectrum Analyzer Chart Buttons
S- Shows only Source
R - Shows only Reference
S R - Shows Source and Reference
EQ - Shows only EQ Suggestions
EQ - Shows EQ, Source and Reference
Flat - Shows EQ Corrections
Off - Shows Left and Right
Left - Shows only Left Signals
Right - Shows only Right Signals
L R - Shows Left and Right (Reset)
Reset - Resets the Spectrum Chart

Source File Loaded
Source File Name - The filename of the loaded source file
Source Balance L R - The balance in dB or -dB, from left to right. 0 dB is perfect balance!
RMS Peak Volume Left - the peak volume of the left channel in -dB
RMS Peak Volume Right - the peak volume of the right channel in -dB
Balance (Not Recommended) - To balance the source to 0dB (L R) not recommended, but can be handy trick.
Load Source - Loads a source with a popup window.
Save Source - Saves the source with a poput window.

Reference File Loaded
Reference File Name - The filename of the loaded reference file
Reference Balance L R - The balance in dB or -dB, from left to right. 0 dB is perfect balance!
RMS Peak Volume Left - the peak volume of the left channel in -dB
RMS Peak Volume Right - the peak volume of the right channel in -dB
Balance - To balance the reference to 0dB (L R) not recommended, but can be handy trick.
Load Reference - Loads a reference with a popup window.
Save Reference - Saves the reference with a poput window.
Save Adjusted Reference - Saved the adjusted or edited referece with a popup window.

Spectrum Properties
Show - Shows Source, Reference, EQ or any combination.
Source - Shows Left, Right or both channels of the source.
Reference - Shows Left, Right or both channels of the reference.
Suggestion - Shows Left, Right or both channels of the EQ Suggestion.
Show All - Shows Left, Right or both channels of the Source, Reference and EQ Suggestion.

Q-Factor Properties
The calculated Q-factor will automatically change accordingly to what DSP-EQ suggestion or preset is used. When the option Automatic Q-factor is set to manual (in the options Tab), you can change the Q-factor manually and set up the Parametric EQSuggestion for use with your own External Parametric EQ. Users who want to work manually with the qfactor within AAMS must be aware of side effects. When AAMS Parametric EQ Suggestion is switched to manual and you set the Q-factor, this will change the behavior of rest of the automated suggestions, (Graphic EQ, Compressor and DSP-EQ Settings). For this reason it is usually best to use an automatic Qfactor when using the internal AAMS DSP-EQ and DSP-Compressor.

Commands
Load Source - Loads a source with a popup window
Load Reference - Loads a reference with a popup window
Save - Saves the Reference (original)
Save Adjusted Reference - Saves the adjusted or editted reference
Copy EQ Suggestion - Copy the EQ suggestion
Do Calculate Suggestion - Recalculates all AAMS Suggestion
Load Audio File - Loads an audio file into the DSP-EQ Player
Analyze Single Audio File - Analyzes an audio file with a popup window

Source Difference VS Reference
Channels Left and Right get compared here from Source to Reference
Channel - Left and Right
Maximum - Maximum levels for left and right in dB.
Difference - Difference levels for left and right in dB.
Percent - Difference levels for left and right in percentages.

Full Data
Load Full Data - Load the Full Data file (Source and Reference in one file).
Save Full Data - Saves a Full Data file (Source and Reference in one file).
Print Spectrum Chart - Prints the Spectrum chart only.
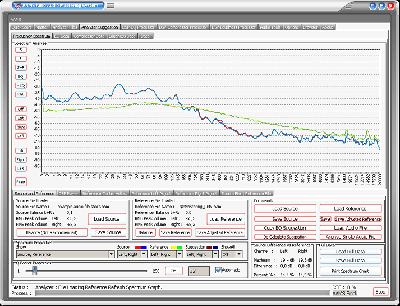
The loaded Source and Reference are displayed here. Under properties the Show function can be changed. Normally Source and Reference are displayed. But however there are more options to display. Source, Reference and 0 dB EQsuggestion. Showing the EQsuggestion can be worth full for users who need to know how the results display in one single chart. Source, Reference 0 dB Flatline. Showing the Reference as a Flatline 0 dB function, makes it easier to see the differences of the Source against the reference. Also the slider (turn of the automatic Qfactor function first) changes the Q factor that is used to display Source and Reference. The will change peak into more flat or more like peak. This Q Factor function does not affect calculations, but changes the displayed chart only.
Now it’s getting interesting. We have loaded the Source and adjusted the loaded Reference by adjusting the charts. Let’s play the sound that will come out on the soundcard and on our speakers or headphones. First we need to load the ‘Example Audio.wav’ file. Press Play and you will be asked for the audio file. Then AAMS will play the file. While playing you can still adjust the charts and AAMS will update calculations and suggestions. The audio that is being played, is played audio wise with the DSP-EQ Processor.
So be sure not to adjust the DSP-EQ Charts, because this will influence the outcome (we discuss the DSPEQ Processor later on). Basically you can adjust the Spectrum and Adjust the DSP-EQ, because both work in serial audio pipeline. Again, for Reference adjusting. Be sure you did nothing with the DSP-EQ settings. Now you have learned that you can be of influence and adjust the Reference Centre, Left and Right.
Therefore you can shape your own sound and use the same adjusted reference for other purposes! The example we have given you is only an example. Using the reference adjust charts this way, and you raise or lower bass frequencies, this will have effect on the outcome (more or less bass frequencies). In the beginning we said that maybe the voice would stick out of the mix, by adjusting the correct frequencies you might have better results and lower some voice frequencies this way. A good start is using AAMS database and use RMS database presets. These are general presets. MostlyAAMS does a good job and maybe you must only adjust when this is really needed. You can save the adjusted reference for later use and therefore have your own preset sound, even the reference can be handy for later use on other tracks. The ‘save reference’ saves the reference without adjustments. The‘save adjusted reference’ saves the reference with adjustments.
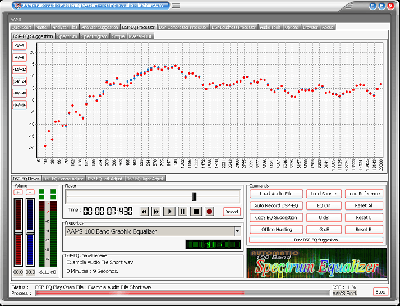
The DSP-EQ Graphic Equalizer Processor is used for processing the adjusted sound and can only be adjusted from -12dB to 12dB per EQ band. So in the real world (hearing audio) the lowest possible cutoff is -12dB by the DSP-EQ Equalizer. The highest possible boost per EQ band is 12dB. So even when you use the Spectrum Reference Adjust Charts and DSP-EQ Adjust charts, the possible boost can only be between -12dB and 12dB on the outcome of the DSP-EQ Graphic Equalizer Processor.
ISO226 Fletcher EQ Spectrum Chart
This chart shows the calculations for the automatic adjust of the differences out of the ISO226 Flecher Muson Curves (AAMS Iso Loudness Curves). Main when you have some more mids (vocals etc.) this curve will adjust the midrange to be little lower and bass and highs slightly higher. The compensation how much mids is reduced is based on the EQ Suggestion and the option 'ISO226 Fletcher EQ Spectrum Chart' in the DSP-EQ Options is turned On (is turned On by Default). The gray line is real maximum mono compensation. The yellow and green lines are the compensations that are applied for the DSP-EQ. AAMS adjusts for human hearing, mainly when vocals are too loud or the mid section is louder, then AAMS compensates for this automaticly. See DSP-EQ options for more info.
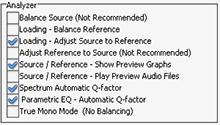
Analyzer Suggestion Options Tab
The AAMS DSP Analyzer consists of a spectrum analyzer and measurements of levels, this can be EQ levels or Compression Levels in dB. The AAMS Analyzer can scan audio files up to 64bit in memory and comes up with AAMS Suggestions. AAMS Suggestions are suggestions for DSP-EQ, DSP-Compressor and DSP-Loudness. But also ment for the user to see what AAMS is suggesting and mastering against. The written *.aam file is a file that represents AAMS Analyzer file system. The *.aam file must belong coexisting with an Audio File (source) of the same name. Or an *. aam file can be a reference file. Anyway AAMS Analyzer does Audio Analyzing by scanning an audio file or realtime by playing audio inside AAMS. You can say AAMS Analyzer is the first and foremost item that is needed towards creating an audio master. The options therefore must only be changed by a more expirienced user.
Balance Source (Not Recommended)
Balances the Source before AAMS Calculates the suggestions. This will Balance Left and Right of the Source Suggestions. This does not mean Mono mode balancing, but just the Spectrum Left and Right are adjusted to sound equal on both left and right side together. Mostly this will affect the Balance and is standard turned Off. Because we do not want the analyzed material to be changed internally by calculations, we want the analyzed material to be the same as the audio file (source).
Loading - Balance Reference
Balances (L+R) the Reference before AAMS Calculates the suggestions. This will Balance Left and Right of the Reference Suggestions. The might be a good idea when you want Left and Right of the Reference to be Balanced. In the later stage the DSP-Loudness Balance has then less balancing to do. This will not affect later mastering, but can be helpfull for DSP-EQ and DSP-Compressor and can have a better feel of middle hearing sense.
Loading - Adjust Source to Reference
Source is adjusted before AAMS calculates the suggestions. This will adjust the source to the reference. Mainly will lower or raise the whole spectrum to match the reference. When not turned ON, standard is ON, The DSP-EQ can have one sided raising or lowering of the whole EQ spectrum. When turned ON the DSP-EQ will do more equal to 0dB line suggestions and mastering might sound better because of not using too much EQ power to raise or lower the whole spectrum.
Adjust Reference to Source (Not Recommended)
Reference is adjusted (Not Recommended) before AAMS calculates the suggestions. This function is not Needed and is standard turned Off. When turned On, the Reference is raised or lowered in the whole spectrum, therefore matches the source spectrum. As this is the other way what we want (we want mastering of Source towards Reference) this oprions is made but has not much use. It is the opposite option from 'Loading - Adjust Source to Reference'.
Source/Reference - Show Preview Graphs and Preview Audio
Shows Compressor Chart in Analyzer Tab, Source and Reference Tabs.
Source/Reference - Play Preview Audio Files
Plays a selected file in the Analyzer Tab.
Q Factor
Q Factor and Bandwidth in EQ: what they mean ? If you are reading up on EQ, and wondering exactly what the terms ‘Q factor’ and ‘bandwidth’ mean, maybe this will help. Q factor controls the bandwidth—or number of frequencies—that will be cut or boosted by the equaliser. The lower the Q factor, the wider the bandwidth (and the more frequencies will be affected). Low Q factor of 0.35 results in a wide bandwidth. The higher the Q factor, the narrower the bandwidth (and the fewer frequencies will be affected). High Q factor of 3.10 results in a narrow bandwidth. Most software-based EQ programs have a Q factor range of somewhere around 0.10 to 100; however, only a very small part of this range need be used. Most boosts and cuts should be carried out with a much gentler Q factor, of somewhere between 0.6 and 1.0, as this tends to result in a much more natural sound.
AAMS Q Factor
AAMS used a q factor from 1 to 250. This is because AAMS Analyzer is based on Spectrum analyzing and differs from EQ that it's measurements are much more detailed. Though we have placed an Q factor for making the displays and charts more readable. The Q factor is also used for AAMS internal processing. A Q Factor for AAMS as 1 is detailed and 250 means more straight lines horizontal. So the more AAMS Q Factor forwards 250 the wider the band is. The more AAMS Qfactor comes to 1 the more detailed the spectrum will be. The Standard Q Factor is about 32.
Spectrum Automatic Q-Factor
The Q-Factor of the Spectrum Analyzer is automatically set. Turn this OFF to input your own Qfactor. Use the silder to user setup the Q Factor.
Parametric EQ - Automatic Q-Factor
The Q-Factor of the Parametric EQ is automatically set. Turn this OFF to input your own Qfactor. Use the silder to user setup the Q Factor.
True Mono Mode (No Balancing)
Sets AAMS to work in mono mode, this can work good on audio that is recorded very differenty with left right middle settings that are panned. Like drums on the left and vocals hard right (example). With the mono mode AAMS will apply mono settings calculated from left and right channels and re-applies them for both channels (left and right) equally. So this may not hurt the left right balance the mix was originally intended for. This settings keeps the balance of the original recording audio source, and does not do anything to correct the balance.
Show Original x-axxis
Shows the x-xxis from the spectrum analyzer (not in Frequency Hz like standard).

Settings, Save Options
Saves all options in the AAMS.INA file. This feature must be used when you changed any option as mentioned above. You can restore AAMS defaults in the preferences tab.
Settings, Load Options
Reloads the AAMS.INA file and restores the options. This feature can be used when you need to reset AAMS options.

Equalizers Explained
An equaliser is designed to alter the tonal quality of audio passing through it, this by using a number of filter circuits. Filters are capable of applying gain to audio signals within specific frequency ranges, positive or negative, referred to a 'boost' or 'cut'. The more filters the better control over the whole frequency range in steps, but with crossovers in the filters there can be upcomming distortion. AAMS uses a linear spectrum equalizer with 100 filters, what basically means there is lot's of control and the sidewalls are so steap, the filtering does not affect each other. The quality of the AAMS DPS-EQ Spectrum Equalizer with 100 EQ Bands is very high and by our users atmitted as the one of the best EQ's around.
Suggestions are made by comparing source and reference, to calculate between them the best settings for processing the source file.
You can load Source and Reference data at any time and AAMS will recalculate its suggestions instantly. The suggestions are displayed on the Suggestion Tab in Charts and Text, so that you can also use any hardware outboard equipment and software plugins that you already own. Also for the visual aspect Charts and Graphs are created to make the user understand more and learn, even adjusting the Reference or the DSP-EQ Suggestion is possible. Based on the Analyzer results AAMS presents suggested Mastering, Equalizer, Compressor and Loudness settings. AAMS uses these suggested calculations for further processing towards the end result, a fully automatic mastering chain. These can be reviewed and edited by the user in many ways. All you need to master your mix to a perfect result. Simply spending the time to listen and understand AAMS suggestions can help you to improve your mixing and mastering. The suggestions based on Analyzer results are displayed here. Each time the state of the AAMS program changes due loading a file or user changes, AAMS will recalculate. The outcome of these calculations will display on the Suggestion Tab and related pages.
AAMS does calculated suggestions on basis of the loaded Source compared to the Loaded Reference. Therefore if we can adjust the reference we can adjust the outcome (or have influence) on the source results. If quite often happens that AAMS is almost correct, but maybe the Vocals just are mixed a little bit high (harder) then the mix itself. Mostly it is better to fix the mix, by adjusting the mix. But when this cannot be undone or done, you can now correct the Spectrum of the Reference that has been loaded and save edited reference as a new reference for later use. Later on we will address the same procedure on adjusting the DSP-EQ that will work just about the same way. But however adjusting the Spectrum Reference might be a better more compatible way.
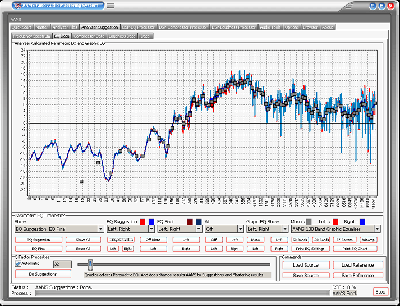

The Parametric EQ Page
This page shows you how to adjust a Parametric EQ accordingly to the analyzer suggestions. How to get a real Equalizer to play these settings is explained later. On the display red lines show Left EQ and blue lines show Right EQ. The darker red and blue lines are Q-factored and smoothed allowing you to set up a parametric EQ accordingly. It is possible to zoom-in (left click mouse and drag to right) and zoom-out (Right click mouse and drag to left), this way you can have a close look at EQ Settings within detailed frequency spectrum. For users who want to investigate and see, this can be a very good overview.

Parametric EQ Properties
Shows the different status of EQ Suggestion into the chart.
Show - EQ Suggestion, EQ Final, EQ Suggestion-EQ Final.
EQ Suggestion - Pre Calculated EQ Suggestion.
EQ Final - The EQ Final Settings.
EQ Suggestion - Left, Right, Left-Right.
EQ Final - Left, Right, Left-Right.
All - Off, Left, Right, Left-Right.
Graphic EQ Show - Off, Mono, Left, Right, Left-Right, Left-Right-Mono.

DSP-EQ Setup
AAMS 100 Band Graphic Equalizer (standard for AAMS Professional Version)
AAMS 50 Band Graphic Equalizer (locked standard for AAMS Freeware)
AAMS 25 Band Graphic Equalizer
AAMS 50 Band Graphic Equalizer
AAMS 15 Band Graphic Equalizer
Standard 31 Band Graphic Equalizer
Standard 61 Band Graphic Equalizer
Standard 15 Band Graphic Equalizer
Alesis 24 Band Graphic Equalizer
59 Bands Bottom End Graphic Equalizer
97 Bands Bottom End Graphic Equalizer
49 Bands Mid Lows Graphic Equalizer
41 Bands High Mids Graphic Equalizer
41 Bands Highs Graphic Equalizer
99 Bands Graphic Equalizer
Keys 86 Band Graphic Equalizer
Samsung 15 Band Graphic Equalizer
Firium 50 Band Graphic Equalizer
61 Band Graphic Equalizer
Sony Plugin 10 Band Graphic Equalizer
Sony Plugin 20 Band Graphic Equalizer
Winamp 11 Band Graphic Equalizer

Buttons
EQ Suggestion - Recalculates AAMS Analyzer EQ Suggestions.
EQ Final - Recalculates AAMS Analyzer DSP-EQ Final Settings.
Show All - Shows original state in the chart.
Reset All - Resets to original state in the chart.
EQ Suggestion - EQ S F All, Left, Right.
EQ Final- Off Mono, Left, Right, L R.
ALL, Off, Left, Right, L R
Graphic EQ Show - Mono, Left, Right, L R.
50 Bands - Sets the DSP-EQ to 50 Bands AAMS Linear EQ.
100 Bands - Sets the DSP-EQ to 100 Bands AAMS Linear EQ.
97 Bottom - Sets the DSP-EQ to 97 Bands of Bottom End EQ.
Winamp - Sets the DSP-EQ to Winamp 10 Band EQ.
Print EQ Settings - Printout of all EQ Settings.
Print EQ Chart - Printout the EQ Chart.

Q Factor Properties
In the Properties window you can change the display of the Q-Factor. The calculated Q-factor will automatically change accordingly to what DSP-EQ preset is used. When the option Automatic Q-factor is set to manual, you can change the Q-factor manually and set up the Parametric EQ Suggestion for use with your own External Parametric EQ. Users who want to work manually with the Qfactor within AAMS must be aware of side effects. When AAMS Parametric EQ Suggestion is switched to manual and you set the Q-factor, this will change the behavior of rest of the automated suggestions, (Graphic EQ, Compressor and DSP-EQ Settings). For this reason it is usually best to use an automatic Qfactor when using the internal AAMS DSP-EQ and DSP-Compressor.

Commands
Load Source - Loads a source with a popup window.
Save Source - Saves the source with a popup window.
Load Reference - Loads a reference with a popup window.
Save Reference - Saves the reference with a popup window.

The Graphic EQ Page (see DSP-EQ Processor)
This page shows you how to adjust a Graphic Equalizer with several EQ bands that can range from 1 to 100. You can select any of the EQ presets and in the properties window you can pre-select a Graphic Equalizer of your choice. The black lines on the display show Mono EQ, red lines show Left EQ and blue lines show Right EQ. These settings will be directly copied to the DSP-EQ. We will discuss the DSP-EQ later on, were you can listen to the outcome of your audio material with the AAMS internal DSP-EQ processor. The settings can be previewed and processed by the AAMS internal Players alike Analyzer and DSP-EQ, so you can hear the proposed changes. Processing is all done internally by aams, so an mastered outcome audio file is written to disk. The built-in DSP audio processing includes a 100-band DSP-EQ, 8-band DSP-Compressor and DSP-Loudness that can process audio in fully automatic, semi-automatic or manual modes. And AAMS will take care of all in between audio problems as clipping, dithering or normalizing.
The functions and processing of the DSP-EQ is not only doing EQ-ing, but in corporation with AAMS Analyzer will process first Spectrum and EQ results by calculations and processing made internally. Mid and Side processing (m/s) is being applied as well as normal EQ processing. The possible 100 band EQ is defining a more spectrum wise way of using EQ. AAMS automatic suggestions will tell DSP-EQ how to behave. So that the best balance and spectrum is possible, AAMS will compare source and reference, making decisions what frequencies to adjust to have the same sound. This is not a copy of the reference, the source and reference are compared by AAMS Analyzer to get the best sound without just copying from the reference spectrum.
The DSP-EQ takes these settings and will EQ spectrum the audio. Also DSP-EQ is accurate meaning straight and each Frequency Band is 41 steep. Next to each other they can form a 100 band EQ, and apply as much differences as possible, because of the higher band count. With the user functions to adjust source to reference and adjust the EQ, the user can make little corrections if needed. Select the DSP-EQ Tab, this represents a Graphic Equalizer that can have a single EQ band or up to 100 EQ Bands. The DSP-EQ also functions as a player for your audio material, just press Load Audio File or press Play and a window will pop up asking for a *.wav file to play. Press Stop to stop the player and press Pause to pause playing. On top of the faders is the Equalizer frequency band, lowering the faders below will change the gain of the EQ Frequency band in db. The first row of red Faders are adjusting all Left EQ frequencies and the second row of blue Faders are adjusting all Right EQ Frequencies. You can move the faders up or down and set all faders to 0dB with Zero All Faders, Zero Left, and Zero Right. If you already have loaded a Source and Reference, AAMS has calculated suggestions for the DSP-EQ and they can be copied with Copy EQ Suggestion. In this way you won’t have to set up the DSP-EQ yourself as AAMS does all the hard manual work for you automatically. Now you can listen to the differences that AAMS suggests. You can always turn OFF the EQ to hear the original audio material. You can also use Zero All Faders and Copy EQ suggestion to A/B your audio material.
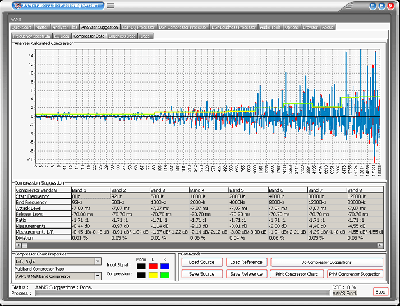

The Compressor Page
This page shows you how to adjust a multi-band Compressor according to AAMS calculations. The Average Compression values for each band are displayed in a grid. Average Compression is the value the compressor lowers the gain while the threshold limits the audio gaining that goes through the compressor band. The more the compressor lowers gain in dB per compressor band is the average compression needed. It is not necessary to understand this in detail as AAMS features an internal DSP-Compressor were suggestions are automatically configured. You can also use tools like plugins or outboard equipment to set up your compressor accordingly to AAMS calculated Average Compression settings. Basically the intention is to lower the Compressor’s Threshold per Band to get the right amount of gain reduction. The ratio, attack and decay times are suggested, but you can use different settings as long as you refer to the Average Compression AAMS is suggesting per Compressor Band. The red lines and blue lines show Left and Right, the yellow line shows the Average Compression per Band. Following the yellow line and seeing the differences per band can help you see what band needs compression the most and what band does not. The display will show black for Mono settings and red and blue for stereo settings. You can select a compressor in the properties window. The DSP-Compressor is a 1-8 multi band Compressor, more on this later. The compressor suggestions are a good way to learn about compressor settings, also you can choose Izotop or Waves compressor settings, if you own those plugins. It is possible to zoom-in (left click mouse and drag to right) and zoom-out (Right click mouse and drag to left), this way you can have a close look at Compressor Settings within detailed frequency spectrum. For users who want to investigate and see, this can be a very good overview.

Compession Suggestion
Compressor 8 Bands - The maximum for Multiband Compression is 8 Bands, all other multiband setups are less.
Start Frequency - The start frequency of the band filter (steap filter).
End Frequency - The ending frequency of the band filter (steap filter).
Attack Level - Attack level in ms per band.
Release Level - Release level in ms per band.
Ratio - The ratio determines how much compression is applied to a signal that goes over your threshold.
Measurements - Compression Levels Suggested in mono (L R = Mono).
Measurements L/R - Compression Levels Suggested for Left and Right channels.
Diviation - Percentage of the suggestion that is diviation, the unsure factor of the calculated compressor band suggestion.

Compressor Chart Properties
Channels - Left, Right, Left-Right
Legenda - Red and Blue, the input signal (source). Yellow and Green, the suggestion for compression.
Multiband Compressor Type
AAMS 8 Band Multiband Compressor - Standard for AAMS Professional.
AAMS 4 Band Multiband Compressor - Standard for AAMS Freeware (locked).
AAMS 1 Band Single Compressor - Standard Compressor with 1 Band.
AAMS 2 Band Multiband Compressor.
AAMS 3 Band Multiband Compressor.
AAMS 5 Band Multiband Compressor.
AAMS 6 Band Multiband Compressor.
AAMS 7 Band Multiband Compressor.
Izotope Ozone 4 Band Compressor.
Waves C4 Multiband Compressor.
Waves LINMB 5 Band Compressor.

Commands
Load Source - Loads a source with a popup window.
Save Source - Saves the source with a popup window.
Load Reference - Loads a reference with a popup window.
Save Reference - Saves the reference with a popup window.
Do Calculate Suggestion - Recalculates AAMS Analyzer Suggestions.
Print Compressor Chart - Prinout the compressor multiband chart.
Print Compressor Suggestion - Printout the Compressor Suggestion Table.
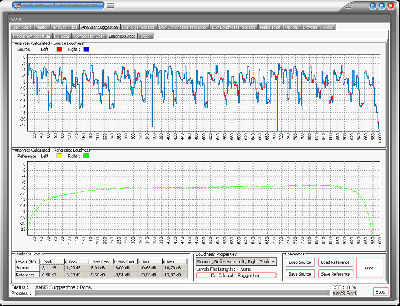

The Loudness Page
This page shows the overall loudness of the Source and Reference. Red and blue lines show Left and Right from the Source in db. Yellow and green lines Left and Right from the Reference in db. The highest lines show peaks and the lines below show RMS averages. From this you can see if the Source comes close to the Loudness of the Reference. Although it is not necessary to get the Source audio material as loud as the Reference, it is a good visual representation of how even your audio material sounds. The internal DSP Loudness processor will re-load and scan levels again when an audio file is loaded. The suggestions from the Loudness Suggestion Tab are not copied directly to the DSP-Loudness settings as the DSP-Loudness processor has its own routines for balance and gain. The grid display will show average and peaked level information in db. The loudness shown on this page is from the original analyzed audio file although the DSP-Loudness page will carry out its own analysis procedure and may differ in levels.

Loudness Levels
Source - The AAMS Analyzed loudness levels for Source.
Reference - The AAMS Analyzed loudness levels for Reference.
L Peak - Peak level found for Left Channel.
R Peak - Peak level found for Right Channel.
L Max RMS - Maximum RMS Peak level found for Left Channel.
R Max RMS -Maximum RMS Peak level found for Right Channel.
L RMS - RMS level found for Left Channel.
R RMS - RMS level found for Right Channel.

Loudness Properties
Source Left Peak - Shows Left Peaks for Source calculated in chart above.
Source Right Peak - Shows Right Peaks for Source calculated in chart above.
Source Left-Right Peak - Shows Left and Right Peaks for Source calculated in chart above.
Reference Left Peak - Shows Left Peaks for Reference calculated in chart above.
Reference Right Peak - Shows Right Peaks for Reference calculated in chart above.
Reference Left-Right Peak - Shows Left and Right Peaks for Reference calculated in chart above.
Source Left RMS - Shows Left RMS Levels for Source calculated in chart above.
Source Right RMS - Shows Right RMS Levels for Source calculated in chart above.
Source Left-Right RMS - Shows Left and Right RMS Levels for Source calculated in chart above.
Source Reference Left RMS - Shows Left RMS Levels for Source and Reference calculated in chart above.
Source Reference Right RMS - Shows Right RMS Levels for Source and Reference calculated in chart above.
Source Reference Left-Right RMS - Shows Left and Right RMS Levels for Source and Reference calculated in chart above.
Show All (Peak and RMS - Shows Source and Reference, both RMS and Peak Levels.
Do Calculate Suggestion - Recalculates AAMS Analyzer Suggestions.

Commands
Load Source - Loads a source with a popup window.
Save Source - Saves the source with a popup window.
Load Reference - Loads a reference with a popup window.
Save Reference - Saves the reference with a popup window.
Print - Print the loudness Levels table.
AAMS Loudness Curves (ISO226 Fletcher Munson Curves)
For AAMS Suggestions te be done, the AAMS Loudness Curves can be calculated from source against reference. When options for AAMS Loudness Curves are turned ON, the AAMS Loudness Curves for Human Hearing are taken into consideration by AAMS Calculated Suggestions for the DSP-EQ, DSP-Compressor and DSP-Loudness.
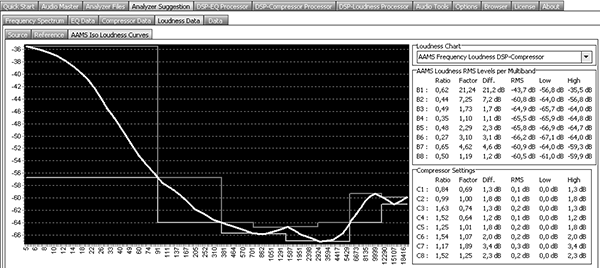
Above picture shows the AAMS Frequency Loudness for DSP-Compressor Multibands. This will show the calculations made for AAMS Suggestions on the DSP-Compressor when AAMS Loudness Curves are used. You can see Bass or lower frequency signals have a higher power dynamic range and impact then higher frequencies. The Chart shows the differences that a human can hear audio with the correct levels according to the ISO226 standard for Human Hearing. If the AAMS Loudness Curves or AAMS Loudness Levels System is used (Turned On standard) the compression levels that raise or lower the signal has been done accordingly to the AAMS Loudness Curves. When turned Off, AAMS uses the straightforward calculations instead.

The Fletcher–Munson curves are one of many sets of equal-loudness contours for the human ear, determined experimentally by Harvey Fletcher and Wilden A. Munson, and reported in a 1933 paper entitled "Loudness, its definition, measurement and calculation" in the Journal of the Acoustic Society of America.The first research on the topic of how the ear hears different frequencies at different levels was conducted by Fletcher and Munson in 1933. Until recently, it was common to see the term Fletcher–Munson used to refer to equal-loudness contours generally, even though a re-determination was carried out by Robinson and Dadson in 1956, which became the basis for an ISO 226 standard. It is now better to use the generic term equal-loudness contours, especially as a 2003 survey by ISO redefined the curves in a new standard. According to the ISO report, the Robinson–Dadson results were the odd one out, differing more from the current standard than did the Fletcher Munson curves. The report states that it is fortunate that the 40-phon Fletcher–Munson curve on which the A-weighting standard was based turns out to have been in agreement with modern determinations.The AAMS Loudness Curves are dirrived from the ISO226 standard and is converted to work with AAMS Spectrum signals. The DSP-EQ, DSP-Compressor and DSP-Loudness can be affected by AAMS Loudness Curves for Human Hearing, by that taking in account that raising the signal (EQ or Spectrum Frequencies) influence the way the Human Ear percieves the signal as hearing. Most likely a Bass signal when EQ is applied to it, raising the Bass signal by EQ will be much louder then raising other higher frequency based signals. The factor of Bass B1 (multiband 1) is much higher (21,24 times) then B8 (1.19 times). So Bass or Lower Band signals tend to give much power and lose headroom more. Higher signals like Highhats or so, will give not so much power and do not really affect headroom as much. In fact Bass Signals are 21 times more powerfull (0-150hz) then signals (10.000hz to 22500hz). The Ratio converts the multibands factor into a workable Ratio. Though Bass signals are more powerfull, a change in signal of Bass B1 and B8 (0.62 and 0,5) are not so different. The Ratio will say something about when a signal is raised or lowered, how it will likely affect human hearing. Anyway the ISO226 Curves are translated by AAMS into the AAMS Loudness Curves and is used by AAMS Suggestions, and the processings chain of AAMS. We see the AAMS Loudness Curves as a good method to predict changes to the source audio material towards the refence choosen. And all will affect the Mastered Outcome. Most likely the AAMS Loudness Curves and AAMS Analyzer / processing system will give a more equal sound when the volume is turned UP or DOWN and therefore improved the steadyness of your sound by more speaker systems played and by more humans hearing.
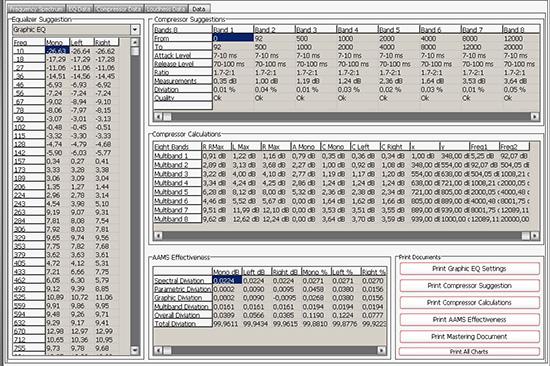

Data Tab
The Data Tab displays all data for every AAMS Analyzer Suggestion. Equalizer Suggestions, Compressor Suggestions, Compressor Calculations, AAMS Effectiveness, Printing Documents. All data is presented here from AAMS Analyzer and its suggestions that are calculated.

Equalizer Suggestion (Graphic EQ Preset)
Freq - Frequency Band (from EQ Preset).
Mono - Level Mono for EQ Band in dB (raise dB, lower -dB).
Left - Level Left Channel for EQ Band in dB (raise dB, lower -dB).
Right - Level Right Channel for EQ Band in dB (raise dB, lower -dB).

Compressor Suggestions
Bands - Multiband (1 to 8 Maximum)
From - Start frequency of the multiband.
To - End frequency of the multiband.
Attack Level - Attack level in ms per band.
Release Level - Release level in ms per band.
Ratio - The ratio determines how much compression is applied to a signal that goes over your threshold.
Measurements - Compression Levels Suggested in mono (L R = Mono).
Measurements L/R - Compression Levels Suggested for Left and Right channels.
Deviation - Percentage of the suggestion that is deviation, the unsure factor of the calculated compressor band suggestion.
Quality - OK for Good or Excellent, Not OK for a miscalculation.

Compressor Calculations
Multibands - Multiband (1 to 8 Maximum).
L Eff - Left Effectiveness in dB.
R Eff - Right Effectiveness in dB.
L Ave - Average Compression Level for Left.
R Ave - Average Compression Level for Right.
L Min - Minimum Compression Level for Left.
R Min - Minimum Compression Level for Right.
L Rms - Average Compression Level for Left.
R Rms - Average Compression Level for Right.
L R Max - Maximum Compression level for Left (R).
R R Max - Maximum Compression level for Right (R).
L Max - Maximum Compression level for Left.
R Max - Maximum Compression level for Right.
A Mono - Average Mono Compression Level.
C Mono - Mono Compression Level.
C Left - Left Compression Level
C Right - Right Compression Level.
X - Internal number for Frequency (0-1000).
Y - Internal number for Frequency (0-1000).
Freq 1 - Start Frequency of the filter band.
Freq 2 - End Frequency of the filter band.
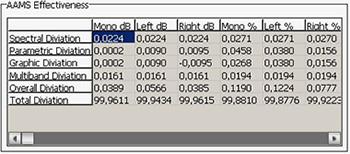
AAMS Effectiveness
Mono dB - Maximum deviation in Mono dB (L R).
Left dB - Maximum deviation in Left dB.
Right dB - Maximum deviation in Left dB.
Mono Percentage - Maximum deviation in Mono Percentage (L R).
Left Percentage - Maximum deviation in Left Percentage.
Right Percentage - Maximum deviation in Right Percentage.
Spectral Deviation - Spectral Deviation in maximum of dB.
Parametric Deviation - Parametric Deviation in maximum of dB.
Graphic Deviation - Graphic Deviation in maximum of dB.
Multiband Deviation - Multiband Deviation in maximum of dB.
Overall Deviation - Overall Deviation in maximum of dB.
Total Deviation - Total Deviation in percentage (close to 100%).
Print Documents
Print Graphic EQ Settings - Printout of EQ Suggestions.
Print Compressor Suggestion - Printout of Compressor Suggestions.
Print Compressor Calculations - Printout of Compressor Calculations.
Print AAMS Effectiveness - Printout of how effective AAMS is.
Print Mastering Document - Printout of the last Mastering Document.
Print All Charts - Printout of All Charts.
AAMS V4 Mastering Document
The mastering document is supplied with every master AAMS will output into a directory and is in TXT MSWORD format. It will show the AAMS Analyzer Suggestion and when processing is done towards a finished Audio Master, what settings where applied on the audio file. This can be handy as documenation and is written alongside the original audio file.
AAMS Auto Audio Mastering System - Mastering Document (Example)
Below is and example of an AAMS Mastering Document :
Source File : example audio file.aam
Reference File : Mastering_RMS.aam
Equalizer Suggestion - Settings
(1) Freq. : 10 Hz M : -26,6 dB L : -26,6 dB R : -26,6 dB
(2) Freq. : 18 Hz M : -17,3 dB L : -17,3 dB R : -17,3 dB
(3) Freq. : 27 Hz M : -11,1 dB L : -11,1 dB R : -11,1 dB
(4) Freq. : 36 Hz M : -14,5 dB L : -14,6 dB R : -14,5 dB
(5) Freq. : 46 Hz M : -6,9 dB L : -6,9 dB R : -6,9 dB
(6) Freq. : 56 Hz M : -7,2 dB L : -7,2 dB R : -7,2 dB
(7) Freq. : 67 Hz M : -9,0 dB L : -8,9 dB R : -9,1 dB
(8) Freq. : 78 Hz M : -8,1 dB L : -8,0 dB R : -8,1 dB
(9) Freq. : 90 Hz M : -3,1 dB L : -3,0 dB R : -3,1 dB
(10) Freq. : 102 Hz M : -0,5 dB L : -0,5 dB R : -0,5 dB
(11) Freq. : 115 Hz M : -3,3 dB L : -3,3 dB R : -3,3 dB
(12) Freq. : 128 Hz M : -4,7 dB L : -4,8 dB R : -4,7 dB
(13) Freq. : 142 Hz M : -5,9 dB L : -6,0 dB R : -5,8 dB
(14) Freq. : 157 Hz M : 0,3 dB L : 0,3 dB R : 0,4 dB
(15) Freq. : 173 Hz M : 3,3 dB L : 3,3 dB R : 3,4 dB
(16) Freq. : 189 Hz M : 3,1 dB L : 3,1 dB R : 3,0 dB
(17) Freq. : 206 Hz M : 1,4 dB L : 1,3 dB R : 1,4 dB
(18) Freq. : 224 Hz M : 3,0 dB L : 2,8 dB R : 3,1 dB
(19) Freq. : 243 Hz M : 4,5 dB L : 4,0 dB R : 5,1 dB
(20) Freq. : 263 Hz M : 9,2 dB L : 9,1 dB R : 9,3 dB
(21) Freq. : 284 Hz M : 7,8 dB L : 8,1 dB R : 7,5 dB
(22) Freq. : 306 Hz M : 7,9 dB L : 8,0 dB R : 7,8 dB
(23) Freq. : 329 Hz M : 9,6 dB L : 9,7 dB R : 9,6 dB
(24) Freq. : 353 Hz M : 7,8 dB L : 7,8 dB R : 7,7 dB
(25) Freq. : 379 Hz M : 3,6 dB L : 3,6 dB R : 3,6 dB
(26) Freq. : 405 Hz M : 4,7 dB L : 4,1 dB R : 5,3 dB
(27) Freq. : 433 Hz M : 7,2 dB L : 6,7 dB R : 7,8 dB
(28) Freq. : 462 Hz M : 6,0 dB L : 6,3 dB R : 5,8 dB
(29) Freq. : 493 Hz M : 9,1 dB L : 9,4 dB R : 8,8 dB
(30) Freq. : 525 Hz M : 10,9 dB L : 10,7 dB R : 11,1 dB
(31) Freq. : 559 Hz M : 9,9 dB L : 9,9 dB R : 10,0 dB
(32) Freq. : 594 Hz M : 9,5 dB L : 9,3 dB R : 9,7 dB
(33) Freq. : 632 Hz M : 9,3 dB L : 9,2 dB R : 9,4 dB
(34) Freq. : 670 Hz M : 13,0 dB L : 13,0 dB R : 13,0 dB
(35) Freq. : 712 Hz M : 10,7 dB L : 10,4 dB R : 10,9 dB
(36) Freq. : 755 Hz M : 9,7 dB L : 9,8 dB R : 9,7 dB
(37) Freq. : 801 Hz M : 13,0 dB L : 13,0 dB R : 12,9 dB
(38) Freq. : 847 Hz M : 11,7 dB L : 11,8 dB R : 11,7 dB
(39) Freq. : 898 Hz M : 10,7 dB L : 10,6 dB R : 10,7 dB
(40) Freq. : 949 Hz M : 7,5 dB L : 7,5 dB R : 7,4 dB
(41) Freq. : 1005 Hz M : 9,2 dB L : 9,2 dB R : 9,2 dB
(42) Freq. : 1062 Hz M : 8,3 dB L : 8,2 dB R : 8,3 dB
(43) Freq. : 1124 Hz M : 4,7 dB L : 4,7 dB R : 4,8 dB
(44) Freq. : 1186 Hz M : 5,2 dB L : 5,3 dB R : 5,2 dB
(45) Freq. : 1254 Hz M : 4,3 dB L : 4,4 dB R : 4,3 dB
(46) Freq. : 1322 Hz M : 3,7 dB L : 3,7 dB R : 3,8 dB
(47) Freq. : 1379 Hz M : 2,8 dB L : 2,7 dB R : 2,8 dB
(48) Freq. : 1472 Hz M : 0,4 dB L : 0,4 dB R : 0,4 dB
(49) Freq. : 1555 Hz M : 0,9 dB L : 0,8 dB R : 0,9 dB
(50) Freq. : 1638 Hz M : 2,1 dB L : 2,1 dB R : 2,1 dB
(51) Freq. : 1729 Hz M : 2,7 dB L : 2,7 dB R : 2,7 dB
(52) Freq. : 1820 Hz M : 1,6 dB L : 1,5 dB R : 1,7 dB
(53) Freq. : 1920 Hz M : 2,4 dB L : 2,4 dB R : 2,5 dB
(54) Freq. : 2021 Hz M : 5,0 dB L : 5,0 dB R : 5,0 dB
(55) Freq. : 2132 Hz M : 5,2 dB L : 5,3 dB R : 5,2 dB
(56) Freq. : 2243 Hz M : 5,4 dB L : 5,4 dB R : 5,3 dB
(57) Freq. : 2364 Hz M : 5,0 dB L : 5,0 dB R : 5,0 dB
(58) Freq. : 2486 Hz M : 4,6 dB L : 4,5 dB R : 4,6 dB
(59) Freq. : 2620 Hz M : 5,3 dB L : 5,2 dB R : 5,3 dB
(60) Freq. : 2755 Hz M : 6,5 dB L : 6,5 dB R : 6,4 dB
(61) Freq. : 2903 Hz M : 6,3 dB L : 6,3 dB R : 6,3 dB
(62) Freq. : 3051 Hz M : 5,6 dB L : 5,6 dB R : 5,6 dB
(63) Freq. : 3214 Hz M : 5,9 dB L : 5,9 dB R : 6,0 dB
(64) Freq. : 3377 Hz M : 5,9 dB L : 5,9 dB R : 6,0 dB
(65) Freq. : 3556 Hz M : 6,7 dB L : 6,7 dB R : 6,7 dB
(66) Freq. : 3736 Hz M : 5,1 dB L : 5,0 dB R : 5,1 dB
(67) Freq. : 3933 Hz M : 4,6 dB L : 4,5 dB R : 4,7 dB
(68) Freq. : 4131 Hz M : 3,8 dB L : 3,8 dB R : 3,9 dB
(69) Freq. : 4349 Hz M : 3,0 dB L : 3,0 dB R : 3,0 dB
(70) Freq. : 4567 Hz M : 3,9 dB L : 3,9 dB R : 3,8 dB
(71) Freq. : 4806 Hz M : 4,3 dB L : 4,3 dB R : 4,3 dB
(72) Freq. : 5046 Hz M : 2,9 dB L : 2,9 dB R : 2,9 dB
(73) Freq. : 5310 Hz M : 2,3 dB L : 2,2 dB R : 2,3 dB
(74) Freq. : 5575 Hz M : 0,8 dB L : 0,8 dB R : 0,8 dB
(75) Freq. : 5866 Hz M : 1,3 dB L : 1,3 dB R : 1,2 dB
(76) Freq. : 6157 Hz M : 2,5 dB L : 2,4 dB R : 2,5 dB
(77) Freq. : 6478 Hz M : 3,0 dB L : 3,0 dB R : 3,1 dB
(78) Freq. : 6799 Hz M : 2,5 dB L : 2,5 dB R : 2,5 dB
(79) Freq. : 7152 Hz M : 3,5 dB L : 3,5 dB R : 3,5 dB
(80) Freq. : 7505 Hz M : 4,2 dB L : 4,2 dB R : 4,2 dB
(81) Freq. : 7894 Hz M : 4,5 dB L : 4,5 dB R : 4,5 dB
(82) Freq. : 8283 Hz M : 5,2 dB L : 5,2 dB R : 5,2 dB
(83) Freq. : 8712 Hz M : 5,0 dB L : 4,9 dB R : 5,0 dB
(84) Freq. : 9141 Hz M : 2,8 dB L : 2,8 dB R : 2,9 dB
(85) Freq. : 9613 Hz M : 2,4 dB L : 2,4 dB R : 2,4 dB
(86) Freq. : 10085 Hz M : 2,2 dB L : 2,1 dB R : 2,2 dB
(87) Freq. : 10605 Hz M : 1,8 dB L : 1,7 dB R : 1,9 dB
(88) Freq. : 11125 Hz M : 1,5 dB L : 1,4 dB R : 1,5 dB
(89) Freq. : 11698 Hz M : 2,7 dB L : 2,6 dB R : 2,8 dB
(90) Freq. : 12271 Hz M : 3,5 dB L : 3,3 dB R : 3,6 dB
(91) Freq. : 12902 Hz M : 2,8 dB L : 2,7 dB R : 3,0 dB
(92) Freq. : 13533 Hz M : 3,2 dB L : 3,1 dB R : 3,3 dB
(93) Freq. : 14228 Hz M : 3,6 dB L : 3,6 dB R : 3,5 dB
(94) Freq. : 14924 Hz M : 5,1 dB L : 5,2 dB R : 5,0 dB
(95) Freq. : 15689 Hz M : 5,0 dB L : 5,1 dB R : 4,8 dB
(96) Freq. : 16455 Hz M : 2,9 dB L : 2,9 dB R : 2,9 dB
(97) Freq. : 17299 Hz M : 2,2 dB L : 2,1 dB R : 2,3 dB
(98) Freq. : 18143 Hz M : 1,5 dB L : 1,6 dB R : 1,4 dB
(99) Freq. : 19046 Hz M : 4,0 dB L : 4,0 dB R : 4,0 dB
(100) Freq. : 20000 Hz M : 7,2 dB L : 7,1 dB R : 7,3 dB
Compressor Suggestion - Settings
Compressor Band : 1
Start Frequency : 5,3 Hz
End Frequency : 92,1 Hz
Compression M : 0,3 dB
Compression Left : 0,4 dB
Compression Right : 0,3 dB
Compressor Band : 2
Start Frequency : 92,1 Hz
End Frequency : 504,1 Hz
Compression M : 1,0 dB
Compression Left : 0,9 dB
Compression Right : 1,1 dB
Compressor Band : 3
Start Frequency : 504,1 Hz
End Frequency : 1008,2 Hz
Compression M : 1,2 dB
Compression Left : 1,2 dB
Compression Right : 1,2 dB
Compressor Band : 4
Start Frequency : 1008,2 Hz
End Frequency : 2000,0 Hz
Compression M : 1,2 dB
Compression Left : 1,2 dB
Compression Right : 1,2 dB
Compressor Band : 5
Start Frequency : 2000,0 Hz
End Frequency : 4000,5 Hz
Compression M : 2,4 dB
Compression Left : 2,4 dB
Compression Right : 2,3 dB
Compressor Band : 6
Start Frequency : 4000,5 Hz
End Frequency : 8001,7 Hz
Compression M : 1,6 dB
Compression Left : 1,6 dB
Compression Right : 1,7 dB
Compressor Band : 7
Start Frequency : 8001,7 Hz
End Frequency : 12089,1 Hz
Compression M : 3,5 dB
Compression Left : 3,5 dB
Compression Right : 3,5 dB
Compressor Band : 8
Start Frequency : 12089,1 Hz
End Frequency : 20000,0 Hz
Compression M : 3,6 dB
Compression Left : 3,7 dB
Compression Right : 3,6 dB
DSP-EQ Results
Fader End Volume L : -3,4 dB
Fader End Volume R : -3,4 dB
DSP-Compressor Results
Hunting Repeats : 4 / 10
Compressor band : 1
Start Frequency : 5,3 Hz
End Frequency : 92,1 Hz
Suggestion Mono : 0,3 dB
Suggestion Left : 0,4 dB
Measured Left : -0,4 dB
Differences Left : 0,0 dB
Threshold Left : -3,5 dB
AGC Correct Left : OK.
Suggestion Right : 0,3 dB
Measured Right : -0,3 dB
Differences Right : 0,0 dB
Threshold Right : -3,5 dB
AGC Correct Right : OK.
Compressor band : 2
Start Frequency : 92,1 Hz
End Frequency : 504,1 Hz
Suggestion Mono : 1,0 dB
Suggestion Left : 0,9 dB
Measured Left : -0,9 dB
Differences Left : 0,0 dB
Threshold Left : -4,1 dB
AGC Correct Left : OK.
Suggestion Right : 1,1 dB
Measured Right : -1,1 dB
Differences Right : 0,0 dB
Threshold Right : -4,1 dB
AGC Correct Right : OK.
Compressor band : 3
Start Frequency : 504,1 Hz
End Frequency : 1008,2 Hz
Suggestion Mono : 1,2 dB
Suggestion Left : 1,2 dB
Measured Left : -1,2 dB
Differences Left : 0,0 dB
Threshold Left : -4,9 dB
AGC Correct Left : OK.
Suggestion Right : 1,2 dB
Measured Right : -1,2 dB
Differences Right : 0,0 dB
Threshold Right : -4,9 dB
AGC Correct Right : OK.
Compressor band : 4
Start Frequency : 1008,2 Hz
End Frequency : 2000,0 Hz
Suggestion Mono : 1,2 dB
Suggestion Left : 1,2 dB
Measured Left : -1,2 dB
Differences Left : 0,0 dB
Threshold Left : -5,0 dB
AGC Correct Left : OK.
Suggestion Right : 1,2 dB
Measured Right : -1,2 dB
Differences Right : 0,0 dB
Threshold Right : -5,0 dB
AGC Correct Right : OK.
Compressor band : 5
Start Frequency : 2000,0 Hz
End Frequency : 4000,5 Hz
Suggestion Mono : 2,4 dB
Suggestion Left : 2,4 dB
Measured Left : -2,4 dB
Differences Left : 0,0 dB
Threshold Left : -6,6 dB
AGC Correct Left : OK.
Suggestion Right : 2,3 dB
Measured Right : -2,3 dB
Differences Right : 0,0 dB
Threshold Right : -6,6 dB
AGC Correct Right : OK.
Compressor band : 6
Start Frequency : 4000,5 Hz
End Frequency : 8001,7 Hz
Suggestion Mono : 1,6 dB
Suggestion Left : 1,6 dB
Measured Left : -1,6 dB
Differences Left : 0,0 dB
Threshold Left : -5,8 dB
AGC Correct Left : OK.
Suggestion Right : 1,7 dB
Measured Right : -1,7 dB
Differences Right : 0,0 dB
Threshold Right : -5,8 dB
AGC Correct Right : OK.
Compressor band : 7
Start Frequency : 8001,7 Hz
End Frequency : 12089,1 Hz
Suggestion Mono : 3,5 dB
Suggestion Left : 3,5 dB
Measured Left : -3,5 dB
Differences Left : 0,0 dB
Threshold Left : -6,7 dB
AGC Correct Left : OK.
Suggestion Right : 3,5 dB
Measured Right : -3,5 dB
Differences Right : 0,0 dB
Threshold Right : -6,7 dB
AGC Correct Right : OK.
Compressor band : 8
Start Frequency : 12089,1 Hz
End Frequency : 20000,0 Hz
Suggestion Mono : 3,6 dB
Suggestion Left : 3,7 dB
Measured Left : -3,7 dB
Differences Left : 0,0 dB
Threshold Left : -6,2 dB
AGC Correct Left : OK.
Suggestion Right : 3,6 dB
Measured Right : -3,6 dB
Differences Right : 0,0 dB
Threshold Right : -6,2 dB
AGC Correct Right : OK.
DSP-Compressor AGC Status
All AGC Correct!
Fader End Volume : 0.00 dB
Fader End Balance : 0.00 dB
DSP-Loudness Results
Master End Balance : 0,00 dB
Master End Loudness : 0,21 dB
DSP-Loudness Results
Master End Balance : 0,00 dB
Master End Loudness : 0,04 dB
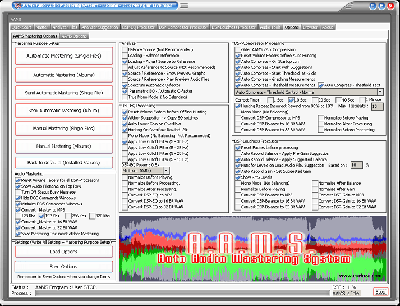
AAMS Mastering Options
On Program Startup
Startup - Create Desktop Icon
Creates an icon for AAMS on your desktop. This icon is also created by installation of AAMS.
When you double click on the AAMS Icon on your desktop the AAMS Software will start.
Create Startup Icon
Creates an icon for AAMS in the Start Menu. This icon is created at installation.
When you click on the AAMS Windows Menu item the AAMS Software will start.
AAMS Options
Show Status Messages in Status tab
Standard to ON. Shows the status messages in AAMS Status Tab. The status messages are mainly to indicate AAMS progress. And serves as a purpose for debugging.
Save Processor Time while Mastering is Busy
Standard to ON. This reduces a bit of processing power that is needed for playback, but not needed while AAMS is mastering. Therefore reduces processortime when AAMS is mastering.
While AAMS is Mastering, follow Display and Tabs
While AAMS is Mastering, the display will follow the Processing by visually see the Tab that AAMS is busy with processing.
Standard is ON.
Save differences beween Source and Reference
This Saves the EQ Suggestions from the loaded Source and Reference in an *.aam file.
Load default ISO226 EQ Spectrum
Load the EQ Suggestions from the AAMS main folder EQ.aam. This is the ISO226 Flecher curve (AAMS Loudness Curves) for human hearing. Do not change the EQ.aam file unless you know what you are doing.
AAMS Display Visual Skin Colors
The user can choose a different skinfile by clicking the button and choosing a skin file for AAMS.
This will change the looks and feel of AAMS. Standard is AAMS3.ssk.
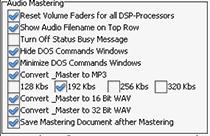
Audio Mastering and Processing
Reset Volume Faders for all DSP-Processors
By default ON. This feature ensures by start of processing that all faders are reset to initial values. So it resets all faders to standard AAMS settings again before each mastering start. If you touched the faders, they will be reset before starting processing. You can turn this feature OFF when you are using manual mastering (nut don't turn this to Off when you don't know what your are doing, it is not recommended.
Show Audio Filename on Top Row
Shows the audio filename on the top of AAMS Auto Audio Mastering System and extends the text with the audio filename you have loaded or the filename AAMS is busy with mastering.
Turn Off Status Busy Message
Turns the busy message Off (not recommended).
Hide DOS Commands Windows
Cannot be changed.
Minimize DOS Commands Windows
Cannot be changed.
AAMS Audio Processing DSP Audio Output File(s)
Convert DSP EQ to MP3
When set and AAMS is mastering or you use DSP-EQ to record (output files), the recording audio file will be saved as MP3 file.
Convert DSP EQ to 16 Bit WAV
When set and AAMS is mastering or you use DSP-EQ to record (output files), the recording audio file will be saved as WAV format 16 bit file.
Convert DSP EQ to 32 Bit Float WAV
When set and AAMS is mastering or you use DSP-EQ to record (output files), the recording audio file will be saved as WAV format 32 bit float file.
Convert DSP Compressor to MP3
When set and AAMS is mastering or you use DSP-Compressor to record (output files), the recording audio file will be saved as MP3 file.
Convert DSP Compressor to 16 Bit WAV
When set and AAMS is mastering or you use DSP-Compressor to record (output files), the recording audio file will be saved as WAV format 16 bit file.
Convert DSP Compressor to 32 Bit Float WAV
When set and AAMS is mastering or you use DSP-Compressor to record (output files), the recording audio file will be saved as WAV format 32 bit float file.
Convert DSP Loudness Gain to MP3
When set and AAMS is mastering or you use DSP-Loudness Gain to record (output files), the recording audio file will be saved as MP3 file.
Convert DSP Loudness Gain to 16 Bit WAV
When set and AAMS is mastering or you use DSP-Loudness Gain to record (output files), the recording audio file will be saved as WAV format 16 bit file.
Convert DSP Loudness to 32 Bit Float WAV
When set and AAMS is mastering or you use DSP-Loudness to Gain record (output files), the recording audio file will be saved as WAV format 32 bit float file.
Convert DSP Loudness Balnce to MP3
When set and AAMS is mastering or you use DSP-Loudness to Balance record (output files), the recording audio file will be saved as MP3 file.
Convert DSP Loudness Balance to 16 Bit WAV
When set and AAMS is mastering or you use DSP-Loudness to Balance record (output files), the recording audio file will be saved as WAV format 16 bit file.
Convert DSP Loudness Balance to 32 Bit Float WAV
When set and AAMS is mastering or you use DSP-Loudness to Balance record (output files), the recording audio file will be saved as WAV format 32 bit float file.
AAMS Audio Mastering Audio Output File(s)
Save Mastering File(s) with Reference Name
This will write the Reference Name choosen behind the Audio Filename of each mastered outcome.
By this why you can find in the AAMS Audio Mastered files will have the reference name as extention text.
So you know by what reference the audio master has been mastered with by AAMS.
Convert AAMS Mastered Audio File to Mp3
This will output an MP3 file just alike the WAV file as output file written by AAMS Mastering. Standard turned ON and with 192Kbs as setting.
MP3 Lame bitrates can be set 96,128,196,256,320 or 512 Kbps.
Convert _Master to 16bit Wav
The AAMS mastered output file is standard 16bit Integer 44.1khz WAV file format.
This is CD Quality format.
Convert _Master to 32bit Wav
The AAMS mastered output file is standard 32bit Float 44.1khz WAV file format.
This is a beter resolution format.
Save Mastering Document after Mastering
By default ON. This feature will create a full mastering document (*.doc) in the directory were AAMS is processing your audio files. This document can tell you all settings AAMS used while mastering your track. The document is saved alongside your original file in the same directory. This document can be used for learning and mixing / mastering purposes. Also this document tells you the mastering end results for all DSP processing Features of AAMS. When not needed, you can turn this feature OFF.
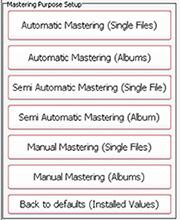
Mastering Purpose Setup
There are 7 buttons to choose from, AAMS will setup itself to according settings. Instead of fiddling with AAMS separate options, you can choose AAMS Settings for Mastering Purposes directly by clicking on one of these 7 buttons and saving the options. The mastering purposes can be different for a user, because for normal mastering of 1 single track or mastering for an full album or collection. This is shown as (Single Files) or (Album) in the buttons name. By default AAMS is setup for Full Automatic Mastering for Single Files (without any user interference or control over AAMS suggestions or processing).
Back to defaults (Installed Values)
Will turn the whole AAMS Options towards original basic settings for AAMS Mastering. The basic settings are for Auto Mastering Features and Single File Automatic Mastering. This is a standard setup for AAMS as it was installed. Use ' Back to defaults' when you are not sure anymore and you changed settings in AAMS options. AAMS will return to original settings. Use Save Options to write the options file and you are back to AAMS defaults at each startup of AAMS. Whilst you do not change settings afterwards, you can revert to the standard setup by clicking Back to Defaults and then Save Options (Buttons).
Automatic Mastering (Single File)
This button will setup AAMS for full automatic mastering as intended (as by AAMS installation). Use this setting for each audio file to be corrected and mastered by AAMS for full best sound possible (on all speaker systems). Single Files means single tracks that do not need coherence between them, because you want then to be mastered as best as AAMS can. This Single File mastering setup can be good for Audio that spread on the internet or streaming services. Mostly as MP3 or some kind of packed audio data. Also it is a good setup for audio collections of MP3 files to be remasterd (like using for Batch Mastering Multibple files at once). As long a you understand it is Full AAMS mastering and for Single File(s). Use Save Options to write these options settings.
Automatic Mastering (Albums)
This button will setup AAMS for full automatic mastering as intended for Albums or Collections. This setting is for when you are mastering for Albums (sets of single tracks that need coherence between each other as a whole. Mostly an Album will explain much with 16 tracks but released by an single artist or band, DJ or performing act. The main thing here is that AAMS will Analyze and take all the tracks inside the collection or album, and master with an overall reference in mind. So AAMS will master each track as best, but within coherence of the Album. That is a bit different then Mastering for Single Files. When you need the same processing to be done by AAMS on a set of audio files that have the same purpose (they are forming an Album, they are common to each other), use this setting. Use Save Options to write these options settings
Semi-Automatic Mastering (Single File)
This button will setup AAMS for semi-automatic mastering, use this setting for each audio file to be correct for full best sound. Use this setting for each audio file to be corrected and mastered by AAMS for full best sound possible (on all speaker systems). Single Files means single tracks that do not need coherence between them, because you want then to be mastered as best as AAMS can. This Single File mastering setup can be good for Audio that spread on the internet or streaming services. Mostly as MP3 or some kind of packed audio data. Also it is a good setup for audio collections of MP3 files to be remasterd (like using for Batch Mastering Multibple files at once).The Realtime Analyzer is now turned ON for DSP-EQ and DSP-Compressor. These give the user some more input on AAMS Analzyer, DSP-EQ and DSP-Compressor visualisation when playing audio files and to adjust AAMS parameters. Use Save Options to write these options settings.
Semi-Automatic Mastering (Album)
This button will setup AAMS for semi-automatic mastering. This setting is for when you are mastering for Albums (sets of single tracks that need coherence between each other as a whole. Mostly an Album will explain much with 16 tracks but released by an single artist or band, DJ or performing act. The main thing here is that AAMS will take all the tracks inside the collection or album, and master with an overall reference in mind. So AAMS will master each track as best, but within coherence of the Album. When you need the same processing to be done by AAMS on a set of audio files that have the same purpose (they are forming an Album), use this setting. The Realtime Analyzer is now turned ON for DSP-EQ and DSP-Compressor. These give the user some more input on AAMS Analzyer, DSP-EQ and DSP-Compressor visualisation when playing audio files and to adjust AAMS parameters. The output files of AAMS Mastering becomes much more by adding in-between files that do come from DSP-EQ, DSP-Compressor and DSP-Balancing and DSP-Loudness. Therefore the user can have acces to all files that AAMS can save including the inbetween files (in between AAMS processing) and the Mastered Outcome. Use Save Options to write these options settings.
Manual Mastering (Single File)
This button will setup AAMS for manual mastering Single Files, use this setting for each audio file to be correct for full best sound. The user is expected to know about audio mastering, but the AAMS software will still be helping by Mastering or doing suggestions. The user is free to setup AAMS and adjust parameters. Mostly the user is recommended to use DSP-EQ Recording, DSP-Compresor Recording and DSP-Balance and DSP-Loudness Recording. These are 3 steps that complete an audio mastering inside AAMS Software. But the user can still use Automatic Mastering functions of AAMS, even do a complete full automatic mastering. The Realtime Analyzer is now turned ON for DSP-EQ and DSP-Compressor. These give the user some more input on AAMS Analzyer, DSP-EQ and DSP-Compressor visualisation when playing audio files and to adjust AAMS parameters. The output files of AAMS Mastering becomes much more by adding in-between files that do come from DSP-EQ, DSP-Compressor and DSP-Balancing and DSP-Loudness. Therefore the user can have acces to all files that AAMS can save including the inbetween files (in between AAMS processing) and the Mastered Outcome. Use Save Options to write these options settings.
Manual Mastering (Album)
This button will setup AAMS for manual mastering for Albums. When you need the same processing to be done by AAMS on a set of audio files that have the same purpose (they are forming an Album), use this setting. The user is expected to know about audio mastering, but the AAMS software will still be helping by Mastering or doing suggestions. The user is free to setup AAMS and adjust parameters. Mostly the user is recommended to use DSP-EQ Recording, DSP-Compresor Recording and DSP-Balance and DSP-Loudness Recording. These are 3 steps that complete an audio mastering inside AAMS Software. But the user can still use Automatic Mastering functions of AAMS, even do a complete full automatic mastering. The output files of AAMS Mastering becomes much more by adding in-between files that do come from DSP-EQ, DSP-Compressor and DSP-Balancing and DSP-Loudness. Therefore the user can have acces to all files that AAMS can save including the inbetween files (in between AAMS processing) and the Mastered Outcome.The Realtime Analyzer is now turned ON for DSP-EQ and DSP-Compressor. These give the user some more input on AAMS Analzyer, DSP-EQ and DSP-Compressor visualisation when playing audio files and to adjust AAMS parameters. Use Save Options to write these options settings.

Settings (Write All Settings + Mastering Purpose Setup)
Load Options
Loads options settings from disk. Reloads the AAMS.INA file and restores the options. This feature can be used when you need to reset AAMS options.
Save Options
Saves options settings to disk. Saves all options in the AAMS.INA file. This feature must be used when you changed any option as mentioned above. You can restore AAMS defaults in the preferences tab.
Back To Defaults
Initialize Options to default settings.
AAMS Program Options
The Program path, Program name and Windows Path list directories that cannot be changed.
Check Windows Version
Allows the Windows Version number to shown. This feature is for the user and debugging purposes.
Show Program Path
Shows the AAMS direcory where AAMS is working in / from (as default working directory).
Turn Off Monitor
Turn Off the Monitor (dont try if you cannot turn your monitor On again!).
Turn On Monitor
Turns the Monitor Back On.
Screensaver On
Runs the screensaver from Windows.
Screensaver Off
Turn the screensaver Off.
Soundcard
AAMS Internal processing do not need a soundcard installed on your computer, though the soundcard is only needed for playback. This sets the default playback soundcard for AAMS. AAMS does all processing inside the AAMS program. The soundcard is only needed to play audio and to listen. The availability of a soundcard is not needed, AAMS does all processing internally. Button - Reset Soundcard.
Internet Connection
The internet is only used for seeking AAMS Updates. No user info or other info is transmitted or send, the website www.curioza.com is checked for AAMS Higher versions or Updates. If so it will state here 'AAMS Updates is Online' and that Winsock is Enabled, then you are online. Show if you have internet in Windows and if it is working correctly. This is a check that AAMS can download updates.
Check for AAMS Updates
Checks for AAMS updates (newer versions available from www.curioza.com. If so AAMS will ask you to download.Most likely the AAMS.zip file will be placed on your Windows Desktop.
Check Internet Connection
Checks the internet connection of your Windows again.
Memory Readout
For debugging purposes, the author or software support can ask you to turn on this option. Mainly the user does not have to turn on this feature when not asked for. This feature measures memory and file handles while aams is processing. The log file will be save to disk, for later use by software support or debugging purposes. This is only needed for debugging sessions of AAMS. The user has no gain by turning this ON. Rather let it stay Off (unchecked). But however for debigging and problem finding of AAMS support, the user can be asked to turn this On.
Processor Information
Shows the Processor of your computer, the info readout of the processor name and brand, id, etc. The last row AAMS Calculations and DSP system (64bits or 32bits) decides the calculation density for AAMS.

Settings, Save Options
Saves all options in the AAMS.INA file. This feature must be used when you changed any option as mentioned above. You can restore AAMS defaults in the preferences tab.
Settings, Load Options
Reloads the AAMS.INA file and restores the options. This feature can be used when you need to reset AAMS options.
Back to Defaults
Resets AAMS to basic installation defaults.
Refresh, refreshes the screen and basic processing functions.
Stop All Processing, this is the button to hit whem you need AAMS to stop what it is processing or doing. AAMS will stop or be halted. If this is needed (hitting the Stop button repeatedly) then you may want to restart AAMS also to be in its default state of startup again.
DSP-Processing Options
Further setups and options are available in DSP-EQ, DSP-Compressor and DSP-Loudness.

How to get the sound you want and re-use it ?
With AAMS V4 there are several ways to get to your own sound, the sound you like! First we want to explain that with AAMS V4 standard references, you can get very close to a good general sound on your masterd audio file. But you need to EQ the outcome if you are not satisfied yet ? Well that is one possibillity. The other possibillities are explained below.
AAMS V4 uses Reference Files to define a complete frequency spectrum from 5 Hz to 20.000 Hz, it also contains compression, loudness scans and other sound analyzed settings found by AAMS analyzer. These files can be found in AAMS V4 Database of Styles (References). For example the ‘Mastering_RMS’ is a general reference preset for a beginning user to start from. This general mastering preset is a good point to start from, but however maybe will not result into what you want to hear. So that will fix a lot, maybe it will not get you exactly the sound with accuracy 100%. This is because maybe you use speakers or an environment room that is not linear and maybe you hear some more bass or less high ? Anyway, try to listen on as many speaker systems you can find, even headphones, even in your car or even somebody else audio setup. Before you decide what you want or need to change (into the frequency spectrum), to make you happy. Anyway, if you know you are right about the sound you want, how do you get there exactly ? With AAMS V4 it is now possible to get very close or exactly there! Read about the solutions below. And watch the Video!
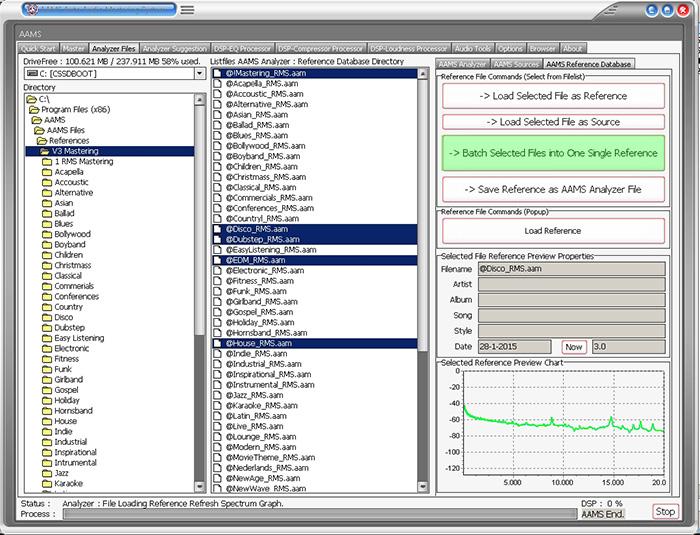
Combining out of the Reference Database of Styles
Until now we have only used the ‘Mastering_RMS’ single reference preset out of the AAMS V4 Database of Musical Styles. But we can also combine several references out of the database and batch them into one new single reference. For this we only have to select multiple references with the 'CTRL' key pressed and use the batch function. See the blue selected references out of the database and press the green 'Batch Selected files into One Single Reference'. You can name the file and save it to disk with the filemanager that will pop up. Now the adjusted reference is saved, you can use it as your own adjusted reference, again and again.
Analyze audio from other sources
One of the options is to analyze audio from other sources, like from other artists, tracks, albums. Collect them in one single directory and analyze them with AAMS Analyzer (read the manual for more explenation). When you have analyzed them all, you can batch a new reference out of the collection of analyzed files. AAMS will then batch a new reference out of all analyzed files and saves it to disk. The new reference is a good starting point and maybe is a better way to get the sound you need.
Adjust the Reference you already use or have chosen
With some testing and maybe working a longer time with AAMS V4, you maybe have some idea’s witch references you are using most, or witch reference are giving you a good sound from the beginning. Maybe you are using the ‘Mastering_RMS’ reference from the database ? Or maybe you have an own reference ? Anyway, the solution is you can always adjust the reference to your own needs and therefore be much closer to the sound you want.
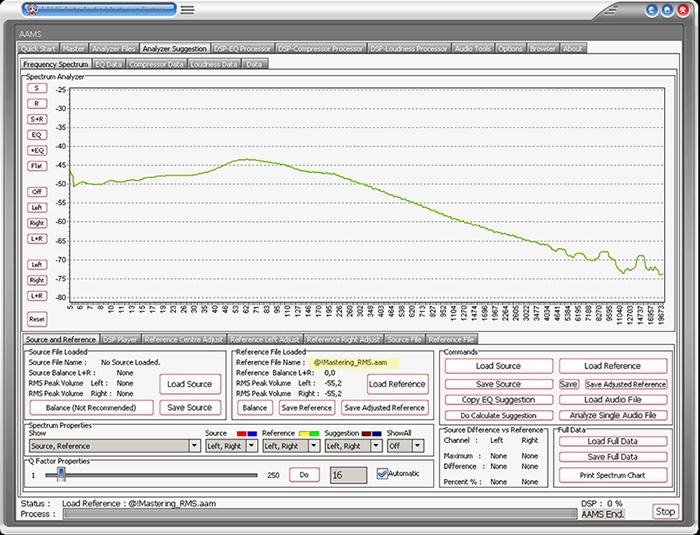
We have loaded the ‘Mastering_RMS’ reference out of the database as our tutorial reference. We have not loaded the source file. Off course you can load any reference file instead. See in yellow the name of the reference that has been loaded.
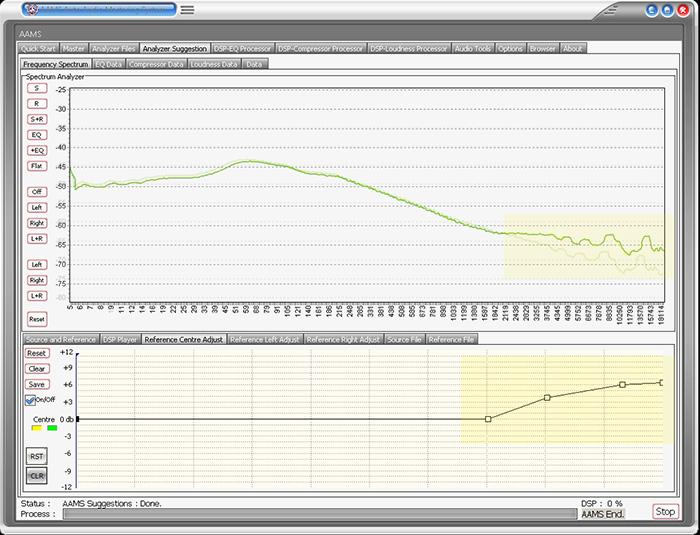
On the Reference Adjust Tab we have changed the Spectrum for the Highs and some Mids with the curve and 4 points. In yellow above you can see the effect it has on the original spectrum, that results in raised frequencies in the upper bands.
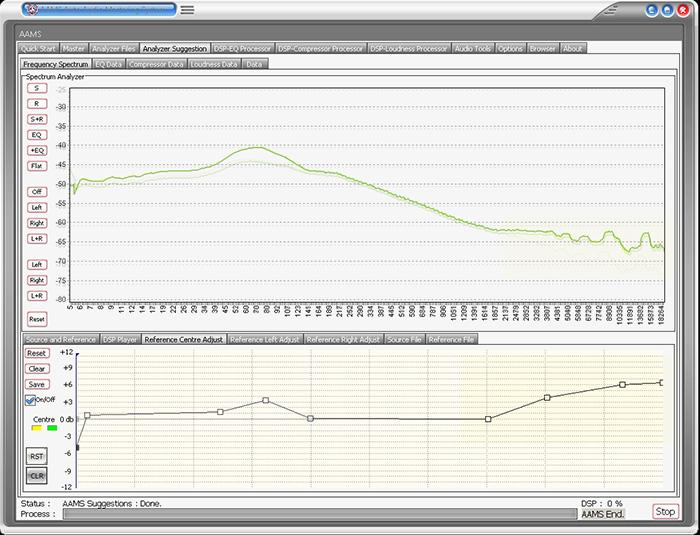
For more adjusting, we have created some extra bass frequencies in the spectrum around 80 hz and have a little cutoff in the beginning at 5-20 hz.
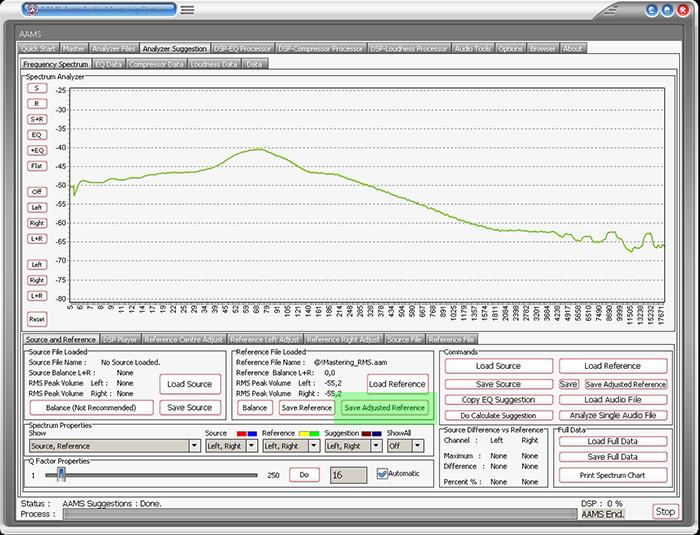
Finally we can save the adjusted reference (see the green button) Save Adjusted Reference. You can name the file and save it to disk with the filemanager that will pop up. Now the adjusted reference is saved, you can use it as your own adjusted reference, again and again. This is a fast explenation of how to adjust the spectrum reference to your own needs and adjust it towards creating your own sound.
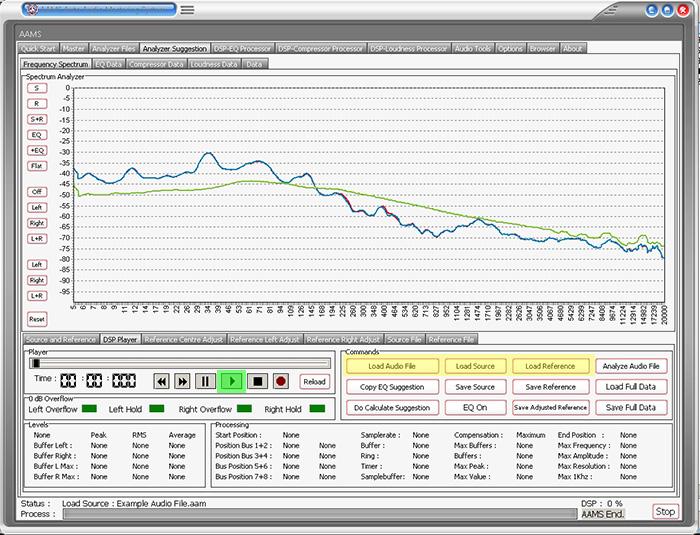
Playing the Source Audio with the Adjusted Reference
Have turned to the tab 'DSP-Player' that can play at any time the source audio material. Above we have loaded the source and reference (yellow buttons). When we press 'Play'(green) the source audio file will be played trough your computer soundcard. If you adjust the Reference like explained above, the changes can be directly heard, so with the Reference Centre or Left or Right Adjust Tabs you can change the reference spectrum while playing. You can hear the differences from your changes at any time, AAMS will adapt the sound with the DSP-EQ processor and updates directly. When you are satisfied, you can save the reference by 'Save Adjusted Reference' to disk. You can name the file and save it to disk with the filemanager that will pop up. Now the adjusted reference is saved, you can use it as your own adjusted reference, again and again.
Any combination of the above will work
If you are using AAMS V4 database of Reference Styles or you analyze your own tracks into AAMS. Or if you use the Reference Adjust Tabs, you can alther and change the way AAMS will master your own music, towards the Reference. Any combination will work and you can progress and build toward a final reference that suits your own musical style. You can even build your own library of references, it is up to you and your musical differences how many styles you need to cover your own music. We have only explained the basic steps to building your own sound reference files. And just to make it faster for mastering, once you have a good reference you like, it can be re-used again.
Now you can listen what you expect!
This video will show how to analyze multiple audio files with AAMS V4. And then create one single reference out of them, with a Batch Reference! And will show you how to adjust the Reference with the Analyzer Spectrum Adjust. For Centre Channels, Left or Right Channels. And save the Reference for later use. Therefore being in control of your own sound! And re-use it anytime you want.
Now you can listen what you expect!

AAMS Mastering LUFS for Streaming Services
Back in the wild days of the internet many streaming services arose. At the same time, there were loudness wars ramping up on Tv and video streaming. Along the way, we had a massive range of loudness per platform. If you had your headphones in and listened to a song and then flipped to another you might hear a huge difference in volume. So some really smart people made a standard of tracking loudness. There are two main ones LUFS and LKFS. But LUFS and LKFS are in practice the same thing.
This standard helped make volumes of songs or video be pretty close to each other. It has helped a lot in ending the loudness wars. The different streaming services have different loudness standards and algorithms to take measurements and apply the normalization. When mastering songs we want to keep the LUFS range to be the final range by that particular streaming service. Otherwise, if we go over then the service might lower the volume to get the LUFS they have decided to keep as a standard.
I also like to remind engineers of the art of mastering as well. The rule of thumb has been the same since the 90s, make it as loud as possible as long as it still sounds good. You want to make it loud, but not distort the sound. AAMS will first create a normal audio master. Then applies the LUFS of the streaming services to the outputted AAMS Master.
Having said this, it makes sense to know the LUFS standard of the platform you are releasing on. You can change the default setting for all streaming services, if you need to. There is no reason to push the sound louder and degrade the sound further if the platform you are releasing on is going to lower it anyways, resulting in the same volume and worse quality. You want to balance the art of making it sound good with the science of the standard of each platform.
The latest addition to AAMS is mastering for streaming services, found in the Options Tab.

Here you can find all options for AAMS Mastering for Streaming Services alike AAMS LUFS, Spotify, YouTube, Apple Music or Apple iTunes, Tidal and Soundcloud. For each service the will be an AAMS Master. So if you enable all, you will have more AAMS Mastered files.

Standard by default AAMS LUFS Loudness Mastering is Enabled. AAMS will perform a LUFS Loudness scan under R128 (Loudness Normalisation and Permitted Maximum Level of Audio Signals ) and the recommendation ITU-R BS.1770-3 (Algorithms to Measure Audio Programme Loudness and True-Peak Audio Level), these are standards for Loudness Normalisation and is fully implemented into AAMS. These standards are mostly also implemented by Streaming Services. When you disable this setting AAMS will not master any outcome for streaming services, also the AAMS loudness scan LUFS is disabled.
LUFS Loudness Scan
The outcome of the Audio that has been Scanned by AAMS Loudness Scan. Measured in LUFS. This is the last scanned audio file that passed trough AAMS. That can be either by AAMS Mastering or the user by using the buttons placed below the streaming services settings.
LUFS Loudness Reference
Measured in LUFS, this is the last reference used. That can be either by AAMS Mastering or the user by using the buttons placed below the streaming services settings.
LUFS Loudness Gain
Measured in dB, this is the last gain of volume used . That can be either by AAMS Mastering or the user by using the buttons placed below the streaming services settings.
AAMS User Default
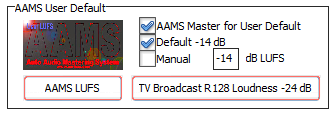
The AAMS User Default is basically done after AAMS has mastered your audio file and you want to bring the AAMS Mastered audio toward a LUFS level. Standard for AAMS LUFS mastering is -14 dB LUFS. You can also change the value by using the manual setting.
AAMS Master for User Default
This is standard enabled. Disable and you will not get a saved audio file for AAMS LUFS.
Default -14 dB
This is standard enabled. Standard for AAMS LUFS mastering is -14 dB LUFS.
Manual
This is standard disabled. When manual is enabled, you can fill in a target (reference) in dB LUFS for AAMS LUFS mastering. You need to disable Default and enable Manual.
Remember when needed for a longer permanent time, use save options!
AAMS LUFS Button
Using this button you can import an audio file and that will be brought to the AAMS LUFS target and is saved.
TV Broadcast R128 Loudness -24 dB
Using this button you can import an audio file and that will be brought to the Television target -24 dB LUFS and is saved.
AAMS Master for Spotify
AAMS Master for Spotify
Standard this is Disabled. Enable when you need an AAMS Audio Master that fits the Spotify LUFS target. When enabled, AAMS will save an audio master for Spotify.
Default -14 dB
This is standard enabled. Standard for Spotify LUFS mastering is -14 dB LUFS
Manual
This is standard disabled. When manual is enabled, you can fill in a target (reference) in dB LUFS for Spotify LUFS mastering. You need to disable Default and enable Manual.
Remember when needed for a longer permanent time, use save options!
AAMS Spotify Button
Using this button you can import an audio file and that will be brought to the Spotify LUFS target and is saved.
AAMS Master for YouTube

AAMS Master for YouTube
Standard this is Disabled. Enable when you need an AAMS Audio Master that fits the YouTube LUFS target. When enabled, AAMS will save an audio master for YouTube.
Default -14 dB
This is standard enabled. Standard for YouTube LUFS mastering is -14 dB LUFS
Manual
This is standard disabled. When manual is enabled, you can fill in a target (reference) in dB LUFS for YouTube LUFS mastering. You need to disable Default and enable Manual.
Remember when needed for a longer permanent time, use save options!
AAMS YouTube Button
Using this button you can import an audio file and that will be brought to the YouTube LUFS target and is saved.
AAMS Master for Apple
AAMS Master for Apple
Standard this is Disabled. Enable when you need an AAMS Audio Master that fits the Apple LUFS target. When enabled, AAMS will save an audio master for Apple.
Default -16 dB
This is standard enabled. Standard for Apple LUFS mastering is -16 dB LUFS
Manual
This is standard disabled. When manual is enabled, you can fill in a target (reference) in dB LUFS for Apple LUFS mastering. You need to disable Default and enable Manual.
Remember when needed for a longer permanent time, use save options!
AAMS Apple Button
Using this button you can import an audio file and that will be brought to the Apple LUFS target and is saved.
AAMS Master for Tidal
AAMS Master for Tidal
Standard this is Disabled. Enable when you need an AAMS Audio Master that fits the Tidal LUFS target. When enabled, AAMS will save an audio master for Tidal.
Default -18 dB
This is standard enabled. Standard for Tidal LUFS mastering is -18 dB LUFS
Manual
This is standard disabled. When manual is enabled, you can fill in a target (reference) in dB LUFS for Tidal LUFS mastering. You need to disable Default and enable Manual.
Remember when needed for a longer permanent time, use save options!
AAMS Tidal Button
Using this button you can import an audio file and that will be brought to the Tidal LUFS target and is saved.
AAMS Master for SoundCloud
AAMS Master for SoundCloud
Standard this is Disabled. Enable when you need an AAMS Audio Master that fits the SoundCloud LUFS target. When enabled, AAMS will save an audio master for SoundCloud.
Default -18 dB
This is standard enabled. Standard for SoundCloud LUFS mastering is -18 dB LUFS
Manual
This is standard disabled. When manual is enabled, you can fill in a target (reference) in dB LUFS for SoundCloud LUFS mastering. You need to disable Default and enable Manual.
Remember when needed for a longer permanent time, use save options!
AAMS SoundCloud Button
Using this button you can import an audio file and that will be brought to the SoundCloud LUFS target and is saved.
LUFS Output

The AAMS Mastering process will save LUFS, Spotify, YouTube, Apple, Tidal or SoundCloud with the following formats. Or when you use one of the buttons for the streaming services.
Output as Wav 16 Bit 44.1 kHz Stereo
Standard enabled, will save the LUFS file(s) to Wav Format 16 Bit 44.1 kHz Stereo.
Output as Wav 24 Bit 44.1 kHz Stereo
Standard enabled, will save the LUFS file(s) to Wav Format 24 Bit 44.1 kHz Stereo.
Output as Wav 32 Bit Float 44.1 kHz Stereo
Standard enabled, will save the LUFS file(s) to Wav Format 32 Bit Float 44.1 kHz Stereo.
Output as MP3 320 kbps Stereo
Standard enabled, will save the LUFS file(s) to MP3 Format 320 kbps Stereo.
Remember when needed for a longer permanent time, use save options!
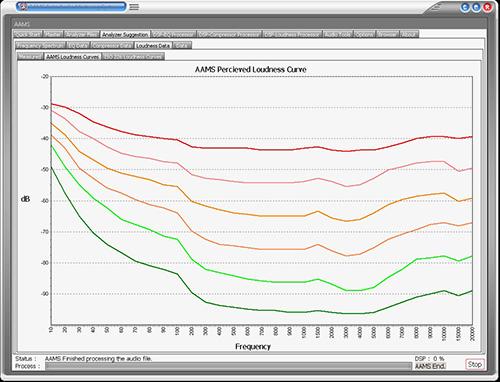
AAMS EQ Loudness Curves
AAMS V4.1 will introduce EQ Loudness Curves. These are dirrived from the ISO 226 standard of Human Hearing. The second name is Fletcher Munson Curves. AAMS is now equiped with a dirrived curves system for adjusting the DSP-EQ with Human Hering in mind and corrects the Analyzed Sources VS Reference Equalizer Spectum results. This option is turned on by default. Read about the DSP-EQ for more information.
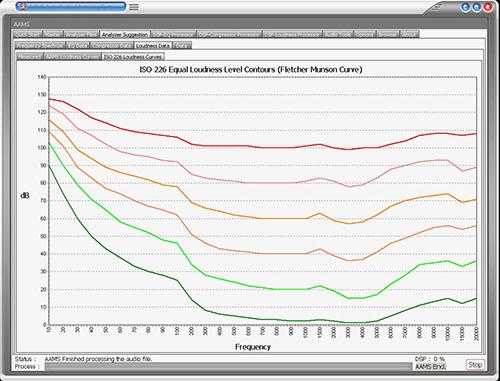
Equal Loudness Contour (Fletcher Munson)
An Equal Loudness contour is a measure of sound pressure in dB SPL over the frequency spectrum. A listener perceives a constant loudness when presented with pure steady tones. The unit of measurement for loudness levels is the phon. Two sine waves of differing frequencies are said to have equal loudness level measured in phons, if they are perceived as equally loud by the average young person without significant hearing impairment. Equal-loudness contours are often referred to as Fletcher Munson curves. After the earliest researchers, but those studies have been superseded and incorporated into newer standards. The definitive curves are those defined in the international standard ISO 226 in 2003, which are based on a review of modern determinations made in various countries. The human auditory system is sensitive to frequencies from about 20 Hz to a maximum of around 22,000 Hz, although the upper hearing limit decreases with age. Within this range, the human ear is most sensitive between 2 and 5 kHz, largely due to the resonance of the ear canal and the transfer function of the ossicles of the middle ear. In 1956 Robinson and Dadson produced a new experimental determination that they believed was more accurate. It became the basis for the standard ISO 226 that was considered definitive until 2003, when ISO revised the standard on the basis of recent assessments by research groups worldwide.
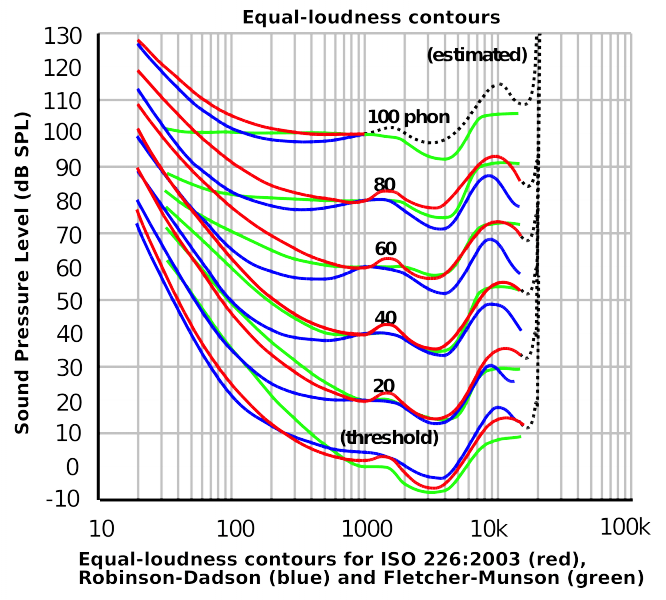
Hearing range describes the range of frequencies that can be heard by humans or other animals, though it can also refer to the range of levels. The human range is commonly given as 20 to 20,000 Hz, though there is considerable variation between individuals, especially at high frequencies, and a gradual loss of sensitivity to higher frequencies with age is considered normal. Sensitivity also varies with frequency, as shown by equal-loudness contours. Routine investigation for hearing loss usually involves an audiogram which shows threshold levels relative to a normal.
Several animal species are able to hear frequencies well beyond the human hearing range. Some dolphins and bats, for example, can hear frequencies up to 100 kHz. Elephants can hear sounds at 14–16 Hz, while some whales can hear subsonic sounds as low as 7 Hz (in water).
A basic measure of hearing is afforded by an audiogram: a graph of the minimum discernible sound level at various frequencies throughout an organism's nominal hearing range. Behavioural hearing tests or physiological tests can be used to find hearing thresholds of humans and other animals. For humans, the test involves tones being presented at specific frequencies (pitch) and intensities (loudness). When the subject hears the sound, he or she indicates it by raising a hand or pressing a button. The lowest intensity they can hear is recorded. The test varies for children; their response to the sound can be indicated by a turn of the head or using a toy. The child learns what to do upon hearing the sound, such as placing a toy man in a boat. A similar technique can be used when testing animals, where food is used as a reward for responding to the sound. Physiological tests do not need the patient to consciously respond. The information on different mammals hearing was obtained primarily by behavioural hearing tests. Frequency is measured in hertz (Hz), the number of sound pressure level vibrations (sonic waves) per second.
Humans
In humans, sound waves funnel into the ear via the external ear canal and reach the eardrum (tympanic membrane). The compression and rarefaction of these waves set this thin membrane in motion, causing sympathetic vibration through the middle ear bones (the ossicles: malleus, incus and stapes), the basilar fluid in the cochlea, and the hairs within it, called stereocilia. These hairs line the cochlea from base to apex, and the part stimulated and the intensity of stimulation gives an indication of the nature of the sound. Information gathered from the hair cells is sent via the auditory nerve for processing in the brain.
The commonly stated range of human hearing is 20 Hz to 20 kHz.[4][5][note 1] Under ideal laboratory conditions, humans can hear sound as low as 12 Hz[6] and as high as 28 kHz, though the threshold increases sharply at 15 kHz in adults, corresponding to the last auditory channel of the cochlea.[7] Humans are most sensitive to (i.e. able to discern at lowest intensity) frequencies between 2,000 and 5,000 Hz.[8] Individual hearing range varies according to the general condition of a human's ears and nervous system. The range shrinks during life, usually beginning at around age of eight with the upper frequency limit being reduced. Women typically experience a lesser degree of hearing loss than men, with a later onset. Men have approximately 5 to 10 dB greater loss in the upper frequencies by age 40.[9][10]
Audiograms of human hearing are produced using an audiometer, which presents different frequencies to the subject, usually over calibrated headphones, at specified levels. The levels are weighted with frequency relative to a standard graph known as the minimum audibility curve, which is intended to represent "normal" hearing. The threshold of hearing is set at around 0 phon on the equal-loudness contours (i.e. 20 micropascals, approximately the quietest sound a young healthy human can detect),[11] but is standardised in an ANSI standard to 1 kHz.[12] Standards using different reference levels, give rise to differences in audiograms. The ASA-1951 standard, for example, used a level of 16.5 dB SPL (sound pressure level) at 1 kHz, whereas the later ANSI-1969/ISO-1963 standard uses 6.5 dB SPL, with a 10 dB correction applied for older people.
Cats
Cats have excellent hearing and can detect an extremely broad range of frequencies, which is the range of about 11.5 octaves, one octave higher than dogs and 1.6 octaves higher than humans. They can hear higher-pitched sounds than either dogs or humans, detecting frequencies from 55 Hz up to 79 kHz (a range of 10.5 octaves) and dogs hear from 67 Hz to 45 kHz,[13] a range of about 9 octaves.[14][15] Cats do not use this ability to hear ultrasound for communication but it is probably important in hunting,[16] since many species of rodents make ultrasonic calls.[17] Cat hearing is also extremely sensitive and is among the best of any mammal,[14] being most acute in the range of 500 Hz to 32 kHz.[18] This sensitivity is further enhanced by the cat's large movable outer ears (their pinnae), which both amplify sounds and help a cat sense the direction from which a noise is coming.[16]
Dogs
The hearing ability of a dog is dependent on breed and age, though the range of hearing is usually around 67 Hz to 45 kHz,[13] which is a range of 9 octaves. (Humans hear a range of about 10 octaves.) As with humans, some dog breeds' hearing ranges narrow with age,[19] such as the German shepherd and miniature poodle. When dogs hear a sound, they will move their ears towards it in order to maximise reception. In order to achieve this, the ears of a dog are controlled by at least 18 muscles, which allow the ears to tilt and rotate. The ear's shape also allows the sound to be heard more accurately. Many breeds often have upright and curved ears, which direct and amplify sounds.
As dogs hear higher frequency sounds than humans, they have a different acoustic perception of the world.[19] Sounds that seem loud to humans often emit high frequency tones that can scare away dogs. Whistles which emit ultrasonic sound, called dog whistles, are used in dog training, as a dog will respond much better to such levels. In the wild, dogs use their hearing capabilities to hunt and locate food. Domestic breeds are often used to guard property due to their increased hearing ability.[13] So-called "Nelson" dog whistles generate sounds at frequencies higher than those audible to humans but well within the range of a dog's hearing.
Bats
Bats have evolved very sensitive hearing to cope with their nocturnal activity. Their hearing range varies by species; at the lowest it can be 1 kHz for some species and for other species the highest reaches up to 200 kHz. Bats that can detect 200 kHz cannot hear very well below 10 kHz.[20] In any case, the most sensitive range of bat hearing is narrower: about 15 kHz to 90 kHz. Bats navigate around objects and locate their prey using echolocation. A bat will produce a very loud, short sound and assess the echo when it bounces back. Bats hunt flying insects; these insects return a faint echo of the bat's call. The type of insect and how big it is can be determined by the quality of the echo and time it takes for the echo to rebound; there are two types; constant frequency (CF), and frequency modulated (FM) calls that descend in pitch[21] Each type reveals different information; CF is used to detect an object, and FM is used to assess its distance. FM and CF are two different types of echo which inform the bat on the size and distance of the prey. The pulses of sound produced by the bat last only a few thousandths of a second; silences between the calls give time to listen for the information coming back in the form of an echo. Evidence suggests that bats use the change in pitch of sound produced via the Doppler effect to assess their flight speed in relation to objects around them.[22] The information regarding size, shape and texture is built up to form a picture of their surroundings and the location of their prey. Using these factors a bat can successfully track change in movements and therefore hunt down their prey.
Mice
Mice have large ears in comparison to their bodies. They hear higher frequencies than humans; their frequency range is 1 kHz to 70 kHz. They do not hear the lower frequencies that humans can; they communicate using high frequency noises some of which are inaudible by humans. The distress call of a young mouse can be produced at 40 kHz. The mice use their ability to produce sounds out of predators' frequency ranges: they can alert other mice of danger without also alerting the predator to their presence. The squeaks that humans can hear are lower in frequency and are used by the mouse to make longer distance calls, as low frequency sounds can travel farther than high frequency sounds.
Birds
Hearing is birds' second most important sense and their ears are funnel-shaped to focus sound. The ears are located slightly behind and below the eyes, and they are covered with soft feathers – the auriculars – for protection. The shape of a bird's head can also affect its hearing, such as owls, whose facial discs help direct sound toward their ears. The hearing range of birds is most sensitive between 1 kHz and 4 kHz, but their full range is roughly similar to human hearing, with higher or lower limits depending on the bird species. Birds are especially sensitive to pitch, tone and rhythm changes and use those variations to recognize other individual birds, even in a noisy flock. Birds also use different sounds, songs and calls in different situations, and recognizing the different noises is essential to determine if a call is warning of a predator, advertising a territorial claim or offering to share food. "Some birds, most notably oilbirds, also use echolocation, just as bats do. These birds live in caves and use their rapid chirps and clicks to navigate through dark caves where even sensitive vision may not be useful enough.
In marine mammals
As aquatic environments have very different physical properties than land environments, there are differences in how marine mammals hear compared to land mammals. The differences in auditory systems have led to extensive research on aquatic mammals, specifically on dolphins. The auditory system of a land mammal typically works via the transfer of sound waves through the ear canals. Ear canals in seals, sea lions, and walruses are similar to those of land mammals and may function the same way. In whales and dolphins, it is not entirely clear how sound is propagated to the ear, but some studies strongly suggest that sound is channeled to the ear by tissues in the area of the lower jaw. One group of whales, the Odontocetes (toothed whales), use echolocation to determine the position of objects such as prey. The toothed whales are also unusual in that the ears are separated from the skull and placed well apart, which assists them with localizing sounds, an important element for echolocation.

Equalizers Explained
An equaliser is designed to alter the tonal quality of audio passing through it, this by using a number of filter circuits. Filters are capable of applying gain to audio signals within specific frequency ranges, positive or negative, referred to a 'boost' or 'cut'. The more filters the better control over the whole frequency range in steps, but with crossovers in the filters there can be upcomming distortion. AAMS uses a linear spectrum equalizer with 100 filters, what basically means there is lot's of control and the sidewalls are so steap, the filtering does not affect each other. The quality of the AAMS DPS-EQ Spectrum Equalizer with 100 EQ Bands is very high and by our users admitted as the one of the best EQ's around.
The AAMS internal DSP-EQ Player / Processor explained
The settings can be previewed and processed by the AAMS internal Players alike Analyzer and DSP-EQ, so you can hear the proposed changes. Processing is all done internally by AAMS, so an mastered outcome audio file is written to disk. The built-in DSP Equalizer audio processing tool includes a 100-band DSP-EQ, 8-band DSP-Compressor and DSP-Loudness that can process audio in fully automatic, semi-automatic or manual modes. And AAMS will take care of all in between audio problems as clipping, dithering, normalizing and corrects the settings to Human Hearing (ISO 226, Fletcher Munson, Equal Loudness Contours).

A 100 Band Spectrum Equalizer, setup by AAMS suggestion calculattions.
The functions and processing of the DSP-EQ is not only doing EQ-ing, but in corporation with AAMS Analyzer will process first Spectrum and EQ results by calculations and processing made internally. Mid and Side processing (m/s) is being applied as well as normal EQ processing and EQ Balancing. The possible 100 band EQ is defining a much more accurate spectrum wise way of using EQ. AAMS automatic suggestions will tell DSP-EQ how to behave. So that the best balance and spectrum is possible, AAMS will compare source and reference, making decisions what frequencies to adjust to have the same sound. This is not a copy of the reference, the source and reference are compared by AAMS Analyzer to get the best sound without just copying from the reference spectrum. The DSP-EQ is a flat linear Equalizer that can correct the source towards the reference in 99.2% accuracy (with the 100 Band EQ applied). Therefore AAMS DSP-EQ is acclaimed as one of the best sounding and correcting Eqaulizers around that will not hurt or destroy your sound, instead AAMS DSP-EQ is made to do what is expected give excellent results!
AAMS 100 Band Graphic Equalizer (standard for AAMS Professional Version)
AAMS 50 Band Graphic Equalizer (locked standard for AAMS Freeware)
AAMS 25 Band Graphic Equalizer
AAMS 50 Band Graphic Equalizer
AAMS 15 Band Graphic Equalizer
Standard 31 Band Graphic Equalizer
Standard 61 Band Graphic Equalizer
Standard 15 Band Graphic Equalizer
Alesis 24 Band Graphic Equalizer
59 Bands Bottom End Graphic Equalizer
97 Bands Bottom End Graphic Equalizer
49 Bands Mid Lows Graphic Equalizer
41 Bands High Mids Graphic Equalizer
41 Bands Highs Graphic Equalizer
99 Bands Graphic Equalizer
Keys 86 Band Graphic Equalizer
Samsung 15 Band Graphic Equalizer
Firium 50 Band Graphic Equalizer
61 Band Graphic Equalizer
Sony Plugin 10 Band Graphic Equalizer
Sony Plugin 20 Band Graphic Equalizer
Winamp 11 Band Graphic Equalizer
AAMS calculates for the best possible settings.
The DSP-EQ takes these settings and will EQ spectrum the audio. Also DSP-EQ is accurate meaning straight and each Frequency Band is 41 steep. Next to each other they can form a 100 band EQ, and apply as much differences as possible, because of the higher band count. With the user functions to adjust source to reference and adjust the EQ, the user can make little corrections if needed. Select the DSP-EQ Tab, this represents a Graphic Equalizer that can have a single EQ band or up to 100 EQ Bands. The DSP-EQ also functions as a player for your audio material, just press Load Audio File or press Play and a window will pop up asking for a *.wav file to play. Press Stop to stop the player and press Pause to pause playing. On top of the faders is the Equalizer frequency band, lowering the faders below will change the gain of the EQ Frequency band in db. The first row of red Faders are adjusting all Left EQ frequencies and the second row of blue Faders are adjusting all Right EQ Frequencies. You can move the faders up or down and set all faders to 0dB with Zero All Faders, Zero Left, and Zero Right. If you already have loaded a Source and Reference, AAMS has calculated suggestions for the DSP-EQ and they can be copied with Copy EQ Suggestion. In this way you won’t have to set up the DSP-EQ yourself as AAMS does all the hard manual work for you automatically. Now you can listen to the differences that AAMS suggests. You can always turn OFF the EQ to hear the original audio material. You can also use Zero All Faders and Copy EQ suggestion to A/B your audio material.

Playing and Equalizing with AAMS internal DSP-EQ processor
The file Example1.aam file is the Source file and is located in the same directory as Example1.afd. The Example1.aam file was created by AAMS analysis of the Example1.wav file located in the same directory. The Example1.wav file can be listened to using the DSP-EQ Player. Go to the DSP-EQ tab and press the button Play or Load Audio File and select the Example1.wav file. AAMS has already copied the Graphic EQ Suggestion into the faders of the DSP-EQ, so there is no need to set up the DSP-EQ. You can adjust the DSP-EQ Bands later on, if needed. What you hear now is the audio file playing with the DSP-EQ turned ON and the AAMS Suggestions applied. If you want to hear how the original audio material sounds like, you can Zero All Faders or Turn OFF the EQ. If you want to hear the suggestion again, turn ON the EQ and press Copy EQ Suggestion.
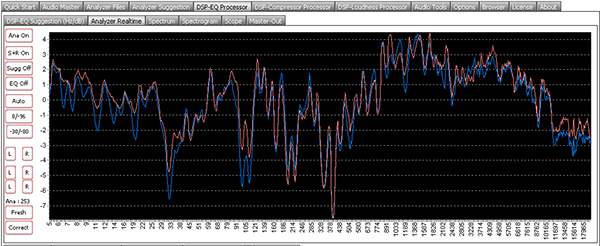
DSP-EQ Analyzer Realtime
Above is displayed the AAMS DSP-EQ Analyzer Realtime Chart with the Analyzed 1 second timeframe EQ Suggestion. The Red line is for Left audio channel, the Blue line is for Right audio channel. The AAMS Analyzer can scan audio files and create suggestions, the AAMS Realtime Analyzer outputs each 1 second suggestions and parameters (charts) and must be Turned On, in DSP-EQ Options Tab. Read about the DSP-EQ options later in this document. The DSP-EQ Analyzer Realtime can display the EQ Suggestions in several spectrum forms. The standard is that the Spectrum shows the EQ settings. But however more van be viewed by turning On or Off the options. The Chart is refreshed every 1 second when audio is playing or being processed. The Chart can be zoomed in or our bij using the mouse and click and making a rectangle. The Analyzer realtime outputs each second an analyzed calculation of Reference Spectrum, Source Audio Spectrum, EQ Suggestions and Differences between Source and Reference. The user has now realtime analyzing of AAMS Suggestions and measuring visible in the DSP-EQ Analyzer Realtime Tab. For Semi-Automatic Mastering or Manual mastering the DSP-EQ Analyzer Realtime is setup to On and is working when the audio is being played inside the DSP-EQ or DSP-Analyzer. Mostly this function is disabled (turned Off) by AAMS Automatic Mastering settings or by AAMS installation. In Options, the Mastering purpose Setup will determine if the Realtime Analyzer is On or Off.
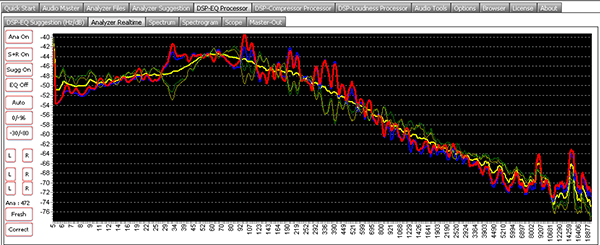
Above is displayed the AAMS DSP-EQ Analyzer Realtime Chart with the Analyzed 1 second timeframe Reference Spectrum, Differences Spectrum, EQ Suggestion. The Red line is the Left Source Spectrum Realtime 1 Second (of the original source audio). The Blue line is the Right Source Spectrum Realtime 1 Second (of the original source audio). The Yellow and Green lines are from the choosen Reference file. The darker Yellow and Green lines are the EQ Suggestions Spectrum (of the original source audio). Remenber the DSP-EQ Analyzer Realtime needs to be turned On. Read the DSP-EQ options for this feature.
Ana (On/Off)
This wil turn On or Off the internal realtime analyzer.
EQ (On/Off)
This will display the realtime spectrum EQ suggestions in the Chart.
S+R (On/Off)
This will display the reference choosen and the Difference of Levels around it in the Chart.
Sugg (On/Off)
This will display the reference choosen and the EQ Suggestions around it in the Chart.
Auto
The Chart y-axxis in levels of dB are automaticly setup.
0/-96
The Chart is setup to view from 0 dB to -96 dB.
-30/-80
The Chart is etup to view from -30 dB to -80 dB.
Ana
The Count Ana means how many seconds are in the buffer and is being calculated with by AAMS Analyzer (Realtime).
Fresh
Refreshes the Charts and sets Ana to Second. Then Ana will count te analyzed seconds number of audio again.
Correct
Transfers the Realtime EQ Suggestion Spectrum to the DSP-EQ Suggestions. Meaning it will correct (as you press the button) the DSP-EQ suggestion with the Realtime EQ Suggestion. Do not use this function. It will affect standard AAMS Suggestion for the DSP-EQ. Only use this to expiriment or you know what you are doing. Refreshes the Charts and sets Ana to Second. Then Ana will count te analyzed seconds number of audio again.
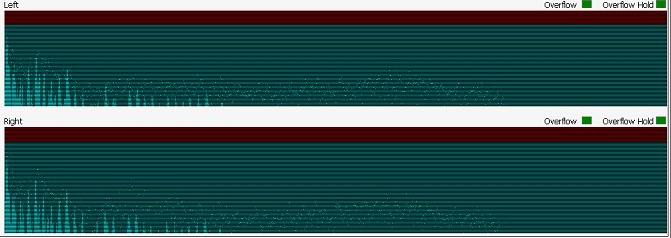
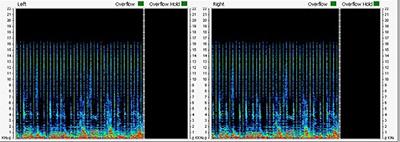
DSP-EQ Real-time Views
The Real-time DSP views are preset in the DSP-EQ Tabs. When an audio file is loaded and playing these views will display and update the Spectrum, Spectrogram, Scope and Master-Out. All views as well as all level meters are updated with their own overflow LED's. When the signal is distorted by passing the highest possible maximum sound level an overflow LED will turn red. The overflow LED will return to green if all levels are returning to normal. The Hold LED’s will stay red until they are reset which can be done manually with a click of the mouse.
DSP Overflow
When audio becomes too loud for the AAMS internal DSP-Processor an overflow is registered by one of the LED’s. AAMS will correct such overflows automatically when the player is playing, lowering the volume faders step by step. This is called AGC (Automatic Gain Control) and the DSP-EQ, DSP-Compressor and DSP-Loudness all use the AGC automatically to reduce the volume to a level that does not contain overflows. In this way you can be assured that levels will stay below 0dB and will not distort your sound. The Automatic Overflow feature can be turned off in the Options Tab, but this is not recommended.
DSP-EQ
All processing is done by AAMS V4 internal DSP-Processor, by the player and DSP pipeline processing. The DSP-EQ is quite an improvement of AAMS V4 and will allow you to hear your audio material directly inside AAMS without the use of other programs, you can also edit the DSP-EQ Bands Centre, Left and Right. Changing the Reference will update all settings and you can hear differences directly, choosing a reference to match the sound you want to hear. A good starting point is loading References from the Reference Database’s 200 Styles. If in doubt, choose the style closest to your music and play that one first. Initially the Example file is intended to explain how AAMS works. The same example will be used to complete a full mastering job later on, but for now take the time to get familiar AAMS features and have some fun with it.
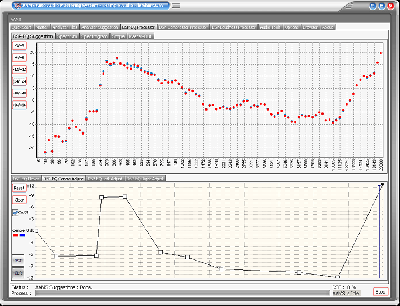
DSP-EQ Centre Adjust
To have influence on the outcome of DSP-EQ Calculations between Source and Reference (Analyzer Suggestions) the DSP-EQ Centre Adjust presents an adjustable envelope chart for all DSP-EQ Bands to be edited upwards or downwards. By clicking into the envelope chart new envelope points are created and can be adjusted. The Left and Right EQ Bands (Centre) will be adjusted accordingly. The DSP-EQ Chart will be adjusted each time you change the envelope. For users who want to adjust the DSP-EQ Bands without changing the Reference, this can be a handy tool. You can off course load a corresponding audio file into the DSP-EQ Player and listen directly to the changes in audio sound. You can reset the Envelope pressing the Reset Button. Or clear the envelope by pressing the Clear Button.
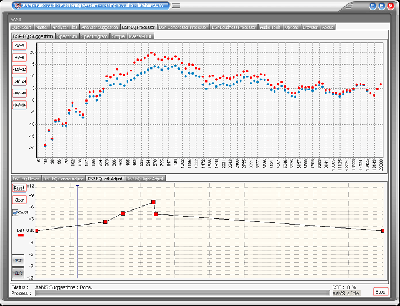
DSP-EQ Left Adjust
To have influence on the outcome of DSP-EQ Calculations between Source and Reference (Analyzer Suggestions) the DSP-EQ Left Adjust presents an adjustable envelope chart for all Left DSP-EQ Bands to be edited upwards or downwards. By clicking into the envelope chart new envelope points are created and can be adjusted. The Right EQ Bands will be adjusted accordingly. The DSP-EQ Chart will be adjusted each time you change the envelope. For users who want to adjust the DSP-EQ Bands without changing the Reference, this can be a handy tool. You can off course load a corresponding audio file into the DSP-EQ Player and listen directly to the changes in audio sound. You can reset the Envelope pressing the Reset Button. Or clear the envelope by pressing the Clear Button.
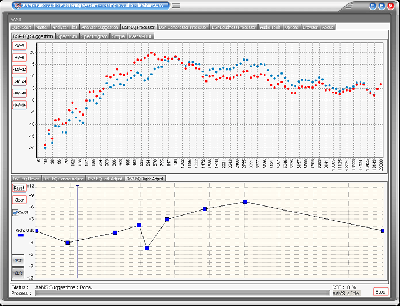
DSP-EQ Right Adjust
To have influence on the outcome of DSP-EQ Calculations between Source and Reference (Analyzer Suggestions) the DSP-EQ Centre Adjust presents an adjustable envelope chart for all Right DSP-EQ Bands to be edited upwards or downwards. By clicking into the envelope chart new envelope points are created and can be adjusted. The Right EQ Bands will be adjusted accordingly. The DSP-EQ Chart will be adjusted each time you change the envelope. For users who want to adjust the DSP-EQ Bands without changing the Reference, this can be a handy tool. You can off course load a corresponding audio file into the DSP-EQ Player and listen directly to the changes in audio sound. You can reset the Envelope pressing the Reset Button. Or clear the envelope by pressing the Clear Button.
Auto Record DSP-EQ
This function is fully automatic. It has 2 Stage processing, first Hunting down the audio file for the suggested volume settings. This will prevent overflows that go over 0dB keeping the signal below 0dB while playing. The second stage is recording the audio file with the DSP-EQ. There is no need to set up the DSP-EQ manually as all settings are taken care of automatically as long as a valid Source and Reference are loaded into AAMS. The recorded audio file has the same name as the original audio file with the addition of the extension '_EQ.wav'.
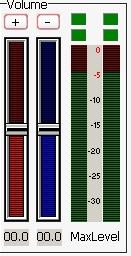
Overflow LED’s
The overflow LED’s turn from green to red when an overflow is present in one of AAMS DSP processors. You can press each LED and the Overflow Hold LED’s turn green again. An overflow is basically a digital domain term, when a signal goes over the 0dB limit an overflow is present. Recording in the digital domain with signals over 0dB will result in damaged audio with distortion therefore it is better to adjust the volume (gain) to a lower level. You can also adjust the faders of the Equalizer to compensate for overflows but this
is quite tedious.
Recording the DSP-EQ
After you are satisfied, you can process the audio material with the Record button. The Record button processes the audio and saves it as a new audio *.wav file. The Example file Example1.wav would be saved as Example1_EQ.wav.

Settings
The DSP-EQ can handle from 1 to 100 Band Graphic EQ settings. The Default is 100 Band Graphic EQ which is a very good setting for all applications. Whenever you need a bit more detail, you can use the 100 Band Graphic EQ setting. Although the 100 Band Graphic EQ will give more detail this will affect processing speed. As a general rule using more EQ Bands can bring phasing into the sound. This will depend on frequency overflow in the audio material and the way a Graphic EQ does its job. Whenever you hear Phasing starting to begin, switchback to a lower DSP-EQ Setting. Most likely Phasing sometimes will only happen using the 100 Band EQ Setting. However 95% of all audio material does not introduce Phasing when using the 100 Band EQ Settings. If you better be on the safe side and in general a 50 0r 32 Band Graphic EQ is a very good default.
Manual and Automatic Mode
Because AAMS is usually set up for Automatic Mastering at installation, if you wish to work manually with the AAMS Processors it is recommended that you use the Record button of each processor. Also for configuring AAMS Options for working in manual mode, there are some settings on the Options Preferences Tab. For all Automatic Mastering purposes, switch back to Automatic Mode in Options Preferences Tab.
Specifications
The internal DSP-EQ has a natural sounding algorithm that equalizes in an exact linear manner with no resonance peaks. The frequency range is 5Hz-22050Hz. The amount of Graphic Equalizer Bands range from 1 band to 100 with 'Natural' and 'Steep' filters. Depending on the amount of EQ-Bands and the Frequency range calculated by AAMS Suggestions, the frequency range 0-5 Hz or 20000-22050 Hz is rolled-off and all Factory Presets have a Roll-On and Roll-Off Frequency range. Gain ranges from -12dB to 12dB, and can be set in fractions of 0.1dB. The Q-factor of each filter is displayed for convenience and changes depending on the amount of Graphic Equalizer filters that are in use. Designed to operate at sampling rates ranging from 44.1 KHz to 192 KHz, although the Sample rate is normally 44.1 KHz, depending on the Audio File outputted by the Player. The Internal DSP-Processing can handle 16/24/32 Bit calculations while the rest of the programming handles 64-bit code. The DSP-EQ allows comparison of the AAMS EQ Suggestions and the Original Audio.
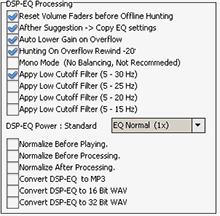
DSP-EQ Options Tab
Reset Volume Faders before Offline Hunting
By default ON. This feature will reset all DSP-EQ faders to original AAMS positions. When manual mastering or setting are applied by using AAMS manually, turn OFF. Otherwise when AAMS is setup for Full Automatic Mastering, Turn ON.
After Suggestion -> Copy EQ Settings
After AAMS Suggestions are calculated or refreshed the EQ-Suggestions are automatically copied. Disable this option if you want to listen to the original audio material first. By default ON. This feature will reset all DSP-EQ faders to original AAMS positions. Then the faders are set to AAMS Suggestions that are pre-calculated from the Analyzer outcome. When manual mastering or setting are applied by using AAMS manually, turn OFF. This an essential setting for AAMS Mastering Automaticly, turn ON. Only Turn Off when you know what you are doing, if turned Off the Suggestions that AAMS Analyzer will do, will not make it to the DSP-EQ, DSP-Compressor and DSP-Loudness, therefore AAMS will master badly. Only for users that want AAMS to have less control and the user more control over the AAMS setting or suggestions.
Auto Lower Gain on Overflow when Playing.
When the DSP-Compressor is used to play audio, AAMS DSP-EQ will automatically lower the gain of the DSP-EQ (Volume Faders) when the signal becomes too loud > -0.1dB, led's will turn red. By default ON. This feature will reduce the level when clipping occurs. This is automatically done by AAMS processing (hunting and processing EQ). Basically no need to turn OFF, only turn OFF when you know what you are doing. So for ensuring AAMS is not creating or passing digital distortion by going over 0dB, you better leave this setting ON.
Auto Lower Gain on Overflow when Hunting.
While AAMS is mastering with DSP-EQ or the user is Recording the AAMS DSP-EQ will automatically lower the gain (Volume Faders) When the signal becomes too loud > -0.1dB. By default ON. This feature will reduce the level when clipping occurs. This is automatically done by AAMS processing (hunting and processing EQ). Basically no need to turn OFF, only turn OFF when you know what you are doing.
Hunting On Overflow Rewind -20% of Playtime
When playing audio trough the DSP-EQ. This feature is important for AAMS mastering and playing the DSP-EQ. It protects the overflows of maximum audio power (by going over 0dB digital border) and reduces the overall volume before DSP-EQ processing chain. Each time in Playing Audio and the Overflow Leds turn from Green to Red, the volume is lowered. Also the playtime is setback for -20% therefore the audio is repeated (and can be lowered again if needed). The -20% will passes if no overflows do occur. So for ensuring AAMS is not creating or passing digital distortion by going over 0dB, you better leave this setting ON, when you want an correct undistored signal.
Mono Mode (No Balancing, Not Recommended)
For DSP-EQ processing in mono mode, the balancing is kept original when this feature is ON. It is not recommended but can be handy for audio that has stranger settings for left and right audio channels. Standard is Off. When you have left and right channels on a source file that is so different from each other, it can't be counted as equal, then maybe no balancing is a better deal to master the track.
ISO226 Fletcher EQ Spectrum (else Linear EQ)
Default is ON. The ISO226 Fletcher EQ Spectrum is displayed as a Chart in the Analyzer Tab (See Analyzer). The corrections when turned ON are taken into account and Adjusts the EQ suggestions and settings for correcting the Mids (vocals etc). The AAMS Loudness Curves are based in the ISO226 Flecher chart and dirreved from that are Human Hearing results and settings implied. Do only turn off this function when you need straight Linear EQ.
Apply Low Cutoff Filter (This will bring the setup of AAMS DSP-EQ with a little cut below < 30 Hz, this can save some headroom by reducing the bottom end (not needed frequencies). Mostly what is below < 30 Hz is rumble and really low base sounds. Standard the < 30 Hz filter setting is ON.
Apply Low Cutoff Filter (This will bring the setup of AAMS DSP-EQ with a little cut below < 25 Hz, this can save some headroom by reducing the bottom end (not needed frequencies). Mostly what is below < 25 Hz is rumble and really low base sounds. Standard the < 25 Hz filter setting is Off.
Apply Low Cutoff Filter (This will bring the setup of AAMS DSP-EQ with a little cut below < 20 Hz, this can save some headroom by reducing the bottom end (not needed frequencies). Mostly what is below < 20 Hz is rumble and really low base sounds. Standard the < 20 Hz filter setting is Off.
Apply Low Cutoff Filter (This will bring the setup of AAMS DSP-EQ with a little cut below < 15 Hz, this can save some headroom by reducing the bottom end (not needed frequencies). Mostly what is below < 15 Hz is rumble and really low base sounds. Standard the < 15 Hz filter setting is Off.
Normalize Before Playing
When loading an audio file into the DSP-EQ the file will be Normalized. Standard is ON. This will give better dynamics and louded sound if the signal can be raised by normalisation.
Normalize Before Processing
When AAMS is mastering the source file will be Normalized. Standard is ON. This will give better dynamics and louded sound if the signal can be raised by normalisation.
Normalize After Processing
When AAMS is mastering the source file will be Normalized after DSP-EQ processing is done. Standard is Off.
AAMS Equal Loudness Curves
Standard is ON. This helps the DSP-EQ Suggestion to be accoring to the AAMS Equal Loudness Curves dirrived from ISO226 Loudness Curves or the Fletcher Munson Curves. Mainly this helps the DSP-EQ to be in accordance with the Loudness Curves for Human Hearing, what means if AAMS changes EQ it will do it with the AAMS Loudness Curves in mind. Turned Off, the DSP-EQ suggestions will be straightforward EQ.
DSP-EQ Power Factor from AAMS Loudness Curves
The EQ power factor (how much 1dB raising or lowering the EQ settings will produce in dB) can be changed below.
This feature is according to the ISO226 Loudness Curves and ISO226 Fletcher Munson. When furned Off, the DSP-EQ suggestions will be straightforward EQ. The standard Power Factor is AAMS Normal : 1.0x. Changing can apply more or less power to EQ processing. Basically AAMS is based on 1x EQ power, like all EQ will do, leave this setting. Experiment only when you need to. If the EQ power is lowered then the original source file will come more true in mastering, but there will be less changes to be heard. If the EQ power is raised above 1x the original source file will be affected more by AAMS DSP-EQ suggestions. For users to expiriment, else leave the DSP-EQ Power Factor at 1x.
Bias Suggestions correct to zero Frequency Domain
The EQ suggestions can be of a kind that bottom end is raised or lowered so it will affect the whole audio in volume that much and raise the whole spectrum or lower the whole spectrum, also it can overflow the EQ and create some distortion. To reduce the Frequency Domain distortions, AAMS will calculate lowering in volumes for Left, Right and Mono channels, and reduces them while processing or mastering. Mostly this helps the DSP-EQ not going over 0dB and have more room for actual EQ to be in line with 0dB.
Bias Suggestions correct to AAMS Loudness ISO226 Fletcher Factor
This will be acoording to the AAMS Loudness Curves Factor. The EQ suggestions can be of a kind that bottom end is raised or lowered so it will affect the whole audio in volume that much, also it can overflow the EQ and create some distortion. To reduce the distortions by taking into account the Loudness Curves, AAMS will calculate lowering in volumes for Left, Right and Mono channels, and reduces them while processing or mastering.
Bias Suggestions correct to AAMS Loudness ISO226 Fletcher Ratio
This will be acoording to the AAMS Loudness Curves Ratio. The EQ suggestions can be of a kind that bottom end is raised or lowered so it will affect the whole audio in volume that much, also it can overflow the EQ and create some distortion. To reduce the distortions by taking into account the Loudness Curves, AAMS will calculate lowering in volumes for Left, Right and Mono channels, and reduces them while processing or mastering.
DSP-EQ FFT Fast Fourrier Transform Multiband Precision Equalizer Setup
DSP-EQ FFT Window Shape Kind
Windowing of a simple waveform like cos ωt causes its Fourier transform to develop non-zero values.
Commonly called spectral leakage) at frequencies other than ω. The leakage tends to be worst (highest) near ω and least at frequencies farthest from ω. If the waveform under analysis comprises two sinusoids of different frequencies, leakage can interfere with the ability to distinguish them spectrally. If their frequencies are dissimilar and one component is weaker, then leakage from the stronger component can obscure the weaker one's presence. But if the frequencies are similar, leakage can render them unresolvable even when the sinusoids are of equal strength. The rectangular window has excellent resolution characteristics for sinusoids of comparable strength, but it is a poor choice for sinusoids of disparate amplitudes. This characteristic is sometimes described as low dynamic range. At the other extreme of dynamic range are the windows with the poorest resolution and sensitivity, which is the ability to reveal relatively weak sinusoids in the presence of additive random noise. That is because the noise produces a stronger response with high-dynamic-range windows than with high-resolution windows. Therefore, high-dynamic-range windows are most often justified in wideband applications, where the spectrum being analyzed is expected to contain many different components of various amplitudes. In between the extremes are moderate windows, such as Hamming and Hann. They are commonly used in narrowband applications, such as the spectrum of a telephone channel. In summary, spectral analysis involves a trade-off between resolving comparable strength components with similar frequencies and resolving disparate strength components with dissimilar frequencies. That trade-off occurs when the window function is chosen.
DSP-EQ Shape Kind
Options are Hamming is Standard ON, Blackman, Gaussian, Hamming, Hanning. Parzen. Rectangular and Welch. Hamming is the EQ Shape that has the least distortion levels and good EQ properties. For instance Rectangular is the Best Shape for EQ, but comes with a little bit more distortion of the EQ signal. Hamming is the best option for middle of the road. But Rectangular is the best for EQ wise have the most correct EQ lowering or Raising as suggested. All the shapes are curved but the rectangulator is straight line. If you do not know (read about it on the web) do not change and leave at Hamming.
DSP-EQ Window Buffer Size
The Buffer Size for the FFT, leave it at 4096! Do not change. It will affect the whole of AAMS Processing. Mostly this is an internal setting of the DSP-EQ, the 4096 buffer for FFT is used 4x4096=16384. That is about 5hz to 22.500hz of spectrum FFT frequency levels that can be accurately be measured by AAMS Analyzer. The lower the setting the less accurate the DSP-EQ will be. So 4096 is best.
DSP-EQ FFT Window Frequency
The lowest undistorted frequency that can be measured perfectly 100%.Actually AAMS measures 5 Hz at 70,7% correctly. The higher frequencies over 50hz are all measured 100% correct.
DSP-EQ Realtime Setup ON
This button will turn the DSP-EQ Realtime Analyzer ON and setup accordingly (and also the Realtime Analyzer). These are shown in charts and mostly will be updated each 1 second. The DSP-EQ Realtime Analyzer can be used for playback and to give the user some more insight to their plaing audio source file. The Turn Off button will turn off the realtime DSP-EQ Analyzer. Read about the Realtime DSP-EQ Analyzer in the section of the DSP-EQ manual.
DSP-EQ Analyzer Realtime Processing
This will turn ON the DSP-EQ Realtime Analyzer and the AAMS Analyzer Realtime functions. This does not mean any of the Realtime Charts will be visible. This set to ON will only turn on the Realtime Calculations needed for processing the audio file playing.
DSP-EQ Analyzer Realtime Show Spectrum
Shows the spectrum of the playing audio source file.
DSP-EQ Analyzer Realtime Show EQ
Shows the EQ Suggestion of the playing audio source file.
DSP-EQ Analyzer Realtime EQ Suggestion
Shows the Spectrum EQ Suggestion of the playing audio source file.
DSP-EQ Analyzer Realtime Bias S+R
Calculates the Bias of the EQ (lower frequencies have more power then higher frequencies).
DSP-EQ Analyzer Realtime Bias S+R
Shows the Bias of the EQ (lower frequencies have more power then higher frequencies).
DSP-EQ Suggestion - Show Realtime Suggestion
Shows in the DSP-EQ Suggestion Chart, shows an extra 2 lines of the Realtime DSP-EQ Suggestion per 1 Second.

Settings, Save Options
Saves all options in the AAMS.INA file. This feature must be used when you changed any option as mentioned above. You can restore AAMS defaults in the preferences tab.
Settings, Load Options
Reloads the AAMS.INA file and restores the options. This feature can be used when you need to reset AAMS options.

Compressor Explained
A multiband compressor is to compress several different frequency ranges. Compression is one of the most useful tools and is widely used in the recording process from tracking to mixing to mastering. The majority of compressors act on the entire audio frequency range, but when we need more control over specific audio frequencies we use a multiband compresser. A multiband compressor is a collection of several individual compressors, typically 3, 4, 5 or 8 multibands. Dividing up the frequency range via crossovers per multiband.

AAMS DSP-Multiband Compressor
A 8 Band Soft Tube Multiband Compressor, setup by AAMS and by compressing automatic on the fly! The AAMS multiband compressor does setup and selfmaintains the compression levels, because it is setup by AAMS Analyzers and hunts for its own compression levels. AAMS DSP Compressor constantly is active to see and hear the signals it is compressing and adjusting to the perfect levels. No more under- or overcompression!
8 Multibands
! Soft tube behavior
! Fully Automatic Compressor
Multiband compressor with automatic gain or limiter functions, 8 multibands possible. Soft tube behavior, not curved but also not straight lined soft tube compressor for each band. Automatic hunting function for calculation of threshold levels per band and automatic gaining functions. AAMS Compressors are setup by AAMS Analyzer calculations in suggestions, these are applied by the automatic DSP-Compressor processing on the audio. A compressor reduces the dynamic range of an audio signal if its amplitude exceeds a specified threshold. The amount of gain reduction is determined by Attack, Delay, Threshold and Ratio settings. A Multiband Compressor has more Bands and each frequency Range (Band) can be separately compressed. A Single Band Compressor has basically no use for Mastering purposes, instead a Multiband Compressor can be highly recommended for Mastering Purposes. AAMS Compressor and multibands are based on compressor functions as for mastering is known.
The main function is balancing the audio track dynamics per multiband spectrum after DSP-EQ has done its spectral functions.The DSP-Compressor is based on spectrum frequency as well as on dynamics and dynamic balancing. Mostly complex to setup by user or manual compressors. Maybe also because compressor as a subject is less easy to understand and maintained as EQ does. Compression in mastering is more subtle. It tries to EQ a bit and Loudness a bit. The DSP-EQ in front and the DSP-Loudness afterwards, they are good friends in AAMS Mastering chain.
The AAMS internal DSP-Compressor Player / Processor explained
Select the DSP-Compressor Tab. This represents a Multi-Band Compressor that can have a single band compressor simulated toward 8 Multi-Bands. The DSP-Compressor functions as a player for your audio material, just press Load Audio File or press Play and a window will pop up asking for a *.wav file to play. Press Stop to stop the player and press Pause to pause playing. If you have already loaded a Source and Reference, AAMS has calculated suggestions for the DSP-Compressor and they can be copied with Copy EQ Suggestion. In this way you won’t have to set up the DSP-Compressor yourself as AAMS does all the hard manual work for you automatically. You can also use Zero All Faders and Copy EQ suggestion to A/B your audio material.

Playing and with AAMS internal DSP-Compressor processor
The file Example1.aam file is the Source file and is located in the same directory as Example1.afd. The Example1.aam file was created by AAMS analysis of the Example1.wav file located in the same directory. The Example1.wav file can be listened to using the DSP-Compressor Player. Go to the DSP-Compressor tab and press the button Play or Load Audio File and select the Example1.wav file.
The DSP-Compressor
Depending on the Setup chosen from the Settings Tab, a single band compressor up to an eight band Multi-Band compressor can be simulated. Each Multi-Band compressor has its own settings for Threshold, Attack, Decay, Ratio and Window. The Threshold fader of each Multi-Band can be set manually and when you click on the value below the Threshold Fader it will reset to 0dB. The DSP-Compressor has got a natural sound and is there to compress the Multi-Band as natural as possible, meaning there are no extra functions like EQ or Exciters used.
Auto Record DSP-Compressor
This function is fully automatic and has two processing stages. The first searches the audio file for the suggested compressor settings. The second stage recordings the audio file with the correct threshold settings found by the AGC. There is no need to set up the DSP-Compressor manually as all settings are taken care of automatically as long as a valid Source and Reference are loaded into AAMS. The recorded audio file has the same name as the original audio file with the addition of the extension '_C.wav'.
Offline AGC Hunting
This function is the first stage and scans the audio file for the correct AGC settings as suggested by AAMS calculations. The outcome is shown by the 'Suggested Threshold Targets' and is automatically copied to the threshold faders of each Multi-Band. After this function you can press Record to proceed to the Second stage.
The Faders
The threshold fader for left and right can be set manually or by choosing a setup. When you click on the value below the fader will reset to 0dB. The Attack, Delay, Ratio and Window settings are preset by the Setup you have chosen but can be changed manually.
The AGC Control
AGC Control is the automatic feature that runs the DSP-Compressor. When the AGC is turned ON, the DSP-Compressor will automatically hunt the audio that is being played or processed for the correct levels. These levels are based on the Compressor Suggestion AAMS has calculated. When the AGC is turned On the DSP-Compressor is hunting for these levels and the AGC Graph and AGC Data displays the results while the audio file is being played or processed. In the AGC Data grid you can see all levels and the suggestion in db. The 1-8 LED’s below show the correct found levels when they turn to Green, indicating the Multi-Band Left or Right threshold level has been found by the AGC. It is possible that Green LED’s turn off and on for a while as the AGC is waiting for the audio signal to be corrected. When all Left and Right LED’s are green a timer will run and after some time the AGC Correct LED will also show green meaning all Multi-Bands are now ok. All correct Multi-Band threshold levels have been found based on the AAMS Compressor suggestion. The suggested Threshold level of every Multi-Band is shown as 'Threshold Suggestion Left' and 'Threshold Suggestion Right'. It is best to turn AGC ON when playing and let the AGC Control hunt down the right threshold levels, playing through the whole file. Then turn the AGC off and set 'All targets threshold' and Record the Audio File (when you press the Record button the AGC is automatically turned to off).
The AGC Chart
The AGC Chart shows the selected Multi-Band and shows the real time audio compressed signal in red and blue lines for Left and Right. The maroon and dark blue lines are the AC controls signal that will try to stay close to the yellow and green Suggestion lines. The nearer that the maroon and dark blue lines come to the yellow and green Suggestion lines, the better the result. The AC will compensate with the Left and Right threshold faders of each Multi-Band and will show the 'Suggested Threshold' as a result while playing the audio signal. You can reset the AC chart and found levels with the buttons besides the chart.
The AC Data
The AC Data grid will show all data that has been measured for each Multi-Band, including the suggestions for each Multi-Band as calculated by AAMS. When the AC is “Hunting” a correct threshold level is not found yet. When the AC is “Ok” the AC has found correct levels. The LED’s below the AC will turn to green for each found Multi-Band level that is correct.
Filters
Each set up of the DSP-Compressor consists of one or several Multi-Bands each with a specific frequency range. The frequency ranges for each Multi-Band are shown in the Filters Chart.

DSP-Compressor Analyzer Realtime
The DSP-Compressor Analyzer Realtime must be Turned On in DSP-Compressor Options Tab. In Automatic Mastering mode the DSP-Compressor Analyzer Realtime is turned Off. In Semi-Automatic or Manual Mastering Modes the Realtime Analyzer is Turned On. The DSP-Compressor Analyzer Realtime Chart updates about 3 times a second with Spectrum Multiband informational levels of each multiband compression. The multiband frequencies can be displayed as 1 to 8 (for 8 multiband Compression settings) and the appropriate measured levels are displayed.
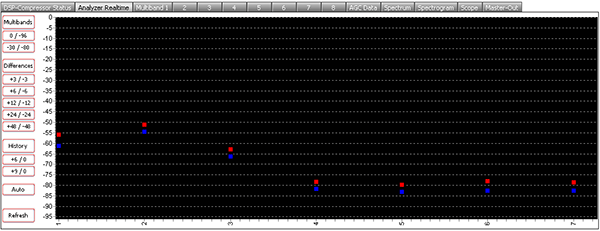
Multiband Differences displayed in Realtime
The above picture shows the DSP-Compressor Analyzer Realtime Chart filled with the Spectrum Levels per Multiband. The Spectrum levels measured per multiband will show an accurate representation what is happening to the signal per multiband. Most likely the signal will follow the reference and by amount the lower frequency multibands will have more level then the higher frequency multibands. By playing the audio or processing the audio, the levels will differ 3 times a second, are captured by AAMS Spectrum Analyzer and Suggestions of Compression are based on what the Spectrum is like and how levels deviate. The Chart an view can be a benefit for a Semi-Automatic Mastering user or a manual mastering user. By following the Chart you might see when the Basedrum kicks, or when Vocals begin or end. This gives a feel of how dynamic the audio spectrum per multiband is.
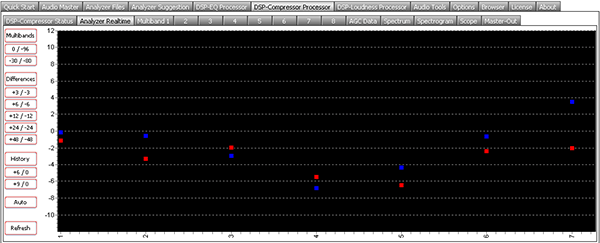
Multiband Differences displayed in Realtime
The above picture shows the DSP-Compressor Analyzer Realtime Chart filled with the Differences per Multiband. This will only show the differences against the spectrum multiband measured per cycle. Each 1 second of Analyzing there are about 3 times measurements done by AAMS Analyzer for the DSP-Compressor. This means the differences are higher then 0 dB measured, the signal of the multiband went Up wards and raised (the measured signal per multiband from the source audio file being played or processed. When the differences are lower then 0 dB measured, the signal of the multiband went Down and lowered. Also when looking a longer time you could reconise that when all signals are around 0 dB the compression is hard and most likely compressed more. When signals are having a better spread and do not come close to 0 dB, the compression is less. Playing the whole track of audio and watching this chart can reveal some info on how the audio has been compressor more or less in time. By following the Chart you might see when the Basedrum kicks, or when Vocals begin or end. This gives a feel of how dynamic the audio spectrum per multiband is.
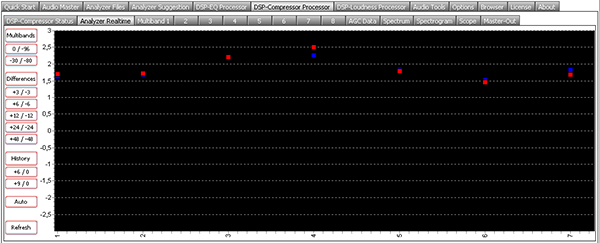
Multiband History displayed in Realtime
The above picture shows the History of the Differences Calculated by the amount of cycles recorded. When the values are above 0 dB there is likely more compression needed. Take in account that +6 dB or +12dB levels shown, will indicate by doing more compression per multiband, the compression levels should get better and more dynamic headroom will free up for loudness to raise the whole audio. When signals are around 0 dB or +3 dB (or so) the compression levels of the audio seem pretty good. When audio signals are below 0 dB it seems that there should be a reduction (decompression) done for the audio being played. It is more likely when signals are -3 dB to -12dB that the audio was compressor too much while mixing or mastering. The audio file that has been played or recorded / processed is in the History Chart. Most likely you need the play the whole audio file for the History to bee correct. The levels will fall the longer the audio has been played. So be sure for correct readings to play your audio file from beginning to end, so the History is correct for the whole audio file shown / played.
DSP-Compressor Analyzer Realtime Options
Like said by DSP-EQ Analyzer Realtime or DSP-Compressor Analyzer Realtime need to be Turned On in their Options Tab. For Automatic Mastering Settings the Realtime Analyzer is being Turned Off. The Semi-Automatic or Manual Mastering setups, Turn On the Realtime Analyzer functions. Find the DSP-EQ Options Tab or DSP-Compressor Options Tab explained to turn On or Off the Realtime functions of AAMS.


DSP-Compressor Real-time Views
The Real-time DSP views are preset in the DSP-Compressor Tabs. When an audio file is loaded and playing these views will display and update the Spectrum, Spectrogram, Scope and Master-Out. All views as well as all level meters are updated with their own overflow LED's. When the signal is distorted by passing the highest possible maximum sound level an overflow LED will turn red. The overflow LED will return to green if all levels are returning to normal. The Hold LED’s will stay red until they are reset which can be done manually with a click of the mouse.
Settings
Here you can set up a DSP-Compressor from several useful presets. The AAMS 1-8 Multi-Band Compressor settings are suitable for most purposes. The AAMS 1-8 Low Band Multi-Band Compressor settings are for lower quality recordings like MP3 and Tape Copies and these settings will concentrate more on the lower rather than high frequencies. Furthermore there are some settings that will help you work with plugins using the correct settings. In a normal situation a 4 Band Multi-Band Compressor is the default setting. Changing to an 8 Multi-Band Compressor will affect processor speed and will improve quality a little more. Use the 8 Multi-Band Compressor when you think you need the extra Multi-Bands, otherwise the 4 Band Multi-Band Compressor setting is default. Selecting a Preset will change the setup of the DSPCompressor and when audio is being played the player will stopped...
The Volume Faders and Level Meters
When the DSP-Compressor is playing the volume faders are automatically lowered when an overload is present on the master-out. To be sure that there are no overloads you should listen to the whole audio material until the end, then the volume faders are set just right and the master-out will not go over 0dB. You can turn off this function in the Options Tab.
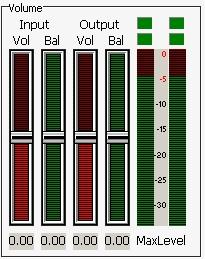
Overflow LED’s
The overflow LED’s turn from green to red when an overflow is present in one of AAMS DSP processors.You can press each LED and the Overflow Hold LED’s turn to green again. An overflow is basically a digital domain term when a signal goes over the 0dB limit. Recording in the digital domain with signals over 0dB will result in damaged, distorted audio. So it is better to adjust the volume (gain) to a lower level. You can also adjust the faders of the Equalizer to compensate for overflows, but this is quite tedious.
Recording the DSP-Compressor
After you are satisfied with the results you can process the audio material with the Record button. The Record button processes the audio and saves it as a new audio *.wav file. The Example file Example1.wav would be saved as Example1_C.wav.

General Rules
The default 4 Band Compressor setting is the basic set up for compression. This will give good results on all kinds of processor speeds and available memory. When you are using a modern computer you can switch to the 6 or 8 Multi-Band Compressor for some slightly better results. 8 Multi-Bands almost halves the speed of operation, so switch back to a 6 or 4 Band Multi-Band Compressor if you experience problems. For best results it is also important that all AC LED’s are green, confirming that good compression levels have been found. When using Automatic Mastering there is a Mastering Document saved alongside the Mastered Audio file, here you can check that the right levels are found (AC Correct).
Manual and Automatic Mode
Because AAMS is set up for Automatic Mastering by default, when working manually with AAMS Processors it is recommended that you use the Record button of each processor. Also for configuring AAMS Options for working in manual mode, there are some settings on the Options Preferences Tab. For all Automatic Mastering purposes, switch back to Automatic Mode in Options Preferences Tab.
Specifications
The internal DSP-Compressor has a natural sounding algorithm that provides linear compression. The DSPCompressor AC Control can handle AAMS Compressor Suggestions automatically or manually. The frequency range is 5Hz to 22050 Hz. Compressor Bands range from 1 to 8 depending on the Factory Preset in use. The frequency range 0-5 Hz or 20000-22050 Hz is rolled-off and all Factory Presets have a Roll-On and Roll-Off Frequency range. The application is designed to operate at sampling rates ranging from 44.1 kHz to 192 kHz. The Sample rate is normally 44.1 kHz depending on the Audio File output by the Player. The Internal DSP-Processing can handle 16/24/32 Bit calculations while the rest of the programming handles 64 bit code.
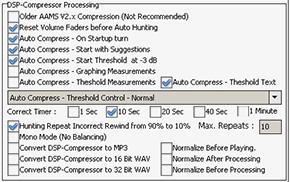
DSP-Compressor Options Tab
Older AAMS V2.x Compression (Nt Recommended)
This will turn ON the compression settings emulation of AAMS V2.x versions. Standard Off, the AAMS V4 compression settings are improved, so better stay to Off.
Reset Volume Faders before Auto Hunting
By default ON. This feature will reset all DSP-Compressor faders to original AAMS positions. When manual mastering or setting are applied by using AAMS manually, turn OFF. Only turn OFF when you do not need auto mastering and using manual user preset controls.
Auto Compress - On Startup turn
The DSP-Compressor will turn the Auto Compression Suggestions On automatically when you play or process a file. By default ON. This feature will turn ON the auto compression DSP features at startup. Only turn OFF when you do not need auto mastering and using a manual user pre-setting.
Auto Compress - Start with Suggestions
The DSP-Compressor will start with AAMS Suggestions settings for the DSP-Compressor that are copied automatically.
Auto Compress - Start Faders at -2.75 dB
The DSP-Compressor starts all Multi-Band Thresholds at -2.75 dB when hunting for levels. By default ON. This feature will start the automatic compression setting of the threshold at -2.75db. This is a better setting than 0db initial fader setting. The initial -2.75db setting will be corrected when the automatic compression feature is ON. Recommended to stay ON.
Auto Compress - Graphing Measurements
Shows Compression Levels measurements in Auto Compession Graphs of all multibands charts. By default OFF. This will show the AGC (auto gain control) in the graphs of the DSP-Compressor.
Auto Compress - Threshold Measurements.
Shows suggestions for threshold in Auto Compression Graphs of all multibands charts.
Auto Compress - Threshold text.
Shows suggestions for threshold in Auto Compression Graphs of all multibands texts.
Auto Compress - AAMS Loudness Curves from ISO226 (fletcher)
Standard set to On. By analyzing the audio passing the DSP-Compressor, the AAMS Loudness Curves are taken into mind and creates offset suggestions according to human hearing. This will imporve the DSP-Compressor by doing only compression needed to get the levels by suggestions. When turned Off, the straightforward suggestions pass and wil be leveled straightforward.
Auto Compress - Factor Multibands
Standard set to On. Uses the Factor calculated from the AAMS Loudness Curves (ISO226, Fletcher Munson). The compression levels to raising or lowering levels, are according to Loudness Human Hearing Levels. When turned Off, the straightforward suggestions pass and wil be leveled straightforward.
Mono Mode
By default OFF. Only turn ON when you are sure the audio file is a two mono channel stereo audio file. The Mono mode will add Left + Right and divide it again. Then applies same levels on Left as on Right. When furned Off as standard, the Left levels can be different from the Right levels.
Normalize Before Playing
When loading an audio file into the DSP-Compressor the file will be Normalized. Standard is On. Nomalisation will give improved dynamics, only when the signal can be raised by normalisation.
Normalize Before Processing
When AAMS is mastering the source file will be Normalized. Standard is ON. Nomalisation will give improved dynamics, only when the signal can be raised by normalisation.
Normalize After Processing
When AAMS is mastering the source file will be Normalized after DSP-Compressor processing is done. Standard is Off.
Auto Compress - Threshold Control
This will change the Threshold Correction while DSP-Compression is done. This feature can make Threshold correction faster or slower by setting. Standard is Normal (1x). The DSP-Compressor Hunts (Hunting) for the correct compression levels per multiband, to find correct levels the compression levels are constantly updated and changed if not correct until the correct compression level is found.
AGC Auto Correct Timer
For the DSP-Compressor to check the compression is correctly done, a timer is placed. This timer (each multiband has its own timer) controls and checks for correct compression. When correct compression is found, a green light will turn on for each multiband. When all multibands are found correct by AAMS, the ALL light will turn on. For each channel Left and Right there can be maximum 8 multibands. So actually for correct compression to be found by AAMS, 16 lights will need to turn ON for 8 multibands. The standard chosen multibands by AAMS is 4 multibands. The user can change multibands in the DSP-Compressor tab. The timer can be set to 1 second to 1 minute. The longer you set the timer, the longer it takes for AAMS to find correct levels for compression for each multiband. Stadard Default is 5 Seconds. When the correct compression level is found for each multiband, it takes 5 seconds before AAMS Analyzer approves the correct levels and are taken into account for the final compression levels per multiband.
Hunting Mode Repeat Incorrect Rewind from 90% to 10%
The AAMS DSP-Compressor will Hunt for levels of compression and suggests on them a threshold level for each multiband. Whem audio mastering the DSP-Compressor will rewind while hunting and repeat the audio source and hunts until the retries are drowned. Standard is On.
Hunting Maximum Repeats
The amount of retries the DSP-Comprossor can play the audio file for hunting the levels. This feature is only used in hunting mode. The more retries the more chance the suggestion be corrrect, but will take more time when the hunting is still with incorrect levels. Before all lights go green and all multibands have good compressions levels found, the DSP-Compressor will try to get correct levels for multiband thresholds as fast as can be. Standard set to 3 retries. The more retries the more likely AAMS Analyzer will find the correct levels for compression on each multiband. Mostlikely with a track more then 2 or 3 minutes of playtime, AAMS Analyzer will find the correct levels in one single pass. So 3 reties is enough for most audio tracks.
DSP-Compressor Analyzer Realtime Processing
This will turn ON the DSP-Compressor Realtime Analyzer and the AAMS Analyzer Realtime functions. This does not mean any of the Realtime Charts will be visible. This set to ON will only turn on the Realtime Calculations needed for processing the audio file playing.
DSP-Compressor Analyzer Realtime Show Multibands
Shows the Multibands Spectrum Levels in the DSP-Compressor Realtime Chart per Multiband.
DSP-Compressor Analyzer Realtime Show Differences
Shows the Multibands Difference Levels in the DSP-Compressor Realtime Chart per Multiband.
DSP-Compressor Analyzer Realtime Show Multibands
Shows the Multibands Historic Difference Levels in the DSP-Compressor Realtime Chart per Multiband.

Settings, Save Options
Saves all options in the AAMS.INA file. This feature must be used when you changed any option as mentioned above. You can restore AAMS defaults in the preferences tab.
Settings, Load Options
Reloads the AAMS.INA file and restores the options. This feature can be used when you need to reset AAMS options.
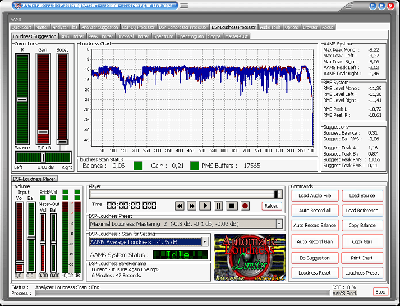
Loudness Explained
Today, most spoken audio issue is control of loudness, daily millions of people adjust their volume controls because of louder or softher audio signals. Modern Music recordings are louder then recordings from the past, promos and commercials are generally much louder than normal. Even the difference by playing recordings, will make you adjust the volume. In general more loudness means we are in the Loudness War, each time upping the loudness levels of recordings. In fact we will loose loudness and the sparkle of the recording (mix) when boost too much, so everything is compressed hard at the tops to 0 db! Speakers need to move, and what happens when we want more loudness ? They actually move less! In general the music industry is still upping the levels, but there is a great understanding now that this is only hurting the actual recording. Loudness is a balance between hearing it loud and hearing soft and hard clearly. So we need to have the loudness levels tamed! AAMS Loudness is according to the setup rules!
Loudness and Limiters
Loudness is the quality of a sound that is the primary psychological correlate of physical intensity. Loudness, a subjective measure, is often confused with objective measures of sound intensity such as decibels. Filters attempt to adjust intensity measurements to correspond to loudness as perceived by the average human. However, true perceived loudness varies from person to person and cannot be measured this way. Loudness is also affected by parameters other than intensity, including: frequency and duration. A Peak or RMS Limiter is a circuit that allows signals below a set value to pass unaffected and compresses the peaks of stronger signals that exceed this set value. A Brick wall Limiter is a circuit that allows signals below a set value to pass unaffected and cutoff the peaks of stronger signals that exceed this set value and to avoid clipping at 0db or above 0db.
The AAMS internal DSP-Loudness Processor explained
AAMS loudness is based on AAMS Analyzer suggestions and a pre-setup desired level. Select the DSP-Loudness Tab and Select Loudness. The DSP-Loudness Player and Processor contain a Balancing Tool, Loudness Maximizer, RMS Limiter, Peak Limiter and Brick wall Limiter in one. Also the loudness DSP has analog properties, meaning the compressor curves are soft and round. Main functions of the DSP-Loudness processor is RMS Audio Scanning, Peak Audio Scanning, Balance Search that balances Left and Right of the whole track. A Gain processor, that functions on AAMS Peak RMS based system or the user can change to RMS more Dynamic based system. In whole the DSP-Loudness Mastering routine that does DSP-Loudness functions automatically or user based. The DSP-Loudness also functions as a player for your audio material. Simply press Load Audio File or press Play and a window will pop up asking for a *.wav file. Press Stop to stop the player and press Pause to pause playing.

Chart - Display Levels
When an audio file is loaded into the player the file will be automatically scanned for its levels. These levels are shown on the chart and above the chart are the Peak / RMS levels. After scanning is finished the suggestions for Balancing and Gaining are shown below the chart. The basic intention of the DSP-Loudness is to balance then add gain to the audio file. The Balance suggestion shows a value in dB, a minus - value is balanced to the Left and a plus value is balanced to the Right. You can set the Balance Faders (There are three in total connected to each other) with the mouse. You can reset the Balance Faders by clicking on the value below the fader and the fader will reset to 0dB. The red LED’s for Balance and Gain will show up when suggestions matching the Audio File are correct.

Chart - Display RMS Limiter, Peak Limiter, Brickwall Limiter and overflows.
While processing the lines show RMS, Peak, Brickwall and overflows in lines inside the chart.
Auto Record Loudness
This function will automatically process Balance and Gaining onto the audio file you load into the DSP-Loudness player/processor. A balanced audio file with the extension '_B.wav' and a gain processed audio file with the extension '_L.wav' will be created. All you have to do is wait until processing is finished. This function is fully automatic, just choose an audio file and AAMS will do the balancing and gaining for you. There is no need to set up the DSP-Loudness functions before using this function as all calculations are done automatically. This function is a two-stage process with Balancing as the first stage and gaining the second stage.
Auto Record Balance
This function is the first stage of the DSP-Loudness processor and balances the audio file you loaded into the Player/Processor. A recorded and processed file with the extension '_B.wav' will be created as the balanced audio file. This function is fully automatic, just choose an audio file and AAMS will do the balancing. There is no need to set up the DSP-Loudness functions before using this function as all calculations are done automatically.
Auto Record Gain
This function is the second stage of the DSP-Loudness processor and gains the audio file you loaded into the Player/Processor. A recorded and processed file with the extension '_L.wav' will be created as the gained audio file. This function is fully automatic, just choose an audio file and AAMS will automatically do the Loudness Gaining. There is no need to set up the DSP-Loudness functions before using this function as all calculations are done automatically.
1 or 2 Stages?
You can use 1 or 2 Stage functions with AAMS. A 1 Stage manual job involves playing the audio file with the Player and setting up Balance and Gain, ensuring that the signal does not go over 0dB, and then record the results. A 1 Stage processing job is less accurate than the 2 Stage type. A 2 Stage Processing job is more accurate and means you Balance the Audio File First Stage 1, record it, and then do Stage 2.
The internal Processing Route
The routing of the DSP-Processor is as follows. The Audio is processed by the Loudness part of the DSPLoudness processor. The Loudness Tab shows Balancing Faders and Loudness Gain Volume faders. The RMS Limiter is there to compress/limit the audio signal when necessary. The RMS limiter is based on an RMS compressor and has as large a ratio range as possible. The Peak Limiter limits some the highest peaks and can be set towards Brick walling or the more moderate Peak Limiting. Finally the Brick wall Limiter limits any signals below 0dB or lower. All Limiters can be turned off or on by depending on what set up from the Setting Tab you have chosen.

Playing and with AAMS internal DSP-Compressor processor
The file Example1.aam file is the Source file and is located in the same directory as Example1.afd. The Example1.aam file was created by AAMS analysis of the Example1.wav file located in the same directory. The Example1.wav file can be listened to using the DSP-Compressor Player. Go to the DSP-Compressor tab and press the button Play or Load Audio File and select the Example1.wav file.
The Setups
The Settings Tab will show the DSP-Loudness setup and you can choose any of the listed DSP-Loudness settings. The Maximal Setups are for Maximal Loudness and will try to get the loudest sound possible and is the default preset. The Average Setups are for Average Loudness and will try to get the best sound possible. The Minimal Setups are for Minimal Loudness and will try to get the sound towards a minimal level. This is useful for compiling CD's or multiple tracks and saves some loudness space for later use. The values for the RMS Limiter, Peak Limiter and Brick wall limiter are also listed. When a Limiter is not shown in the chosen setup this means that it is not required in the current configuration. When an Audio File is loaded into the DSP-Loudness processor / Player, the levels in the file are scanned. You can change the Scan Level in the Settings Tab, which will raise or decrease the Loudness Level that is being scanned for (and are subsequently used in the suggestions. When the correct level is reached for the Maximal 0dB Setup the Suggestion Correct LED’s will show Green. When the correct level is reached, for the other Setups the Suggestion Correct LED’s will show Green or Yellow. The Yellow Led indicates that the Used Setup highest level has not been reached yet as only the Maximal 0dB Setup will do this. You can use the Average and Minimal Setups for a single stage pass. When you apply the Average and Minimal Setups more than once the Yellow LED will stay and will turn green only when it reaches the Maximum Setup Loudness Levels. When you use the Average or Minimal DSP-Loudness Setups the first pass of DSP-Loudness Processing is sufficient, so making multiple passes is not recommended. You can always use more Loudness Gaining to make it louder although this is also not recommended. When you use the Maximal DSP-Loudness Setup, the first pass will gain the loudness directly to the Maximal and then the Green Led will show-up. On start up the Average 1 Setup is the default to ensure a good Average Loudness. When you change the DSPCompressor Setup to Maximal, be aware that some distortion in the audio signal cannot be prevented. Only use the Maximal Setup when you are certain ofof it and the intended result. If you are unsure, a good start is the Average Setups of the DSP-Compressor.
Loudness
The Balance Fader can be set manually and clicking on the value below the fader will reset it to 0dB. When you use 'Copy Balance Suggestion' the suggested Balance is copied to the Balance Fader. The Gain fader can be set manually and clicking on the value below the Gain Fader will reset it to 0dB. When you use 'Copy Gain Suggestion' the suggested gain is copied to the Gain fader. The buttons 'DSP-Loudness Preset' and 'DSP-Loudness Reset' are setting or resetting the chosen Setup, which is useful for comparing its effect.
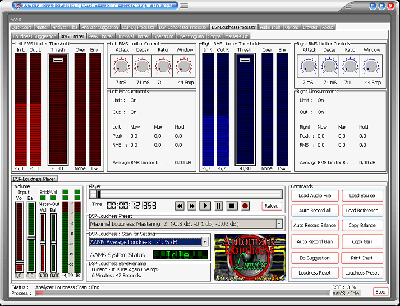
RMS Limiter
The threshold fader for left and right can be set manually or by choosing a setup and when you click on the value below the fader it will reset to 0dB. The Attack, Delay, Ratio and Window settings are preset by the Setup you have chosen but can be changed manually. The RMS Limiter is not as fast in correcting the audio signal as the Peak Limiter is. Most of the times when threshold levels for left and right are low, the RMS Limiter will only work on loud parts of the audio signal, making it slightly lower when needed. The RMS Limiter will pass signals higher than 0dB to the Peak Limiter and is only meant for moderately correcting the audio signal.
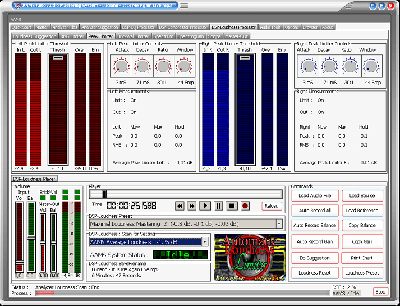
The Peak Limiter
The threshold fader for left and right can be set manually or by choosing a setup and when you click on the value below the fader it will reset to 0dB. The Attack, Delay, Ratio and Window settings are preset by the Setup you have chosen but can be changed manually. The Peak Limiter is very fast in correcting the audio signal and can also be used as a Brick wall Limiter when the attack time is set to <= 1ms. The Peak Limiter will adjust every signal that goes above the threshold level with the ratio chosen. A ratio of 50:1 will compress / limit the audio signal a lot more than the RMS Limiter will ever do. The Peak Limiter is meant to 'Scrape off' some of the loudest peaks of the audio signal.
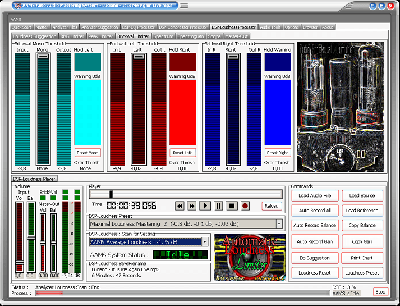
The Brick wall Limiter
The threshold fader for left / right and mono can be set manually or by choosing a setup and when you click on the value below the fader it will reset to 0dB. Every audio signal that goes over the Threshold Level will be cut off immediately. A Threshold Level of -0.05 dB will cut off all audio signals before it rises above 0dB. The LED’s indicate only if the Brick wall limiter is correcting the audio signal, and are not the same as an overflow. The LED’s can be reset by clicking the corresponding button.
The Volume Faders and Level Meters
When the DSP-Loudness is playing and Gaining / limiting the volume faders are automatically lowered when an overload is present on the master-out. To be sure that there are no overloads you should listen to the whole file until the end, then the volume faders are set just right and the master-out will not go over 0dB. You can turn off this function in the Options Tab.
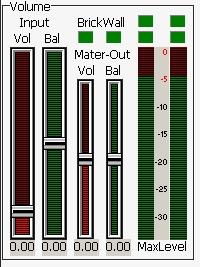
Overflow LED’s
The overflow LED’s turn from green to red when an overflow is present in one of AAMS DSP processors. Press each LED and the Overflow Hold LED’s turn green again. An overflow is basically a digital domain term. When a signal goes over the 0dB limit an overflow is present. Recording in the digital domain with signals over 0dB will result in distorted audio, so it is better to adjust the volume (gain) to a lower level. You can also adjust the faders of the Equalizer to compensate for overflows, but this is quite tedious.
Recording DSP-Loudness
When you are satisfied with the results you can process the audio material with the Record button. The Record button processes the audio and saves it as a new audio *.wav file. The Example file Example1.wav would be saved as Example1_L.wav.


DSP-Loudness Real-time Views
The Real-time DSP views are preset in the DSP-Loudness Tabs. When an audio file is loaded and playing these views will display and update the Spectrum, Spectrogram, Scope and Master-Out. All views as well as all level meters are updated with their own overflow LED's. When the signal is distorted by passing the highest possible maximum sound level an overflow LED will turn red. The overflow LED will return to green if all levels are returning to normal. The Hold LED’s will stay red until they are reset which can be done manually with a click of the mouse.
Manual and Automatic Mode
Because AAMS is set up for Automatic Mastering by default, when working manually with AAMS Processors it is recommended that you use the Record button of each processor. Also when configuring AAMS Options for working in manual mode there are some settings on the Options Preferences Tab. For all Automatic Mastering purposes, switch back to Automatic Mode in Options Preferences Tab.
General Rules
DSP-Loudness Processor settings define how loud the end result will be. By default the Loudness Scan setting is 'Average', which is quite a conservative setting. Usually you can master multiple tracks (for example for an album of tracks) with the 'Average' Setting and this will give good results on all kinds of tracks. Whenever you need some more loudness power, set the DSP-Loudness Settings higher.
Specifications
The internal DSP-Loudness has a natural sounding algorithm to produce exact, linear Loudness Gain with no resonance peaks. The DSP-Loudness processor has several main functions, Balancing, Loudness, RMS Limiter, Peak Limiter, Brick wall Limiter. The frequency range is 5Hz to 22050 Hz. The frequency ranges 0-5 Hz and 20000-22050 Hz are rolled-off and all Factory Presets have a Roll-On and Roll-Off Frequency range. The amount of gain ranges from - 80dB to 9dB, and can be set in fractions of 0.1dB. Designed to operate at sampling rates ranging from 44.1 KHz to 192 KHz, the Sample rate is normally 44.1 KHz depending on the Audio File output by the Player. The Internal DSP-Processing can handle 16/24/32 Bit calculations while the rest of the programming handles 64 bit code.
AAMS Loudness System
The AAMS Loudness system is based on a percentage of peaks and RMS levels or RMS/Peak Levels. The AAMS system will do a more peak based search of the audio and also scans for RMS levels. But however AAMS system will calculate and process audio as being more careful to avoid distortion levels. This means that for most it will bring your audio input to appropriate levels. Not doing the Loudness War, but being careful and still have a loud sound. AAMS DSP-Loudness process will anticipate troubles and avoids them. Still Loudness that is applied to much, will still have distortion or overflows. So limiters and calculations in processing are used in the AAMS Loudness Based system option. When needed this system can do full album mastering based on AAMS System of transferring loudness levels. Also on its main settings Single Audio Mastering can be an advantage over the RMS Dynamic Levels system.
RMS Dynamic Level System
The RMS Dynamic Level system is based on more know RMS and Peak scanning methods. If you are into RMS levels, there is much to say about it. Because it is the main system used by everyone into the discussion of the loudness war. So read about that on the internet if you are unknown.
The main function is RMS and Dynamics / some say Dynamic Range.
Why use a Loudness Processor and what is it doing?
Well the user can setup a desired RMS level for the whole track. The peaks will be calculated and shaved off the whole track, so that the RMS Level is what is needed as loudness or RMS levels for the whole track. Basically the user setup is for RMS Levels, and the Limiters or Calculations a computer can do to process the audio that loud. For different genres there are RMS levels appropriate. So the user can make up the RMS, and does not really care about peaks that will be hurt. RMS Levels are nowadays convenient method to get the loudness desired. With shaving the peaks and making things louder, comes at a price. Distortion and Overflows. We hope that the Limiters and internal processing will do not do too much damage. If the user sets the RMS Levels too high (-6dB to 0db!) be sure of artifacts inside the audio.
You can select RMS levels and Dbfs levels.
For single files and genres of music, when mastering to a certain level is needed. Dbfs system is the same as RMS system but it relies on other measurement system called dbfs. Both RMS and dbfs systems are good when you are wanting to do things manually and adjust the loudness. When mastering or even after mastering. You can hunt down your appropriate levels and setup AAMS DSP-Loudness to follow. That must be digital distortion? Both systems AAMS system and the RMS System are not opponents, but friends!

AAMS Loudness System
AAMS Sub Zero 0: 6.00 dB
AAMS Sub Zero 1: 5.75 dB
AAMS Sub Zero 2: 5.50 dB
AAMS Sub Zero 3: 5.25 dB
AAMS Sub Zero 4: 5.00 dB
AAMS Sub Zero 5: 4.75 dB
AAMS Sub Zero 6: 4.50 dB
AAMS Sub Zero 7: 4.25 dB
AAMS Loudness War I 1: 4.00 dB
AAMS Loudness War I 2: 3.75 dB
AAMS Loudness War I 3: 3.50 dB
AAMS Loudness War I 4: 3.25 dB
AAMS Loudness War II 1: 3.00 dB
AAMS Loudness War II 2: 2.75 dB
AAMS Loudness War II 3: 2.50 dB
AAMS Loudness War II 4: 2.25 dB
AAMS Increased 1: 2.00 dB
AAMS Increased 2: 1.75 dB
AAMS Increased 3: 1.50 dB
AAMS Increased 4: 1.25 dB
AAMS over the Top 1: 1.00 dB
AAMS Over the Top 2: 0.75 dB
AAMS Over the Top 3: 0.50 dB
AAMS Over the Top 4: 0.25 dB
AAMS Ultra Hard Loudness: 0.00 dB
AAMS Hard Loudness: -0.25 dB
AAMS Super Strong Loudness: -0.50 dB
AAMS Strong Loudness: -0.75 dB
AAMS Good Loudness: -1.00 dB
AAMS Average Loudness: -1.25 dB - Normal levels AAMS target setting
AAMS Medium Loudness 1: -1.50 dB
AAMS Medium Loudness 2: -1.75 dB
AAMS Soft Low ends 1: -2.00 dB
AAMS Soft Loudness 2: -2.25 dB
AAMS Uttara Soft Loudness 1: -2.50 dB
AAMS sutra Soft Loudness 2: -2.75 dB
AAMS Headroom Loudness 1: - 3.00 dB
AAMS Headroom Loudness 2: - 3.25 dB
AAMS Headroom Loudness 3: - 3.50 dB
AAMS Headroom Loudness 4: - 3.75 dB
AAMS Minimal Loudness 1: - 4.00 dB
AAMS Minimal Loudness 2: - 4.25 dB
AAMS Minimal Loudness 3: - 4.50 dB
AAMS Minimal Loudness 4: - 4.75 dB
AAMS Minimal Loudness 5: - 5.00 dB
AAMS Minimal Loudness 6: - 5.25 dB
AAMS Minimal Loudness 7: - 5.50 dB
AAMS Minimal Loudness 8: - 5.75 dB
AAMS Minimal Loudness 9: - 6.00 dB

RMS Dynamic Loudness System
RMS Range Ultra Stupid: 0 dB
RMS Range Ultra Stupid: -2 dB
RMS Range Ultra Stupid: -3 dB
RMS Range Ultra Hard: -4 dB
RMS Range Ultra Hard: -5 dB
RMS Range Ultra: -6 dB
RMS Range Ultra: -7 dB
RMS Range Loud: -8 dB
RMS Range Loud: -9 dB
RMS Range Normal: -10 dB – Normal levels target setting
RMS Range Normal: -11 dB
RMS Range Normal: -12 dB
RMS Range Normal: -13 dB
RMS Range Normal: -14 dB
RMS Range Normal: -15 dB
RMS Range Normal: -16 dB
RMS Range Low: -17 dB
RMS Range Low: -18 dB
RMS Range Low: -19 dB
RMS Range Low: -20 dB
Dbfs Range Ultra Stupid: 0 dB
Dbfs Range Ultra Stupid: -2 dB
Dbfs Range Ultra Stupid: -3 dB
Dbfs Range Ultra Hard: -4 dB
Dbfs Range Ultra Hard: -5 dB
Dbfs Range Ultra: -6 dB
Dbfs Range Ultra: -7 dB
Dbfs Range Loud: -8 dB
Dbfs Range Loud: -9 dB
Dbfs Range Normal: -10 dB – Normal levels target setting
Dbfs Range Normal: -11 dB
Dbfs Range Normal: -12 dB
Dbfs Range Normal: -13 dB
Dbfs Range Normal: -14 dB
Dbfs Range Normal: -15 dB
Dbfs Range Normal: -16 dB
Dbfs Range Low: -17 dB
Dbfs Range Low: -18 dB
Dbfs Range Low: -19 dB
Dbfs Range Low: -20 dB
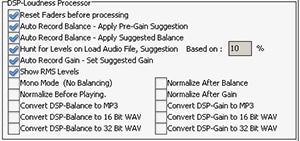
DSP-Loudness Options Tab
Reset Faders before processing
By default On. This feature ensures all DSP-Loudness faders are reset to original default position. Set to On, when you need full automatic mastering by AAMS.Set to Off, when you are manual mastering. Beter to leave this function On.
Auto Record Balance - Apply Pre-Gain Suggestion
By default Off. When turned On, before using loudness AAMS will apply pre-gain from its suggested calculations. This can improve Loudness by using pre-gain, but also raises levels, so more clipping could occur. Only use this feature when your original track is very soft. Else, leave it Off.
Auto Record Balance - Apply Suggested Balance
By default On. This feature applies the automatic calculated suggested balancing by AAMS. This will balance your track (audio master) and will have a good effect on the listener’s left and right perception while hearing the audio master. The balancing is done before loudness is applied. Balancing will mean Left and Right signals are even powered. Balanced audio gives a more human feel and will give a little bit more headroom to raise to 0dB and give some more dynamics.
Hunt For Levels on Audio File
Scans the loaded Audio File for its levels (DPS-Loudness Suggestions will not work when this feature is turned off). By default On. This feature scans the audio file for its levels and is needed for AAMS Suggestion for DSP-Loudness. Better leave this On.
Hunt for Levels on Load Audio File, suggestion based on Loudness Points
Set to On, when you need full automatic mastering. Set to Off, when you need manual mastering. Basically leave this ON, only set to Off when you do not want levels te be changed by AAMS. Turn this feature OFF when you need no balancing done by AAMS and keep your track as balanced as original (not recommended). Scan Suggestion Based on 10 Loudness Points (default). This feature is hard to explain, because its AAMS internal processing for hunting the correct Loudness levels to be found and corrected for end mastered file. This value can be raised or lowered by users to experiment. Else when not sure, leave 10 as a value here.
Auto Record Gain - Set Suggested Gain
By default ON. This feature applies the Loudness. When turned OFF, no Loudness will be applied. Keep in mind the DSP-Loudness will be functioning, so when turned OFF only the limiters will work. Better leave this On.
Chart Show RMS Levels
By default ON. This feature will show RMS levels in the chart. By turning OFF it will not.
Chart Show Loudness Left, Right and Mono lines
By default Off. This feature will show RMS levels in the chart. By turning OFF it will not.
Mono Mode (No Balancing)
By default Off. When turned On, ensures Stereo tracks that are actually two mono channels to stay correct as original. AAMS by default does not read or open mono files. But it is possible to fake AAMS by inserting two mono files into one stereo file. Only turn this feature ON, if you are sure your original file is completely mono. You can also turn Off, when you completely do not want any Balancing to be done by AAMS. Better not to use Mono mode, so leave it Off.
End master loudess at -0.3dB
By default Off. When turned on the end resuls in loudness will be 0.3 db lower and will not reach to 0.0 dB (normal).
Normalize Before Playing
When loading an audio file into the DSP-Compressor the file will be Normalized. Standard is On. When normalisation can raise the signal, the more dynamics are applied. But the DSP-Loudness system will raise the audio master to the suggested levels anayway. So this options helps, but is not of such importance. Leave it Off.
Normalize After Balance
By default off. This feature is mainly not needed to turn ON. Only turn ON for a normalize pre-balance. This will make the audio file before Balancing more louder. When normalisation can raise the signal, the more dynamics are applied. But the DSP-Loudness system will raise the audio master to the suggested levels anayway. So this options helps, but is not of such importance. Leave it Off.
Normalize After Gain
By default off. This feature is mainly not needed to turn ON. Only turn ON for a normalize pre-gain. This will make the audio file before Loudness more louder. When normalisation can raise the signal, the more dynamics are applied. But the DSP-Loudness system will raise the audio master to the suggested levels anayway. So this options helps, but is not of such importance. Leave it Off.

Settings, Save Options
Saves all options in the AAMS.INA file. This feature must be used when you changed any option as mentioned above. You can restore AAMS defaults in the preferences tab.
Settings, Load Options
Reloads the AAMS.INA file and restores the options. This feature can be used when you need to reset AAMS options.
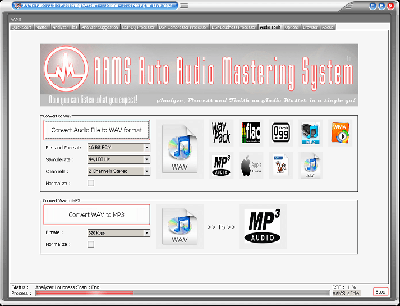
AAMS Tools Tab
Audio file convetions and multiple dithering in 64bit calculations. Mostly understand AAMS will work best with WAV 32 or 16 Bit Stereo 44.1 KHz Files. You can import MP3 and WAV files. When AAMS has a problem with these files, use the tools tab. Or convert your files with a convertor program / software, audio editor of your choose.
Normalize Audio File
Normalize an audio file to 0dB. Select the file format, click on Normalize Audio File. Select the input audio file that will be normalized. Select the output audio file that will be saved.
Convert MP3 Audio File
Convert an audio file to Wav. Select the file format, click on Convert MP3 Audio File. Select the input MP3 file that will be converted. Select the output audio file that will be saved.
Convert Wav to MP3 Audio File
Converts Wave Format files to MP3 audio files. Select the file format, click on Convert Wav Audio File. Select the input Wav file that will be converted. Select the output audio file that will be saved.
Wav Bitrate Converter
Select the file format, click on Convert Wav Audio File. Select the input Wav file that will be converted. Select the output audio file that will be saved.

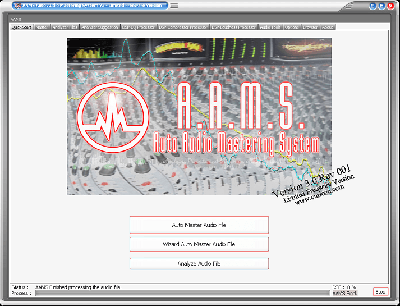
AAMS V4 - Freeware version is free to download and free to use. It allows users to audio master files up to 3.5 minutes for free. Also the free version of AAMS you can test out the software and the quality of sound by listening the end results on your own speakers of computer / audio player. AAMS is a good learing tool and so it is recommended just to hear the sound and play around with the settings of reference vs source.
The following functions do apply to the AAMS V4 freeware version :
Mastering single audio files up to 3.5 minutes with standard settings.
The user can analyze and master single audio files only ono by one.
The user can choose a reference file out of the Reference database Only.
Importing WAV and MP3 Audio Files into AAMS or Master Audio Files With AAMS.
DSP-EQ, 50 EQ Bands.
DSP-Compressor, 4 Multibands.
DSP-Loudness, AAMS measuring system.
AAMS saves the mastered outcome files as WAV16 Integer Stereo, WAV32 Float Stereo and MP3(192kbps).
For most users this might be enough, simple one button mastering for free.
For full functionality read about the AAMS V4 Full Licensed Version.
To make full use of AAMS V4, you must register for AAMS V4 Full Professional Version. The AAMS software program, website and this manual gives information how to do so. AAMS Limited Freeware Version can be freely used. This program is Free Distributable, i.e. you can evaluate this functional Limited Freeware Version. Distribution of AAMS installer and AAMS software can be done on a freeware basis, take into account that asking money or payments for the AAMS software is prohibited and not legal. AAMS is distributed on NON-COMMERIAL basis, so if you paid money for AAMS, ask your money back from the distributor. When you commercially distribute AAMS Software or AAMS Coding or AAMS Install files or any reference that suggests commercial use to make money out of AAMS, you must stop your activities!
AAMS Auto Audio Mastering System - Is Limited Freeware!
This software package is available free of charge. You can show your appreciation and support future development by donating on existing and upcoming products. When you are using this software for a longer time or using this software for commercial use, to earn money, you must think about giving a part of it to the author and register AAMS for a Full Version License.
Thank You!
Denis van der Velde
Sined Supplies Inc.
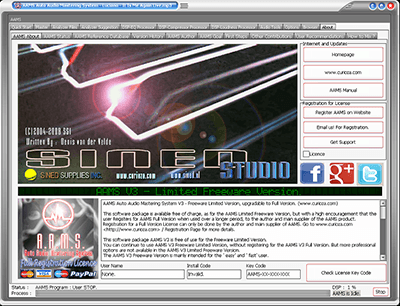
AAMS Auto Audio Mastering System V4 - Full Professional Registered Version.
The freedom to create your own audio style (reference) out of analyzing a single file or multiple files, combining references or adjusting references.
For users who like more control over the reference or the aams processing, create / adjust a reference out of the AAMS database.
Spectrum Reference Adjustments possible for Mono, Left and Right spectrum of a loaded reference and saving a new reference.
Or analyze commercial audio and create a reference accordingly.
Therefore having full control over Creating your own style reference and creating your own sound!
DSP-EQ, 100 EQ Bands.
DSP-Compressor, 8 Multibands.
DSP-Loudness, AAMS Mastering and LUFS Streaming Services.
Features : Over > 1 Hour mastering audio tested, intresting option for long tracks or DJ-mixes.
Reference Adjust, adjust the loaded reference file according to user EQ Spectrum changes, save user created reference.
Adjustements possible 5Khz to 20 Khz, -12dB to 12dB in the spectrum reference range by edditing anvelopes for Mono, Left and Right spectrum
Master Batch Audio Files, master multiple audio files at a single go, this is a good function for creating your own style reference!
Master Batch Analyze Files, create a new reference (or source) out of multiple analyzer files.
Auto Mastering (Albums), Semi Mastering (Single), Semi Mastering (Albums), Manual Mastering (Single), Manual Mastering (Albums), features to change AAMS behavior directly (options) for Single Audio or Albums of Audio.
Batch Multiple Reference(s) into One, this is a good function for creating your own style reference!
Batch Mastering multiple files or albums, first each files with their own reference.
Batch Mastering multiple files or albums, with a user made album reference (option).
DSP-EQ processing up to 100 Bands and full control to adjust each EQ band.
DSP-Compressor, 8 band Multiband Compressor Maximum, 1 to 8 Multibands setups possible.
DSP-Loudness (Balance and Loudnnes), with AAMS measuring system or dBFS measuring system.
DSP-Loudness, with two measuring and correction systems, AAMS measuring system and dBFS measuring system.
Able to Automatic Master, Semi-Automatic Master and Manual Mastering!
AAMS Options are all available, as well as options from Analyzer, DSP-EQ, DSP-Compressor and DSP-Loudness.
Printing Documents in text and as charts.
Realtime Spectrum Analyzer.
Mastering outcome audio files and in between files.
This means after DSP-EQ processing an audio file is saved.
After DSP-Compression an audio file is saved.
After DSP-Loudness Balancing an audio file is saved.
After DSP-Loudness Gain an audio file is saved.
This gives the user control over the mastering process.
Also the AAMS Mastered audio file is saved.
Importing Wav, Wavpack,Vorbis Ogg, MP3,WMA, Apple M4a, Monkey Audio, AAC, Audio Files into AAMS or Master Audio Files with AAMS.
Get the AAMS V4 Full Registered Version for Licensed Users!
This software package is available free of charge, as for the AAMS Limited Freeware Version. But with a high encouragement that the user Registers for AAMS Full Version when used over a longer period, to the author and main supplier of the AAMS product. Registration for a Full Version License can only be done by the author and main supplier of AAMS. Go to www.curioza.com / Registration Page for more details.
This software package AAMS V4 is free of use for the Limited Freeware Version. You can continue to use AAMS V4 Limited Freeware Version, without registering for the AAMS V4 Full Version. But more professional options are not available in the AAMS V4 Limited Freeware Version. The AAMS V4 Limited Freeware Version is mainly intended for the ' easy' and ' fast' user. were mastering of a single track is done with a few button clicks and is done by AAMS V4 automatic functions. The end result will be a fully mastered track and all free of charge, AAMS V4 will stay Limited Freeware! You can master as many tracks as you like.
Register for the AAMS V4 Full Version.
This software package is available free of charge, but with an encouragement that the user makes a registration to the Full Professional Version. You can show your appreciation and support future development by registering AAMS, and make full use of the AAMS Software Full License Package. Without any blocking of options. A registered and licensed user can make use of all AAMS V4 professional functions! The price for registering a single computer and full license for AAMS V4 will be around 65 dollars or 65 Euros. For each single computer after registration is around 33 Dollars or 33 Euros.
Go to www.curioza.com / Registration Page for more details.
Thank You!
Denis van der Velde
Sined Supplies Inc.
For all users who want to know the background to of the creation of AAMS Auto Audio Mastering System, here are some words about the author.
AAMS V1 to AAMS V4 - Development from Year 2004 to 2021!
The programming of AAMS Started in mid-2004, at which time I had done enough manual mastering to see that some aspects could be automated. At first the AAMS V0.5 Beta program was simply creating suggestions for EQ, Multi-Band Compression and Loudness. This information was displayed and could be used to set up external equipment like plugins or outboard gear. This was time saving and made the mastering process more visible. Then in AAMS V0.97 I added the routine for saving a Firium Preset based on the Graphic EQ Suggestions that would help setting up Firium EQ without having to do this manually (which that was time consuming). I could listen each time AAMS calculated suggestions and confirm that it really did speed up the mastering process. After adding some more routines, testing and bug testing the small Reference database with 100 presets to use and scan for a good sound. AAMS V1.0 was released on 01/01/2005 and soon a user base was established. The best thing about releasing AAMS V1.0 to the public, was that more users were giving information back on their feelings about the program. After some time and changing some functions to be more defined, AAMS V1.1 was released. This version was quite stable and gave good information to users in its suggestions. The information back from users confirmed that the suggestions were quite good and helped most users very well. Although AAMS V1.1 needed some work to understand most users were very pleased with AAMS results. Most complaints about AAMS V1.1 were that the calculations were not very fast and the application needed some guidance when installing.
So for AAMS V1.5 I had to speed up the programs calculations and change the AAMS V1.1 platform. This meant full recoding and programming. For the requested use of DSP it was also necessary to increase the speed and the way AAMS V1.1 operated. After some DSP-EQ coding and reprogramming, AAMS V1.5 was released with its own internal Player and DSP-EQ. Now it was possible to listen and play AAMS Suggestions through a windows soundcard that helps scanning for a good sound. The DSP-EQ had a natural sound and worked correctly for most users, so the programming for DSP-Compressor and DSPLoudness could continue.
Now days AAMS V4 has got its own internal Mastering Rig!
With the combination of DSP-EQ, DSPCompressor, DSP-Loudness you can complete a quality mastering job within AAMS with ease. I have a good understanding of mastering and AAMS contains those ideas. AAMS users also have a lot to say and have good ideas, so if you have something to add your ideas will be listened to. I do hope you have as much fun as me using the AAMS Program.
With AAMS V4 the mastering of audio is finally of an yet unbeaten quality. Download AAMS now for free on our download page, use it for a while, then decide what you think.
We do make a lot of work making AAMS a good and steady mastering alternative and I know AAMS can make a good sounding master. So please donate for this software when you are using AAMS and like it! We can use the donations for future updates and for keeping AAMS alive. Also we will use the donations for creating more software tools in future SSI releases. Register AAMS V4 for Full Version.
Thank You!
Denis van der Velde
AAMS Author
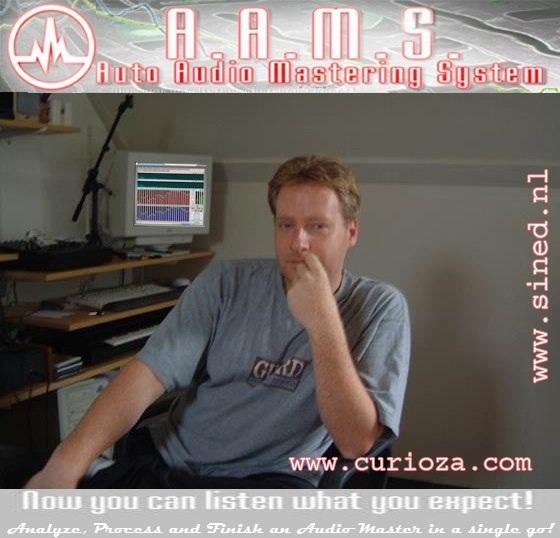

Some music makers, mixing their own tracks into a stereo file, will always depend on a good hearing and good use of processors to make their mix into a good sounding master. Therefore AAMS does not replace a professional mastering engineer, but however AAMS does contribute towards learning and results in a good mastered sound when you apply these rules;
You can’t polish a turd.


Meaning if you mix lacks a good sound and is not mixed well enough, do not expect a mastering engineer or AAMS to make your sound better. AAMS does in most cases a good job. If not? Refer back to your mix, when mastering results in bad results or you expected better results. Mainly then AAMS can be a good learning tool, by mastering your mix down into a mastered audio file. At least you can hear the differences and find out were you mix needs improvement. It is always better to take care of separate mix tracks, resulting in a better overall sound. AAMS is based on that the user can expect what AAMS is going to do, so maybe understanding better what can be done inside a mix, and what can be done at the mastering stage. I would say Mixing is not about Mastering, vice versa.
For instance when you hear less or more bass frequencies, do you expect AAMS to correct them perfectly?
Well, AAMS does improve them. But when you are not happy with the amount of bass, you could adjust the Base drum and Bass inside your mix more and return back to AAMS, and see and hear the results. In some cases a professional mastering engineer will reject your mix down and will warn you for end results. Using AAMS as a learning tool for Mixing and Mastering, will improve your mixing skills and your sound. Some believe that only hearing, is the only way to master. That is old fashion true. But however, in most cases hearing is distorted by misuse of equipment, mistakes, and the room were you listen. Fatigue hearing is the most common distortion in mixing and mastering. When your ears are hearing the same music over and over, you will get distracted and will have to rest and come back another day, with clean ears! This is time consuming. Mastering manually is always time consuming. I say a master in 10 minutes can only be done by AAMS, or by manual results with a very good created mix down. The AAMS path is that audio files can be mastered inside 10 minutes by AAMS. So that is a timesaver, and the user can concentrate on the mix.
If this is mixing again, or using aams to have the best sound possible?
Even when you have the Best sound on one speaker system, why is it possible when you listen on another system the sound can still be bad or worse ? Well, some mix or master with headphones. Some mix and master with expensive speaker systems, enclosed or open rooms. Some are hearing bass frequencies better than others, some hear treble frequencies better than others. Still, when you switch speakers or the user, the same master will sound differently. The difference inside a car and household rooms can affect hearing the same sound. AAMS is mastering equally for all sound systems to have the best possible sound quality on all sound systems. AAMS does the same job, each time you use AAMS, the results are the same way, each time you can expect what AAMS does. AAMS has no distortions as fatigue or room environments or bad hearing. AAMS is purely based on precise calculations and you can expect what is coming out, is just the same. Each time. In the longer run you will expect what your sound will be, running it through AAMS. Because you can depend on AAMS doing the same job, over and over.
Do you believe this or not?
Fiddling with knobs, listening for the right sound in all rooms or speaker systems, taking more time and still thinking you did not get it exactly right ? This can be all over with thrusting AAMS to make a good master out of a good mix. In most cased Mastering is a byproduct. You have mixed your track or album, and you need it out to the public fast. Finally it is your choice!
Do you spend money on AAMS or a real professional mastering engineer ? For users who want to be in the creative music and mixing process, AAMS is a real solution with easy and costs far less money and will have a change of making your mix into a good sounding master, easy. And off course, never will you hear a real mastering engineer say ‘use AAMS instead’. Because they need your money and workload.
What are you going to do?
The music buss collapsed by free music. The money to be made is not the same as 10 years ago. The equipment is not the same. At least you can now save money for mastering your ‘free’ music. And thrust me AAMS does a really good job.
I say 70.7% at least and more. Just concentrate on making good music and mixing it good! AAMS will do a great job then for you….
Still it is up to you.
We intent to make AAMS to create the best sound possible on all systems. If you do not thrust this statement, you can still try AAMS Limited Free Version and listen how your mix will sound, for Free! Or if you do not have any thrust, let your masters be done by a real mastering engineer or mastering website and still compare that with AAMS results ? Who is the better ? And if you are a real doing it yourself person ? AAMS is a great learning tool also! Need easy mastering ?
Use AAMS! We thrust in it!
AAMS V4 is Freeware to Try, So before bashing it, Try it!

Biography
Born in the year of 1969 and lived in Amstrerdam, currently residing in Lelystad, Netherlands.
Since the start of computers and midi composing, i was busy with music on a small Casio Sampling keyboard. Enjoyed that fun, so bought an Yamaha PSR home keyboard in the 80's and used an Amiga computer with a music program unkwown but was enthousiastic about it. Later on found the famous Fasttracker program and started working with samples and musical instruments. Got hold of an Korg M1 Workstation and started 2 program it, with sounds and sequences and a Korg Wavestation SR rack sampled them into fasttracker. Switched to the PC platform and started with Steinberg Cubase. Also started playing with The NiceTime Freedom Reggae Band. Got intrested in producing own recorings and learned more about recording, mixing, mastering, productions. Build up an impressive instrumental and drums sampling library. Also wrote the AAMS Auto Audio Mastering System software for Windows. Doing productions for Audio Mastering and Audio Mixing. With more then 26 years of expirience in the Audio Enginering field, you could say i have experience and being professional. Started half 2009, getting into making some EDM House and reggae music. Developed and released AAMS Auto Audio Mastering System from 2003 until now 2018 from Version 1 to Version 3 windows software. Build a Studio where there is room for colaboration and production of music and lots of learning, mastering audio and developing games. Learned in 20 years how to mix and master, while doing productions for everybody in the netherlands and abroad, on the internet. Started 2008 a new website and edited in 2018 as is. Worked as technical enigineer for Johnson Controls and Kieback & Peter.
Hardware Kitlist :
AAMS Auto Audio Mastering System
Korg Padcontrol
Soundblaster ZxR Soundcard and extention module
M Audio Oxigen 61 Controller Keyboard
Mackie Control Universal Pro
Native Instruments Traktor S4 MK2 DJ Controller
Yamaha MW12 Mixer
Yamaha MW10 Mixer
Rode NT2A Mic
Shure SM57 / SM58 Mic
Behringer B1 Condersor Mic
Korg DTR-2000 Rack Tuner
KRK V12S Series 2 Subwoofers
Behringer Truth Active Monitors B2031
Yamaha HS10W Subwoofer
Bose Companion 2 PC Speakers
Sony MDR-V900 Headphones
Sony MDR-V700 Headphones
Seiko Automatic ST1000 Tuner
Cremona Accoustic Guitar
Fender Squire Bass Guitar
Squire Stratocaster
Gibson Epiphone
Blessing Mouth Harmonica
Software kitlist :
AAMS Auto Audio Mastering System
Steinberg Cubase 9 Pro
Steinberg Wavelab 9.5 Pro
Songwriters Pad
Mixed In Key
Traktor DJ Pro
MP3 Tag
Winamp
Adobe Photoshop
Abode Illustrator
Sony Vegas Video
Format Factory Convertor
Total Commander
VST Plugins :
Steinberg Halion 6
Steinberg Groove Agent 4
Steinberg Groove Agent SE 4
Steinberg Halion Sonic 3
Native Instruments Kontakt 5
Native Instruments Battery 4
Waves Audio Complete
Korg Wavestation
Korg Legacy Collection
Sonnox All Plugins
Sonnox Vocal Vox Doubler
Nugen Audio Monofilter
Nugen Audio StereoIzer
Credland Audio StereoSavage
Audiothing All Plugins
Wave Arts Trackspacer
Sound Radix SurferEQ2
Sound Radix Pi
Sound Radix Powair
Sound Radix Auto Align
Sound Radix Drum Leveler
Midi Mood Kameleono
Squareheads Nora
Obelisk Midi
AutoTheory PRO
Audiority Side Filter
Soundspot All Plugins
Air Music Technology Hybrid3
Scaler Plugin Boutique
Kirnu Interactive Cream MIDI
BigKick Plugin Boutique
Roland sound canvas VA
Valhalla All Plugins
XFer Records Cthulhu
Audio Damage EOS2
| Download | Name | Play | Size | Duration | ||
|---|---|---|---|---|---|---|
| No items to display | ||||||
Hello, I am the Author of AAMS Auto Audio Mastering System. That is software for audio mastering, you should take a look at it.
Personally i am intrested in making music and spend quite a lot of time into composing, mixing and mastering.
Some software and plugins i use for mainly for Composing, Recording, Mixing and Mastering / Production.
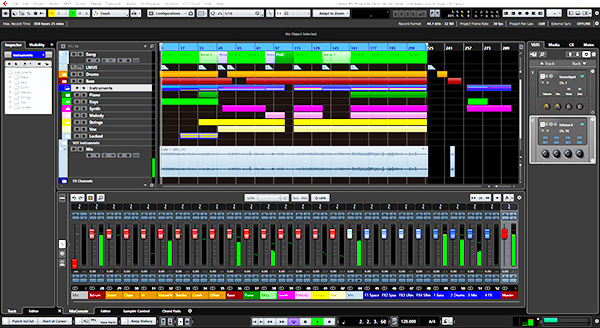
Youtube Channel Playlist of Cubase
Cubase 10 is the software Digital Audio Workstation for me as far as it goes. What Steinberg did to the Music world was run music as software on a computer, and that was an instant hit. As like now days there are many of them DAW's available for Windows and Mac. Like Fruityloops, Pro-Tools, Ableton, Reason, etc. I started out with using a Audio Tracker like FastTracker that is a more pattern based music and one shot sampling system that runs under DOS. But Cubase was always my first choice. And still is. The main reason is, it works great with midi and audio (sampling and streaming). As in FastTracker with musical samples and patterns, midi and audio are well taken care of with Cubase. So in combination with Halion and Groove Agent it is my main production house, because i sample all. Not only Cubase in what version you take it or what year since it came out, it did Midi and Scoring, Audio, and maybe the main thing boom was VST plugins and ASIO Drivers. That made the change for like audio software BigTime. Be sure to have the TrackSpacer pluging below. Including Wavelab as a more audio editing tool for samples. Also Kontakt and Battery are great for use as Samplers. What VST or running Plugins as Intruments and Effects, Cubase doe it all and even much more. I tend to do things in midi with samplers playing the audio instruments and not recording the track with audio. So my system is more Midi and Plugins, instead of recording audio. I only record Vocals as audio. So everything stays editable in Midi and Audio, adjustable and midi note wise i can change anything at any time. But that is more of my own choice, because soundcard ASIO latency is always on the ride. So much processor speed is needed for this kind. And Cubase does best on a modern computer, SSD, Memory and Speed! You can run projects with many effects without any probs. As far for a mordern DAW Cubase does the job very very well. Until you reach the limits of your computer, mustly that is processor speed. Though it can be a hassle to learn it all, becuase Cubase is packed with tools and options and editting posibillities. But sure Cubase has a big big fanbase in the world. Sometimes i just step to Renoise or Maschine Plus for good simple steady fast anf fun compositions. But Cubase is still the one to edit all and mix all. It is a one stop go machine, but takes sometimes the easyness out of your hands and make you pull your hair out when things go wrong or you have to read the manual to see how it exactly works. Or working with mouse and keyboard gets me bored. Also to really have a backup of your song mix track, Cubase does not save all data to one file. And with the wide third party plugins, your song can be later damaged when you dont have all the files, like samples or plugins on your system. Instead it saves the song mix track, but presets, vstplugins, samples are loaded from their original location. And it is a hassle to have it all, in one directory or backup. Ten years later and you song track might reload not as good as it was. The directory you save your song in is a good place to have all samples and vstpresets in. Else afther a few years and a new computer system, your track might not load exactly as it did. Therefore Renoise is a good option that saves in one single file. Cubase does not and that can be messy filesystem in your directory and in future you might not load a track into Cubase that is an exact copy of before. So is it not with everything ? So Cubase is that good, and i recommend it for everybody that want a good DAW in software. Also with any DAW on a computer watch the latency and get a good enough soundcard. Like always you will run out of processing power very fast using effects and instruments. So while Cubase can do allmost everything, it is also dependant on the computer system you have. Any flaws and speed interruptions of you computer are anoiancies. It will be never enough, until you can buy all the processing speed you want. Stil most computers or laptops on the expencive side will do nowdays to make great music.
With millions of musicians, producers and sound engineers around the world using Cubase every day, Cubase is one of the most popular digital audio workstations of our time. Due to its pristine sound quality, intuitive handling and unrivaled range of advanced tools, Cubase is not only considered by many users as the most complete DAW on the market today, but also sets the benchmark for contemporary music production software. Covering all stages of the creative process from composing, recording, editing and mixing, Cubase excels with intelligent tools and features that put creativity first. Offering maximum flexibility, Cubase does not impose a certain workflow onto you, but provides the freedom you need to push your creative envelope. Every musician is different, and every project is unique. Leveraging off our decades of experience in providing solutions for creatives of all stripes, we listen carefully to the needs and requests of our users and innovate features that inspire and generate real-life value. Free customer support, regular maintenance updates and an open, constant flow of communication with our customers are the firm pillars that uphold the strong relationship with our customer base.
.
Native Instruments - Maschine Plus
If Akai MPC was the base of all Rapp and Production music boxes, this NI Maschine Plus Standalone has smashed Akai and taken that market. Or did it not ? Well we have a lot of tools in hardware that basically have a lot for them. And the Machine+ is just as good. Depending As an overall DAW it is Standalone and has all features of the MPC form and a DAW software. But don't look at it as a software DAW (Digital Audio Workstation). The most good of this Maschine Plus is the very very Low Latency! As of most computers runs soundcards and have Latency, the hardware Machine Plus has one big favor over Software and a Controller, that is allmost no Lantency. The Machine Plus is not a DAW in software, it is another form and workflow and speed, that a DAW on a computer just can't do. The Pads and connecting Midi to the Maschine Plus is the main thing as input and it is all very responsive. The Machine Plus fits the range of usefull and smart development alikes of Akai MPC's and more comparable alikes, makes the Maschine fit in that row more. Some say it is the MPC killer, because that is that MPC that had run the buzz all these years. Hardware and software music creation tools in a single box, a hardware box. If you like fiddling with knobs and buttons and be fast underway, have big libs of sound and effects. Also touching something else like a Mouse of a computer alltime, the knobs, Pads and every butten, switch or knob, like mixing or creation of music by Hardware in the 60's and 70's. It is different, and the Maschine Plus is really not a DAW but is made to sit down, make something and have no worries at al... Afther opening the packaging and setup the NI Machine Plus, i found myself within minutes having a beat running, baseline and some pads sounds. In fact it is like the MPC a toolbox creative and very fun, enjoyable at least. And that is how it should be. Since i work with the Machine Plus is has taken me off the DAW software and have lots more fun and enjoyment. People who like a Mouse and DAW Software on a computer, dont buy this! But every one else that wants a tool for creation and mixing, this might be the one. Sampling! Only backdraw is no battey, so you cannot use it underway in a park or where you have no power supply. Basically this is a DAW computer in a box, so power it needs. There are also a lot of other companies with simelar hardware boxes, and they are all mostly very good and fine. But very well done by NI to bring this thingy out. I simply love it! One of the drawbacks could be lack of processing power, so do not see this thing as a fully fledged daw, it hass all functions of a DAW, but if you start using all, then it will lack the processing power. Setup to much effects and instruments, you lack power. But the way to do this is offcourse Sampling. That means with ease you can play a synth on the machine, but you can straight away Sample it, drop the instrument and take the sample. That saves processor power, and really like the MPC was, Sampling machine. The main succes for me with the lack of a DAW and processing power, is that it will focus you more on the job with the Machine Plus and that is what this is all about. The knobs and hands on fast workflow is making music fun and you get a lot more now control. I say enjoyment. On a DAW you can get obsessed by using more and more sounds and effects and instruments, you soon will fly on the space you have and forget the details. While mostly this much options and power, will just get you into more trouble. Focus on the sound and what you do with it musically is more important. Fiddle with the sound (edit the sample) and you have plenty of knobs and controls to do so with the Machine Plus. Allso chopping of samples it it is drums or music play (like guitar play). You can chop up samples on the 16 pads so fast, and that makes you get control over music with 16 pads chopped up samples. So basically with like 6 to 8 instruments (samples) and some drums, you are off and you will focus on music making more and will me to the point. Setup fast and the play live with the machine, pump in beats, baselines, what ever, and once in the flow it might be you create a song from scratch straight in one go. It is possible! The build of this thing is remarkable strong and good. The Machine Plus is offcourse in for a processor update and will offcourse get faster, because a lot of users that come from a DAW and a fat computer, will complain at Native Instruments door and be unhappy. But this is not really way the things here in history, Machine Plus builds basically on the MPC like history and catches on very well. With the machine plus you get something else (back) and that is simple basic music making in a very great and creative machine. Forget that it will run out of speed, it will bring you back to simple fast music creation. Sampling, editting your sound, turn knobs, puch the pads and rock on it, you allways get something. One of that is the multiple connections with keyboards or connection with the OP-1 or other gear. And the other is the seamless recording you can do on the fly, just setup instruments and record live just in a few takes. This is not a DAW, it gets you into the box and out of the box, into the fun stuff.
Standalone Hardware. The workflow. The sounds. No computer necessary. MASCHINE+ is a sampler, a drum machine, a synth, and an on-stage superpower. In short, it’s whatever you make it. Leave the laptop behind, jam with your other gear, and create beats in minutes with a wealth of on-board sounds, instruments, and effects. It’s the iconic MASCHINE workflow, with fewer strings attached. Standalone means more focus, more freedom, and more music making. Plug in, power up, and get creating straight away in the embedded MASCHINE+ production environment – from first ideas to finished tracks. Dial in effects to tweak your sounds, or sample audio and make it your own with an intuitive interface designed to keep the creative juices flowing. And if you want to bring your ideas into a DAW, copy them over, and boot up the MASCHINE software on your computer to pick up where you left off. As well as its classic groovebox workflow, MASCHINE+ includes MASCHINE+ Selection: A dedicated package of nine synths and sampled instruments, 35 effects, and seven Expansions (including two of your own choosing) that work seamlessly in standalone mode. It includes heavy-hitters like MASSIVE, FM8, MONARK, PRISM, the MASCHINE Factory Selection, RAUM, and PHASIS. That means its 16 pads can sound like a dusty vintage drumkit, a warped wavetable lead, or an organic modal synth – pretty much anything you can think of if you flex your sound design skills. Whether you’re digging records or ripping radio edits, record any sound into MASCHINE+ and quickly chop and stretch the results into your own custom kits. Or transform and twist them in real-time with the Audio plug-in. The same goes for guitars, vocals, drums, and anything else – more sounds means more creative ways to make music. Bring real expression to live performances with intuitive control over your music – tap out beats, run arpeggiators, or tweak synth melodies in real time. MASCHINE+ is an intuitive live sequencer, a fully-fledged groovebox, and a powerful performance synthesizer rolled into one.
What to say about the OP-1? There is still a lot of discussion about this little and handy thing. And that is good, you like it or not. Does it all what you want ? Ahum. Well it has a battery that wont die in 16 hours of full use. It is a Synth and Drums, Sequencer and 4 Track Recorder and a record player, radio. Some want to compare it to a DAW or other tools,don't because it is offocurse not. But basically it is handy fun fast and does not really compare to other DAW or Tools. The best thing is you can carry it with you, it does not need anything else but You. And a headphone, though the little speaker will do (you dont hear any base, hahah). If you doubt it's capabillities, once you have it, you never knew why you ever doubt it. Also why did you but this thing? It is sturdy also, mechanical and software wise. The price is high, maybe stupid, because it is a one of a kind. It is for me, but is it for you? Yes surely. But it is not a complete DAW, it is a handy tool to make music with and has all features you should expect of it. But it is also different and awkward. Does it have it all ? No, but it does work very well for all people loving Drums, Synth, Sequencing and Recording. Like the MPC or other keyboard, but in a small box. Sampling is also here every well done. The effect and synths are maybe a little strange sometimes, but into not knowing what you actually doing, turning the knobs can change the sound into something else.Make music on it. Then transfer what you have done to a DAW. Or make music, sample it and you the samples in a DAW or re-use it straight on the OP-1. It is a good sampler and has some good editting features. You can make a song, track, music and have loads of fun with it. Enjoyment i say again. While you should ask, how did they think programming this thing ? Or what did they use ? Drugs ? No, prob. not. While making this OP-1. It is a Casio on steriods maximum. Loads of fun and serious toys within. When you buy this thing the first time it is off the wall funny, then after a while you think it is not a toy anymore, then later on you cannot do without it. You get hooked or you will sell it on. Depends on who you are and what you want to do in music creation. So be carefull, you might get hooked, or say 'why did i buy this?'. It is the to take away thingy that goes with you, when you go outside, or sit on you couch or bench at home. You can use it anywhere it starts in seconds, and you can do your thing again. And the fun and enjoy you have from it, will last for years. It is a Toy! And it is also very serieus fun, it has 99% of what you want. You could only wish they had a full midi sequencer, and yes the tape recording survives, it lacks also, it is surely not a DAW. Also the OP-1 will bring back at your fingers, at a sample or synth level, adjusting is so much fun on this thing. Also the USB connectivity is like connecting to other gear, as a midi device or audio device. The effects and setup of the OP-1 is so wierd but yet playfull, recording stuff into other gear like sampling maschines is very welcome in the last firmware update. The bad thing is that when you see Youtube Video's about the OP-1 allways it is some king od chopped up sampling RBD Rap beat, it seems that people allways post this kind of stuff of the OP-1. The OP-1 is surely more than some sample chopper and beat thing. Maybe at first glance the OP-1 is quite remarkable and it is joy but takes time before you get the flow, and how it works. Then the real fun begins!
OP-1 is the all-in-one portable synthesizer, sampler and controller. with additional features like a built-in FM radio and an assignable G-force sensor for motion controlled effects, there is nothing quite like it.Its modular architecture enables endless sound possibilities without making the workflow complicated or distracting. The compact design and real physical interface makes it inspiring to create music, no matter who you are or how experienced you are. With thirteen synthesizer engines, seven high quality effects and multiple routable LFO’s, you'll never hit the wall when it comes to creativity or finding the right sound for the job. add the unique built-in sequencers on top of that and you'll understand why so many highly regarded producers and artists hold this little machine so dear. In controller mode, OP-1 turns in to a full blown MIDI controller, with access to transport (play/stop, rec, rewind and forward), a two octave keyboard with four endless encoders as well as a sound module that can be controlled from virtually any external software. Record anything you create with the 4-track tape feature. match the tape speed to the sequencer tempo for some really nice overdubbing. change tapespeed while recording, or record backwards in realtime. switch to the 4 channel mixer and add some punch with the built in EQ and compressor. Finally, create a live mix in album mode on a virtual vinyl. Use OP-1 to synchronize your pocket operators or connect it to any other gear using MIDI over USB. when you connect OP-1 to a computer using the included USB 2.0 cable, the OP-1 shows up as a MIDI controller or a storage device. if storage device is selected, just drag and drop audio files between your computer and the OP-1. all 4 tape tracks are available as well as the drum and synthesizer samples. everything ready for you to tweak or add to your DAW. no additional software or drivers required. just plug and play. You can travel the atlantic ocean and back again, constantly making music on your OP-1 before it runs out of power. with over 2 years of stand by time, you can pick it up and create whenever you feel for it. Charging is easy with the provided cable plugged into any computer or phone charger that has a USB connector.
Renoise is build to be a DAW that does things very fast and very easy. And it is a bombshell with possibilities, full features like any other DAW. You might think we have to goto other DAWs to get things done. But this is the first software i turn to, too create music and is my start of every new track. It may look some kind of awfull to modern DAWs, but it shines in having all tools. Compose wise for listen drums samples and add samples, even an sample audio editor is build in. It is easy to start a song with finding samples you like and add them, start a pattern of drums, set a drumloop and slice it. It all all possible and at hand straigh away. Composing is more easy because all is the same. It is all samples and play notes or insert them with the keyboard. It takes flawless midi timing from a midi keyboard and records it straight latency spot on. Husting around with patters and turn sounds on and off, make you find a song building contruction kit, that is easy and works like a charm form me. Special attention is for all who where into Audio Trackers like Fasttracker, you can still use the old modules and all is still working. From the old days and from what this software has become to, it is my favorite starting poing and with such easy workflow, sampling and editting. So the nr.1 for me. But, the sofware is great DAW, the support and getting onto the Renoise Forum is beating me to the ground. You can send emails for support, you get no answer. The software is not updated / website since 2016. So when you need good software this Renoise is great! But when you want support / updates and a good forum, look somewhere else and then dont get it. But the Renoise 3 version is so stable it does not crash and do weird things at all. That is why Renoise 3 is so workable and you can trow all kinds of sound in, the processor wont give a budge. So it is that good for creating tracks and create compose a song. For mixing you can do a lot in Renoise 3, but for an end mix it might be better to goto Cubase before you get it mastered and finished off. It is not an expensive buy and there a all kinds of plugins inside renoise and it loads VST plugins with ease. So it is a DAW but foremost a tracker. But i like the tracker system better then many other DAWs. As for of searching sounds and samples, adding them and edit them, renoise is a one solution! Pattern and Notes is simple and easy to work with, that i am way more accurate and faster then modern DAW systems, just because all is under the keyboard or your mouse. Renoise saves all data the whole song, mix, samples, all under one file. So that means clean directories and a tidy system. Also for tracker lovers, yes your older XM files will load perfectly and run and sound like it was before. Renoise is that good, but like allways an outsider in the software DAW industry.
Renoise is a Digital Audio Workstation (DAW) with a refreshing twist. It lets you record, compose, edit, process and render production-quality audio using a tracker-based approach. In a tracker, the music runs from top to bottom in an easily understood grid known as a pattern. Several patterns arranged in a certain order make up a song. Step-editing in a pattern grid lends itself well to a fast and immediate workflow. On top of this, Renoise features a wide range of modern features: dozens of built-in audio processors, alongside support for all commonly used virtual instrument and effect plug-in formats. And the software can be extended too: with scripting, you can use all of your MIDI or OSC controller to control it in exactly the way you want. Whether you're an audio veteran or just starting out, Renoise is a fantastic addition to any bedroom or professional studio.
.
Redux is a great sampler that you can use with Renoise 3 or any DAW or VST host. The twist is that Redux is a sampler that can do a lot of things many modern music makers need. It is like an Arp Samples but that does not even cover it, it can do to sounds samples what you want, because just like in Renoise 3 it has got the same kind of track system like Renoise. It is a sampler within a sampler and it does wierd things and very workable sound malipulation. All within the beat so you never mis it. And good things are, manipulation and easy sounds. Just like Renoise you are up and running fast and will love this otherwise cheap sampler. If you have Renoise get Redux with it. If you need an affordable sampler that works well, get Redux. And you are into one key playing loops, many sound and patterns, it is mind boggling to play on a keyboard some notes or chords, it rocks the mind and breaks it trough. But when you want support / updates and a good forum, look somewhere else and then dont get it. Otherwise i do not think there is a pattern random samples that arps like this thing does! Like Renoise it is a not known and used sampler, but this thing is a mix between Renoise, a tracker, a sampler. And that makes it very ARP feeling, like the MPC or Machine Plus or the OP-1. It has some very good and creative fast workflow that works very well. Setup the patterns and you can play the samples, patterns on any keyboard or drumpad etc. Very good sampler, but basically very unknown.
Redux is a sample-based instrument, combined with a powerful phrase sequencer. Enjoy the full-featured MIDI implementation and performance-friendly features, for the first time available outside of Renoise. The sequencer in Redux is closely integrated with the instrument, and used to create musical phrases. These phrases are controlled via notes and program-change events, and allow you to alter the playback in a variety of ways.
.
Though Wavelab is the basic industry audio editting tool, it laks also some modern features found in the MPC, Machine Plus, or other software can have. Steinberg has mainly first focussed that Wavelab is an editting tool and mastering tool. Lets say what a recording studio needs. But it has got all you want for that. My fav tool, but there are some more software companies doing good jobs in the same sector. Also you would wish that Wavelab was enbedded into Cubase. But they are two separate software packages. Wavelab offcourse laks Midi or Instruments, but is a great audio editting tool.
For more than 20 years WaveLab has constantly pushed back the boundaries of what is possible in mastering, audio editing, restoration and analysis by including features carefully crafted for mixing and mastering studios, post-production facilities, sound designers, musicians, journalists and broadcasters. Its comprehensive set of features, customizability and outstanding audio quality are the reasons WaveLab became the world’s most popular professional platform for audio refinement. WaveLab Pro 9.5 introduces many improvements for mastering and editing workflows as well as carefully selected features for audio refinement and polishing. Ranging from a top-notch Spectrum Editor to the new restoration plug-in suite to the unique Audio Inpainting technology alongside a redesigned and enhanced plug-in set — WaveLab 9.5 is a quantum leap in audio quality.
.
A sampler is the one and only real instrument that i use, because i like to sample everything. Everything means, i use VSTi Instruments as synths and all kinds, but i sample then into a Sampler. Also to save processor power, drop the instruments and use the sample. The way you can adust per sample volume and panning is keeping it all good for stereo. And just checking and positioning samples recorded from the VSTi Instruments, layering samples over keyboard or pads. Halion is great to adjust the sound while it is still in its main stage, the sample. This gets you focussed on the sample instead of the effects. Also with sampling like Halion and Groove Agent, samples are greaty manipulated by using Wavelab as an editor. And Halion as a Sampler has lots of good tools by itself. Like Sample recording and chopping them up. Batch processing of Samples from one Sampled Instrument is a good way to get rid of plugins you would otherwise in your DAW and take up processor speed or latency. Sampling is the way to go for me and Halion is the main insert for use. Samples are much easyer stored in a folder and to backup. Halion is far more then just a sampler, its a sampler on steriods. Though they might say NI Kontakt is the industry sampler nowdays. Halion is a very good sampler.
Halion is the most comprehensive virtual sampling and sound design system available today and excels the present creative process for producers and sound designers in all areas.It covers the complete creative workflow from recording and sample editing to programming advanced synthesis and modulation setups. With Halion, create customized user interfaces and export ready-to-release instrument libraries with every step streamlined to the greatest extent. The powerful set of oscillators for seamless sample playback as well as the next-generation synthesis make Halion a versatile creative tool in simply every situation. Its broad library includes thousands of high-class and deep-sampled instruments and cutting-edge synthesizer sounds for all kinds of musical genres.
.
Steiberg Groove Agent on Youtube
As for having a sampler as a Drummer or Drumkit, Groove Agent has it all. It is for sampling and manipulation of drums really effective by playing patterns with midi notes. Or just playing midi notes and hear drum samples directly. The drumsets by installation give a good view what this drum monster can do. For me i like to sample everything as well as drums. But Grooving with this tool is so enjoyable and gets clear and effective realistic sounding drums, just by rithmicly playing on your keyboard or midi controller. Steinberg has done a good job getting into the MPC world, like NI with Machine did. The one to go drummer for me. But really it is samples, why not put something else on the pads, like paino or guitar. But for drumming sampler it is not a mistake to buy this one.
Steinberg’s easy-to-use yet powerful drum studio is the ultimate source for any kind of drum production style. Look beyond your standard workflows and get creative by combining electronic beats with warm acoustic drums to produce your individual sound. Groove Agent 4 redefines “virtual drummer” instruments by allowing you to combine up to four of the included drum Agents — each a specialist in their own field — with each other, opening up completely new ways of creating drum and rhythm tracks. Each Agent draws on a massive new sound library created especially for this version, with over 22,000 samples and more than 3,800 grooves that cover almost any contemporary music genre. All included patterns and grooves can be altered on the fly using the integrated Pattern Editor for even more creative options. Easy to use yet functionally deep and featuring many innovative approaches, Groove Agent 4 has been designed to excel in a number of roles, such as the studio, on stage, in the rehearsal room or as a creative inspiration for music production at home or on the road. Launch the stand-alone version of Groove Agent 4 in Jam mode to assist you during song-writing sessions, for example, when your drummer is not around. Groove Agent also supports all the most common e-drum hardware, allowing you to play the included kits on your setup. Groove Agent 4 has been engineered to harmonize completely with Cubase to keep your workflow smooth and your creativity flowing. Drag and drop samples and MIDI patterns from Cubase onto Groove Agent 4 or drag patterns from the Groove Agent 4 pads into your project to build a Cubase arrangement in seconds. But the integration goes even further: drum maps are automatically created for you from your Groove Agent kits, and all pad names are copied to Cubase, meaning less hassle and more creative freedom.
.
If you have Cubase don't forget there is a dedicated controller specially for Cubase and still works very well. If you are into mouse and keyboard with cubase that is fine. But there is something about having a rotary knob wheel and having suddenlij control over any instrument midi or audio parameter (if the plugin supports mouse hoove over knob in software). For having this next to your keyboard and mouse it does not take up space, and it is very very handy with and alongside Cubase. So think about the controls if you also like to have some fader, pan and have complete control over cubase and fiddle around with the wheel is most fun and helps to get that older analog tough feel back.
Engineered specifically for the thousands of production environments using Cubase worldwide, CC121 interfaces the creativity of musicians and producers with the functional complexity of the world’s most popular music production system. Built to an extremely high manufacturing and component standard, CC121 provides totally integrated tactile control of all parameters within Cubase, with a unique design architecture that keeps you 100% focused on your Cubase project.
Mackie - Universal Control Pro
The one to go for DAW Controller for me, it works, it does not die or break and you can be a mixer engineer and adjust your mix in a DAW with a controller like this beast. Well it is only because Mackie make good products and this a winner when it came out and still is the one mixing console that feels good and is really creative for mixing! Yes, in the old days where in the Studio you must have been there gobbling about that many faders and knobs and how do they manage that ? Well at home the Mackie Controller can be big and cumbsy, it still represents a mixing console and controlling EQ or plugins (even the faders and panning directly) is hands on the best. Why not doing with a mouse and keyboard ? Because you can do thins quiker better and more FUN and be more creative! Modern DAW software has given us virtually unlimited possibilities for manipulating audio, but sacrifices the organic feel of faders and knobs at our fingertips. Reclaim that experience without losing the power of software with the expandable MCU Pro control surface. With simple USB plug-and-play setup with nearly any DAW, you will be mixing like a pro with real motorized touch-sensitive faders, buttons and assignable V-pots in no time.
.
Well if it was not for the latency, there would be more products for sure like this. It does what it says, microphone to midi in realtime. And it is fairly accurate and well made, also the software. It does the job, only when you put your computer at low latency, else the timing is off to make good midi parts straight from your voice. So if you have a new fast computer and you can set latency at low levels and have less then 4ms -> 2 ms or even 1m latency then this is the thing for u. Else if you do not want to switch latency settings, it still provides the idea to your computer by voice. And that is what i also have been looking for, something you recorded earlier, or just out of your mind with your voice. If you have a melody and can sing it a bit properly, you can at least see the notes in midi, or the provided software will tell you every note you sing. And still with the latency it is also nice to have a synth running. So you can at least find out fast, what notes you sing. And record it as midi into your sequencer. Or play it in notes on a keyboard. It is in midi recording of your voice in realtime, so a lot of mistakes can be written in the midi notes your record. Not only that it records also a lot of other midi data. So expect some more or extensive midi edditing then you are used to. You have to give and take with this thing. Depending on how good you are at singing or beatboxing, it solves the problem. A Low Latency computer system will help also. If your not good at this and have a computer that runs loads of effects while you want to use Dubler, then expect major drawbacks. It is not exactly like, bang on, so dont buy it if you dont need it. For me it at least translates my head to voice into midi. And that is good enough. So a good product, but will not work in all circumstances!
Bridging the gap between mind and music. Trigger drum samples instantly by making any percussive sound beatboxing, clicking, clapping, or even the sound of a home made drum kit. Instead of recording your latest melody in a voice note, you can now hum that idea straight into your DAW with real-time voice-to-MIDI notation. Dubler tracks the pitch, envelope, and timbre of your voice to let you control effects, expression, and pitch bend all while laying down a melody or beat. Dubler Studio Kit is a live voice-to-MIDI controller. Incorporating intelligent desktop software and a custom USB microphone. Play software instruments, manipulate effects and trigger audio samples through the pitch, timbre and percussive sounds of your voice. All in real-time, and straight into your DAW. Make more of the music you love, without having to worry about how to get your ideas into your DAW. Dubler transforms your voice into a real-time MIDI controller, allowing you to write music at the speed of thought. If you can sing it, beatbox it, hum it, or whistle it, now you can play it.
.
Fruityloops is surely a DAW, because all the updates it have been given, it is now surely as powerfull as any DAW. Though it started out al some kind of pattern tracker on drugs, it now is a complete workstation. Loved by the EDM and Houde scene, though you can surely create any kind of music with it. Though i still see it as a pattern tracker (like Renoise), it is now a complete DAW workstation. Though the PRO version can be very expensive, you will not have to pay for updates, because you have a lifetime free updates after payment of your first copy. That is a very good thing and will stick users to Fruity. Like Steinberg with Cubase or Wavelab, if it allmost every update $99, and i have to say i payed more for Cubase and Wavelab over time then i would with Fruityloops. Also the development is great after 20 years they did everything in software to make every user happy and stay happy. So this is maybe the first one to look at, because fruitloops can do all and even more, it is loved by many and i would get it and be happy with it. Very good DAW and Pattern based software. Get it now.
The fastest way from your brain to your speakers. FL Studio is the result of over 20 years of continuous development, to become the fastest way from your brain to your speakers. Many of the world's top DJs and producers started by downloading the FL Studio trial, making their first beats in a bedroom studio. Now it's your turn, our trial allows you to make and save projects, then export them to audio formats like MP3 and WAV, ready to share with the world. How far will FL Studio take you? Mix and master music to the highest professional standards. All the features you need to create today's most complex productions including: effects chains, audio sends, sidechain control, advanced automation, plugin delay compensation and more. No other DAW matches the flexibility of FL Studio’s Playlist. Sequence all elements of the project to make the final song. Tracks can hold notes, audio and automation. Place any data type anywhere and even overlay them. Use the Browser to organize all the data in your project. Free your workflow and your mind! FL Studio's Piano roll has the well deserved reputation as the best Piano roll in the business. The Piano roll is used to send note and automation data to plugin instruments (sequencing). It includes a wide range of tools to aid complex score editing and manipulation. If the huge array of native instruments and effects are not enough for you, FL Studio supports all VST standards 1, 2 and 3. VST gives you access to the widest range of 3rd party plugins currently available. You can even use FL Studio itself as a VST plugin in another VST host. Whatever FL Studio Edition you buy, you’ll get all future updates FREE. Nothing more to pay ever again.
.
Top notch filtering bass frequencies to mono. Basically i use this plugin on the Master channel on a complete mix. Some say do not do this, you will kill the lower frequencies. That might be true. In the mix you can first start working on what you hear and kill the lowest frequencies out of your mix. Setting mono to 128 Hz and Higher to 512Hz. This will bring all bass over two speakers in exact mono. Bring transparent solidity to your bass. Sharpen, define and align for the tightest mix using Monofilter in every track. And the loudest bass sound will arise. With presets for every situation and controls for fine tuning to perfection, Monofilter anchors your bass with ease. You can at least hear your music now! So great is that you can choose what frequencies are mono and then also set when it will get wider, until like above 128-500hz it is all stereo. A tight Baseline and a Tight Basedrum, where the lowest frequencies are in mono comming out exactly the same on both speakers. And really that is what you want in your mix.
Bringing definition to weak/hollow/flat bass, Re-centering LF after stereo FX, Correcting phase issues, Sampling/restoring old masters, Taking care for vinyl, Psychoacoustic 'Panning' bass, Making a frequency split,Stereo spectrum analysis. Trusted by producers the world over, Monofilter grabs hold of your bass and roots it solidly within your mix. With its intuitive controls you can quickly anchor the power, while retaining the essential character and perceived spatial characteristics of the original sound. Monofilter defines the centre of your bass, so easily lost through stereo effects processing, synth sound generation, unwanted phase inconsistencies and live recording mic. bleed. Market-leading features give you really accurate control over stereo spread, transition and phase alignment, with precise visual feedback in a tactile interface that lets you grab the applied stereo envelope and manipulate it directly – without using abstract parameters and knobs. A solid foundation, when solid or natural sounding bass is a requirement in your recording projects, Monofilter provides the foundation for real power and definition. The non-directional nature of low frequencies can often contribute to a perceived lack of clarity and focus in the mix. Adding stereo FX processing and using multiple mic. set-ups in the studio can introduce phase inconsistencies leading to ‘weak’, ‘hollow’ or ‘flat’ sounds. Monofilter lets you align and balance low frequencies with the minimum of effort, leaving you with the same sound, yet louder, more focussed and better defined. And with Monofilter you can be sure of great playback performance on systems with separate low-frequency handling, such as club PAs, live rigs, home cinema systems, HiFi, and 2.1 gaming systems.
.
Just as Monofilter, this is a must have plugin!!! If you have not used this plugin before, if you did not side chain a compressor before, you be asking why your mixes sound so bad and you cant separete the mix more ? TrackSpacer is the answer! Ducking the Basedrum in front of the bass or putting the Vocals upfront. A compressor does not the same as TrackSpacer does, TrackSpacer removes a amount of EQ that is used by the source input. If you want to have a clear Basedrum, is just a first start. You can duck anything with anything. In version 2.5 seems easyer to work with Cubase. Anyway, If you want a good Basedrum just duck all other tracks or even a mix track bus. So you clear all other sound while the Basedrum is playing! And it is a good idea to have a Short Basedrum as can bee (so set envelope as short as can be or cut the sample, as it will duck all other signals by it. Just place TrackSpacer on any track you have but the basedrum, and give the basedrum as input, set reduction at 23 % or higher. Many applications arise with this plugins that can cancel out the EQ or cutout the EQ of other tracks so that your main materials, like Bassdrum, Vocals or anything will stick out and be earable by ducking the others with TrackSpacer. Also some kind of rythmic ducking at the same time is happening when used on other things like while vocals sound, you can duck the guiters and that piano. By reducing the EQ of the sound by the basedrum sound (for instance) it does not matter if you change volume on the tracks. With ducking in compression the threshold is important and any vome changes on the track reduces or even cancels you ducking by the compressor. That is why TrackSpacer is not only better by reducing EQ on that tracks, also when you adjust the track volume, pan or effects, it does not matter, and there is no need to adjust TrackSpacer as you would with a crompessor. Fiddling with a compressor ducking all the time is useless time, TrackSpacer is better and takes no time from you, setup and go! Then second the plugin is easy to setup and just to put on a Channel and improve your mix in just about 30 seconds. Then afther that it is only some occasional adjusting. This simple EQ ducking solutions works great for anyone mixing and having problems, because now with TrackSpacer it just became too easy! Whatever you want to come out of your mix you decide priority in your mix. Vocals upfront you can easely reach. Drums like basedrum combined with bass, what kills or what gets killed, what gets sound what is getting not. Very hard to do otherwise, and took so much time, TrackSpacer is the plugin to have, timesaver and mix ease!
The Trackspacer plug-in features a 32 band EQ that reacts to the incoming sidechain signal. It analyses the spectrum of the sidechain and applies a reversed EQ curve to another track. As if by magic, Trackspacer creates space for the primary track by cutting the exact frequencies on other tracks. No more fighting for space for the vocal in a mix, or any other instrument for that matter. If you have a solo that needs to room to breathe then Trackspacer makes the task easy – complicated automation moves on your mix are a thing of the past!
Trackspacer is an award-nominated plug-in that creates space in a mix by carving the frequencies that the main track needs into another track in real time. Trackspacer is no ordinary plug-in, it is similar to a sidechain compressor plug-in but much more powerful and transparent. It’s considered a secret mixing weapon by many artists, producers, and engineers. TapeOp said “I would call this a secret-weapon plug-in, but the word is hereby out! TrackSpacer is a ridiculously affordable, easy way to get various elements of your mix to interact in useful and musical ways.
Second after Trackspacer, Soothe 2 is also one not to miss. When you can't handle your mix or a sound EQ wise, fixing harsh elements, Soothy is the solution. A Solution that handles EQ like multiband compression. Works mix wonders because all the nasty harsh frequencies can be now polished or taken out. And this without a lot of work, but fast, this is a timesaver and works wonders. Your mix will sound better, instruments will not sound harsh, it is ment for Vocals and does the job very well on all kinds of instruments, specially on the ranges mids highs where problems do occur. Also it can work on the bottom end. Take out harsh sound on everything, without fiddling around. Soothe is a new kind of dynamic EQ processor and works great on like samples and offline processing, mix tracks and stereo audio. Vocals, Cymbals, Harsh Sounds on the overall. So used on sounds or audio that can have a treatment of taking out unwanted frequencies that pop out and though the whole mix or vocals, even usefull in audio mastering. It is very usefull to get the harsh sound out of samples and audio, and if you do not like EQ to be so fiddling, use soothy for the job of removing those tiny spikes of EQ. It is way faster to use Soothy and start with a moderate mix level inside soothy find the frequency range and remove as much as you need. We call this the ringnoises that pop out of the frequency range and are mostly unwanted sounds for human hearing. Remove with Soothy and make something recorded harsh, suddenly smooth. Still one of a kind plugin or at least very very usefull to get the harshness and EQ artifacts out of your sound. Not a sound changer, but a sound scraper and cleaner. It is alike Trackspaces basically a must have tool for mixing and getting a better cleaner (no so harsh) sound.
Soothe is a dynamic resonance suppressor for mid and high frequencies. Originally designed as vocal processor, the plugin aims to give you "the perfect, in control, world class vocal sound you've been striving for, with unmatched ease". Soothe is a dynamic equaliser with self-adjusting frequency bands. Unlike traditional EQ-tools, soothe analyses the signal on the fly and adjusts the frequency-wise reduction based on the input. This saves you from having to manually notch the problematic mid and high frequencies. The reduction kicks in when needed and where needed, without affecting the nearby frequency areas. This results in more detail, top end, and presence.
Fixing Mix Probelems : A vocalist with problematic sibilance recorded with a saturating microphone. Fingerboard noises on acoustic guitar and double bass tracks. Excessive whistling from the cymbal close mics. Overly bright electric guitar and piano tracks. The graphical user interface allows you to target just the areas you want, with control over the frequency range and sensitivity of the process. The frequency graph shows exactly which frequencies are being processed. Tweak the material for round results that sit well in the mix, or go overboard and find new innovative sounds. The delta toggle presents you with the difference signal, letting you hear and see just what is being removed. This allows you to fine-tune the parameters with confidence. Designing a spectral process with minimum amount of artefacts. Soothe is free from pre-ring, crossovers, and summing artefacts commonly found in dynamic eqs and multi-band compressors. The process sounds as natural as you like, with the option to add even more resolution and oversampling. If your CPU can handle it.
Most users will think of warmth by adding tube warmth to their tracks. That is one way to add discrete harmonics. Other will revert to tape simulation plugins for that tape effect and hitting the volumes that tape likes. But there are mostly Transformers that raised the bar for Synths, Microphones, Vintage Compressors and all kinds of high end audio equipment. Kazrog True Iron add what we call indiscrete harmonics. And when raised, it will give a subtle warmth and when driven in dB gives harder and more open sound. This emulation by Kazrog will open your eyes on what it does by using inside your mix on the master or any track, samples, etc. For breaking out the vocals, synths or even the whole mix. Useful and very kind on CPU usage. This is about the only good emulation of discrete transformers and with very subtle or very hard settings, you can add, what you could not do before. Somehow Karzog software is very well done, it gives the analog sound or just that sound you looking for, but it really is not a sound changer. Warmth? Tape? It is discrete harmonics, but it will improve as soon as you use it into your mix. Best for Groups Busses or on the Master.
The sound of transformers. Add warmth and heft to your tracks and masters, made by Shane McFee in conjunction with Devin Powers. It accurately emulates 6 classic line transformers, known for their use in many of the biggest names in vintage analog outboard sound processing. Models are based on UTC 108 X, Malotki E4M 4001B, Western Electric 111C, Haufe V178, Marinair LO1166A and the UTC O-12. Take a look behind the scenes at some of the transformers that inspired the plugin. These transformers add weight, heft, and girth to your mixes and masters. The plugin features adjustable strength, input impedance, wet/dry ratio, and a special Crush control to add fat transformer saturation to tracks and buses. The CPU usage of the plugin is low enough that you can add it to every track or bus in a mix for added virtual analog warmth across your entire mix. True Iron was developed to capture the true essence of the subtle warmth of outboard line input transformers. A secret weapon of pro audio engineers in a wide range of styles and applications. True Iron emulates a single component circuit, purpose built with fidelity in mind, while still imparting analog character.
The Big Brother is all EQ for a mix or master. Not only because it has -96dB Cutoff Filters, it is just the EQ where we have it all under one plugin and with quality sound. If you ever had limitations on your EQ, this Fabfilter did good! Also it is not even processor draining at all, you can set it up on every track and still have room in processorspeed! The one and only tool look at, when you need a good EQ, look no further.
Unrivalled sound and workflow. An equalizer is probably the tool you use most while mixing and mastering, so you need the best of the best.
With FabFilter Pro-Q 3, you get the highest possible sound quality, a very extensive feature set, and a gorgeous, innovative interface with unrivalled ease of use.
The option to have a -94dB cutoff filters on Low and High is very useable to just add that sound and reject lows or higs out of the mix, making it less blurry and cluttering. The LowCut of -94dB is great for Bassdrum or Base cuts at around 25hz, or any other Instrument or Vocals etc to take away the bottom End of a sound, like setting the cutoff Low above 120hz to 512hz depending on the needs of the sound. Basically scan with the LowCutout filter of -94dB all what is blurring the mix and that is why the -94dB cutfilter of this plugin is so important. Same with the Hoghfilter but used lesser, you can take out Highs from Bass and Bassdrum and keep what you need on the rest of the sounds. Also the Analyzer is Ok in very, with under the Keyboard to find out notes. The only thing this EQ can do is manage the sound of the channel. But really Frequency is the 1st EQ i use for a track. Even i setup any audio channel or instrument channel with a Frequency Plugin just to do all the Channel EQ. So the only thing i use first in the Channel.
Frequency is a high-quality equalizer with 8 fully parametric bands. The bands can act as either shelving filter, as peak or notch filter (band-pass), or as cut filter (low-pass/high-pass). You can choose between the EQ types Low Shelf, Peak, High Shelf, and Notch. For band 1 and 8, you can also select the types Cut 6, Cut 12, Cut 24, Cut 48, and Cut 96. Low Shelf boosts or attenuates frequencies below the cutoff frequency by the specified amount. Peak boosts or attenuates frequencies at the set frequency value with a bell shaped filter. High Shelf boosts or attenuates frequencies above the cutoff frequency by the specified amount. Notch boosts or attenuates frequencies at the set frequency value with a very narrow filter. Cut attenuates frequencies below (band 1) or above (band 8) the set frequency. You can choose between different slopes: 6 dB, 12 dB, 24 dB, 48 dB, or 96 dB per octave.
Surfer EQ is great for all monophonic or mono channels, as long as the pitch of the sound can be tracked with this good EQ for adding some umph and timbre (harmonics) and adjust EQ to about mono notes to follow. Basically if you track EQ the lowest note of a Bassline, the Surfing function follows that lowest note as the track plays. The notes in mono that follow are all EQ'd the same. So it is a tracking EQ for mono material. What it does is what was needed and other EQ's (until now) could not do. That is having a second EQ option that works on just the tonal settings of mono sound. So it is great for Basslines and Vocals, also on mono synth material. Just monophonic sounds, but hey to mess with harmonics of the sound on every note that SurferEQ2 follows, you can make a Baseline steady on all notes played. So it is EQ follows notes and does Compression or even Gates the signals. So many options. But to enhance or change you sound to what you whant, instead of messing with the sound source, just setup SurferEQ2 on all mono material and you will find out, you can adjust the sound in another EQ style way.
Timbre Shaper, SurferEQ 2 is a ground-breaking pitch-tracking equalizer plug-in that tracks a monophonic instrument or vocal and moves the selected bands with the music. Synthesizer filters can track the pitch to maintain the timbre of the sound throughout the instrument's voices. However, sound equalizers have always been static. While being effective for broad tone-shaping and room resonance correction, standard EQs do a poor job at maintaining the vocal or instrument's timbre as the music changes. Tracks the pitch of a monophonic instrument or a vocal source and can adapt its bands' frequencies relative to the music in real-time, maintaining the natural harmonic balance of the sound source and making it possible to shape the source's timbre relative to the notes being played.
.
Steinberg Pitchcorrect - AutoTuneSteinberg Pitchcorrect - AutoTune
On-the-fly Pitch Correction, designed for vocal and solo instrument recordings, the new PitchCorrect VST3 plug-in brings easy and automatic intonation control and scale correction of vocal and monophonic instrument recordings to Cubase Essential.
PitchCorrect is based on the acclaimed Yamaha Pitch Fix technology and constantly detects the pitch of the input material and immediately corrects it to match to the closest pitch of a user-specified scale, including minor, major, chromatic and custom scales. Various parameters, like the Retune and Tolerance control, help adapting the retune rate to almost any performance style for very natural-sounding pitch correction.
.
So another great tool to get you mix tracks to stand out, or even better a mix track plugin that is better then all compressors and plugins you find for getting your Drums, Bass, Guitar, Piano, Keys, Melody, Vocals, etc, sound good in front or up in your face. It depends on the settings you take on it, the controls can be quite hard to understand. But what it does, it keep it all under control, like a compressor does, but with in fact a lot more. Once understand, you will need this one if you are just not getting your mix in control. It is with Fabfilter Pro Q the next plugin i place in line on each track in a mix. Just to adjust it to fit in the mix, every track in the mix can have one! Way better your mix sound!
Vocals, bass, solo guitars, saxophones. They all deserve to be on top of the mix all the time. To accomplish this, some engineers used compressors, others automated faders. Both needing a lot of time or effort. Now you have MAutoVolume, which does the job for you with almost no effort and with unbelievable audio quality.
Meldaproduction - MSpectralDynamics
Essentially a dynamics processor which works in the spectral domain allowing you to work with individual frequencies. The compressor can make loud frequencies quieter for example - but that's just a beginning. With MSpectralDynamics you can expect nothing less than pristine audio quality!
Standard tasks, such as flattening the spectrum or removing noise, are available from the main screen with simple controls. Quick and easy, unless you want to dive deeper and make use of all the controls. The plugin can do anything with each frequency. It can be a compressor, expander, gate, or any combination, and you can even draw your own processing shape for more creative effects. Add in integrated parallel compression, full channel linking, up to 8 channel surround processing and much more and you might just become a hopeless addict. The unbelievable level follower that you may know from MDynamics is here too! Automatic release modes, peak hold, RMS length, look-ahead, custom attack and release shapes and much more. Preventing collisions between tracks is just one example of what you can do by analyzing a different track from the one that you are actually processing. Unleash your creativity!
.
MAutoPitch is a simple but great sounding automatic pitch correction plugin designed for vocals and other monophonic instruments.
Besides making the audio more in-tune, MAutoPitch also provides creative features such as formant shift and stereo-expansion.
It is quick, easy to use and free!
.
Graillon - AutoTuneGraillon - AutoTune
Graillon is a Vocal Live Changer that brings a world of possibilities right into your DAW, with carefully designed features.
The Pitch-Tracking Modulation, unique to Graillon, changes the type of speakers, generates throat sounds, creates choruses, make octaver sounds, enriches a voice to make it more masculine.
The Pitch Shifter cleanly transpose a voice up and down, and has been optimized for voice.
The Pitch Correction module brings an immediate robotic sound, while the Bitcrusher addition softly add sparkles to the mix.
.
GVST Gsnap - AutotuneGVST Gsnap - Autotune
Free VST pitch-correction. Use with subtle settings to nudge off-key vocals back in line. Extreme settings can create sounds like the famous T-Pain or Cher effect.
MIDI control mode allows you to fit a recording to a new melody.
.
For enhancing the sound right afther you placed some EQ, followed with Vinylstrip there is quite a few Channel Strips around on the market. But Vinylstrip has some mind of its own and just sounds good. The distortion, Comperros and Tilt EQ are good to get some sound breaking forwards. Reverb, the Bit mixer even Gain and Mix, make it very handy to have as a second improvement tool on samples or channel tracks. It is gettting you sound more outward and in front and crispy as you like, not to over due it. Also the Vinyl part as adding dirt and clicks is very wierd to destroy your sound with it, but it works to have some grain dirt added to an otherwise clean sound.
Vinyl Strip is a cracking plugin, ideal for treating individual channels and processing whole loops/groups. It does exactly what it sets out to, with the added bonus of offering five versatile mixing tools, so even if you're not looking to bring the sound of classic wax to your productions, it's highly recommended. A multi-effect plugin featuring 6 modules: Distortion, Compressor, Bit Crusher, Tilt EQ, Vintage Reverb, and Vinylizer. The modules can be arranged in any combination by simple drag-n-drop. Vinyl Strip will add life and an old school touch to your samples and tracks, and achieve that classic vinyl record sound in your digital environment. The plugin is optimized to be lightweight on the CPU.
.
Just because the original Roland Space Echo is used on may Reggae and Dub records, it is just about the ultimate vintage reverb around to get something started. Unlike other Reverbs this has Delay and more and consist of a sliding tape accross tape heads, very adjustable and syncs good. And to get that other wierd stuff just fiddle around with the knobs or use the random button.
Outer Space is a faithful emulation plugin of a famous vintage tape echo made in the early seventies. As the original unit, Outer Space features a tape echo section with three playback heads and a spring reverb tank. We have modelled three different tape frequency responses and saturations, along with all the analog imperfections of tape recording/playback. We’ve also modelled the ballistic response of the delay rate (repeat rate) which can create eerie pitch shifts (due to the Doppler effect), one of the classic tape echo-based sound effects.
.
For adjusting there is one forgotten thing, that is tuning. You music needs to be in Tune. Guitarists tune their instrument before playing. And with VSTi Instruments around, you might think you sound is tuned allready ? Wrong. In some cases yes, some NO. You should check and correct false tuning. That is why i use Sampling with Halion. And it works so well if all is tuned and you mixes improves greatly if all is tuned correctly.
GTune is a chromatic instrument tuner which operates much like similar hardware units. It will automatically detect the pitch of a note being played, and display the closest corresponding Western scale note. You then change the pitch of your instrument, using the "LED"-like indicators and the numerical read-out in order to bring your instrument quickly and accurately into tune.
.
Are you recording Youtube Video's or do you have a blog on the net ? Do you have a problem that the microphone is not working (not recording or no audio ?) or have problems when you start another audio application on Windows while recording the ScreenVideo ? Ever had problems wanting te record your voice with Video or running a DAW at the same time ? Yes, i managed once to get a voiceover microphone working while recording a video and then running audio software that blocks the soundcard. Even with a microphone working, there can be lagg and latency even stutter comming from the computer or soundcars. This plugin vor Windows soundsystem (so usefull for everyone) and has the routing you need, like routing a microphone from a soundcard to the systems record channel or output, so you can here it while explaining (recording a video) and have a program like Cubase use the same soundcard. Voicemeeter is Audio Mixer Application endowed with Virtual Audio Device used as Virtual I/O to mix and manage any audio sources from or to any audio devices or applications. So it works and does the job well.
.
The savior is here! When need of sub material like on Basedrum, Base or other instrumets Voices, the BX_Subsynth from Brainworx is like the holy grail. It creates from the incomming signal a 2nd and 3rd lower sub synthesis frequencies and a upper part. Basically when you dont have a Base that has the power, you can add it now and make you music much stronger (it has the options to overdue it). And there is also the Monomaker, that makes frequencies Mono below a cerain setup frequency. Pricy but essential for most amateurs that don't know how to fix or create LOW frequencies and a must have for anyone mixing or mastering music. It can add sub warmth even where there seemed to be none, in a mix or even on a master.
bx_subsynth is the Holy Grail for bass fanatics. Integrating a mix of classic and modern processing, this 10-ton beast gives music tracks, cinematic special FX and DJs’ sound systems a bottom end that goes all the way to the Earth’s core! Bass EQ can’t do what bx_subsynth does. The discrete frequencies bx_subsynth generates leave more space across the bass-frequency band for other instruments, letting you jack up subsynth’s bass without muddying your mix. Plus, EQs can’t boost bass in a thin track that doesn’t have any bottom to begin with. bx_subsynth doesn’t just boost—it adds new bottom! And whereas psychoacoustic bass processors trick your brain into hearing phantom subharmonics that don’t actually exist—and which you can’t feel—bx_subsynth adds real sub-bass that will shake your body like an earthquake!
.
Redux is a great sampler that you can use with Renoise of any DAW or VST host. The twist and good things are, manipulation and easy sounds. Just like Renoise you are up and running fast and will love this otherwise cheap sampler. If you have Renoise get Redux with it. If you need an affordable sampler that works well, get Redux. But when you want support / updates and a good forum, look somewhere else and then dont get it.
Redux is a sample-based instrument, combined with a powerful phrase sequencer. Enjoy the full-featured MIDI implementation and performance-friendly features, for the first time available outside of Renoise. The sequencer in Redux is closely integrated with the instrument, and used to create musical phrases. These phrases are controlled via notes and program-change events, and allow you to alter the playback in a variety of ways.
.
A special mention is Acid Pro. For magling audio and set tempo adjustments for audio files (creating loops) and to have all audio files aligned to one tempo, this is great good software.
All the classic ACID Pro features including real-time pitch/tempo transposition during playback and preview, unlimited tracks, and our signature pick/paint/play interface. ACID Pro 7 software also includes 90 virtual instruments so you can start creating music right out of the box. ACIDized loops are more than just audio files. They contain information on length, transients and even key of the samples. ACID analyses the file and uses the information to manipulate the sound and pitch with ease. DAW powerhouse that combines full multitrack recording and mixing, MIDI sequencing, and looping functionality for a seamless studio production environment. More creative partner than production tool, ACID Pro 7 software inspires like nothing else. With its Transparent Technology design, ACID Pro 7 software removes typical barriers to the creative workflow so you can effortlessly transform ideas into real results. Experience unparalleled MIDI sequencing in ACID Pro 7 software, with real time MIDI processing and precise control over MIDI events. Use track envelopes to automate and modify modulation, expression, or other types of MIDI controller data.
.
Native Instruments - Traktor Pro DJ
Just because i am not a DJ but creating music with a DAW, i was allways interested in DJ software and many of us like to be a DJ. For wannabees and home recorders (and offcourse the real DJ), the Traktor software is making a DJ of you and anyone! So many DJ software out there. Traktor is just great Dj software that can also be controlled by a DJ controller or Midi Controllers. The main part for me is when i create music in a DAW, i can also export audio mixdowns and control that with Traktor and a DJ controller. And that is so much fun! And i record audio samples (recodring your DJ set in Traktor). Cut samples from them and then re-use them inside my ongoing track in a DAW like Cubase. So for anyone, i can say fiddling around with DJ software is great for fun and gets you samples that are usefull.
Customizable 4-deck interface and streamlined workflow were designed with the professional DJ in mind.
Create on-the-fly remixes with powerful cueing and looping. Add drama and tension with the industry’s largest FX suite. Maximize your mix with the fully customizable, versatile interface. Mix tracks, loops, Remix Sets, Stems, and live input to layer sounds and create unique DJ sets on up to four decks. Automatic beat matching keeps all four decks in perfect sync, giving you more time to get creative with your mix. Jump to key points in a track, like builds and drops, to create unique edits, or simply start it from a favorite point. Set loops, change loop length, and set hot cues on-the-fly for each loop, to instantly remix a track. Creatively mash up a track with stutters, chops, and rolls without losing your relative position on the track. Create dramatic buildups and drops with over 40 tempo-synced FX across four units, including Beatmasher, bit crushers, filters, and more. Sample your favorite audio loops directly from playback to create unique remixes and re-edits instantly with Remix Sets. Stems is a new audio file format that splits tracks into channels based on four musical elements: bass, drums, vocals, and melody, for example. This makes it easy to mix in innovative ways or create spontaneous edits, acapellas, instrumentals, and more, with each track element available independently. In Traktor Pro 2, each stem is visible as its own waveform, thanks to the Stem View.
.
A good mention is having a DJ controller for DJ software. The Vestax VCL100 i have for many years now is so robust and with the touch wheels very creative controls for any DAW or DJ software. Not to mention Native Instruments own controllers and the sound mangler Machine Software with a controller. All good fun and creative in the same time, DJ your own tracks or parts like Bass, Drums or any audio, you can manipulate in realtime and creat funny effects that you never come accross. A real DJ set or Software Controlled DJ ? Wel software like Traktor is not expensive like having a Pioneer set in hardware. And a DJ Controller or Midi Controller should be not that hard to find and pay for. So home users can now be real DJ's. And with a Laptop running the software you can even do real DJ sets and get payed for. Eh ?
.
Native Instruments - Traktor S4 MK2 Controller
I allways loved the Traktor software.
And being a DJ was allways nice but nowdays everything changed that anybody with some cash can buy a laptop and a DJ controller and actually bee a Deejay. Not only great fun but remixwise when creating or making your own tracks, the controller and DJ software can help you get surpricing results. The S4 MK2 is sturdy build and is designed very well, also the price is good and the Traktor 2 software is very good, combining hardware and software with this controller, you cannot go wrong. As i like sampling veru much for my own music, this is a creative option to record while just busy having fun with this setup.
The S4 combines a premium 4-channel mixer section, built-in 24 bit/96 kHz soundcard, an intuitive interface, and TRAKTOR PRO 2 software. Pro features, instant usability and go anywhere portability. Includes a versatile, wide-frequency response audio interface. Connect turntables, CD decks, instruments, MIDI gear – anything you need to kick your performance up a notch. Four full-featured, ergonomic mixer channels are each fitted with 3-band EQs, filter knobs, and two FX sends. Filters and EQs can switch between TRAKTOR, Xone, and other industry standard styles to fit your taste. Stems is a completely new way to DJ. A Stem file is an open, multi-channel audio file that contains a track split into four musical elements – bass, drums, vocals, and melody, for example. With each element available independently, you can mix in ways that just weren’t possible until now. Create instant on-the-fly edits, mash-ups, a cappellas, and more with hands-on creative control. TRAKTOR PRO 2 is the choice of countless professionals worldwide. Get in-depth control of your music with up to four software decks, customizable interface, and advanced track library management. Trusted by countless professionals worldwide, offers more pro DJ features than ever. Sync with other devices using Ableton Link for seamless back-to-back sets, or to create your dream performance setup across different devices. And get set up at the club fast connects seamlessly to the latest industry standard hardware from Pioneer and Allen & Heath. The layout is designed for perfect integration, all controls feel familiar right from the start. Easily access transport controls, cue points, and trigger loops or Remix Decks. Plug and play control of TRAKTOR PRO and TRAKTOR DJ for iPad and iPhone means the S4 is in perfect synergy with the software – no mapping or control assignments necessary. And if you want to customize it, freely assign unused controls to parameters of your choice from the preferences, all while preserving original plug-and-play mapping.
.
If you are a DJ or becoming a DJ, you need tracks that sound alike and within about the same Musical Key. Mixed in Key is a software program that scans you music collection and sets Musical Key values in the ID tag or within the software you use. Like Traktor DJ (Native Instruments) Mixed in Key generates more info on all tracks. The easy way to find music that kind of matches to each other is a great help for all DJ's struggling with what to play next and not to fuck'up a DJ set while playing live. Great tool at a good price. The softwate comes with some flaws, if the audio file read is bad the software will crash or get stuck.
Become a Master of Harmonic Mixing with the Camelot Wheel. The world’s best DJs use Mixed In Key. It analyzes your files, and helps you use Harmonic Mixing so you will sound perfect in every DJ set. Use all the cool tricks used by pro DJs. Use Mixed In Key to prep your music! Mixed In Key scans your music files and shows you everything you need to play a great DJ set. Use our exclusive Key Detection. We save Mixed In Key results in two different formats, like C Minor or "5A".
.
A side by side companion is Platinum Notes and Mixed in Key. Platinum Notes is a one drop fix for audio files alike MP3 that will level each track towards a prefered setting -12.5dB or as set by the user. Second it can correct pitch of the track. The feature to add warmth i have disabled. It takes your music collection and levels it to the desired level set. Corrects all peaks and clips, it can also retune or repitch the track. All in one single pass and some waiting time. Your music collection is set at a good level for listening, especially for DJ's this is very good thing. One thing, the program does have some flaws. The first one when an original MP3 or file was not written correctly beforehand, PN can crash or present an Error. Well this means something is wrong with the original file. Out of 1300 files i first put in, 100 files where bad. So it is kind of easy to pick them out, when crashed see what files are written or not written, so you can see the files that are bad. The error files reported by PN are mostly without any header on the MP3. Long files like DJ mixes can crash the software also, try to avoid them. Not saying PN is buggy, it will get stuck or crash only on files that where bad in the first place. So it will sort out the files that are (where bad beforehand) and now you can do something about them. Also the version PN4 seems a bit old and not updated.
Drop in your music files. Platinum Notes will make them sound perfect. Platinum Notes uses studio filters to process your files. It corrects pitch, improves volume and makes every file ready to play anywhere - from your iTunes to a festival sound system. We designed it to work with music from Beatport, iTunes and other stores. Even if you buy WAV files, Platinum Notes will improve them. Created by the developers behind Mixed In Key. It is currently used by the world's best DJs. Add Warmth to your music for a beautiful analog sound. Visualize the results of Platinum Notes processing at a glance. Save files to MP3, WAV, AIFF, Apple Lossless, or FLAC.
Streamripper Plugin and Frontend
Streamripper is a plugin that can be added to many music players like Winamp or Musicbee, as long as the player supports external plugins. When you open or listen to your favourite radio station online by streaming, you can rip the tracks with Streamripper. Streamripper will save each track as MP3 with their name. That means you can rip hours of music, to your hard drive. This is a very handy plugin for people who need music that might be else not available. It was for me the best way to collect Reggae Dub tracks, that else where almost impossible to download or find. The best thing Streamripper is easy to setup and does all ripping’s automatically, just choose your favourite radio station, start Streamripper! Also there are several front end applictaions for streamripper. Though i never used them, i only use Winamp and that works like a dream.
Streamripper was started sometime back in early 2000. Streamripper started as a way to separate tracks via Shoutcast's title-streaming feature. Streamripper has now been expanded into a much more generic feature, where part of the program knows at where one track starts and another ends, thus allowing a mp3 decoding engine to scan for a silent mark or name mark, which is used to find an exact track separation. Streamripper is now part of the FreeBSD standard distribution, mentioned in the Linux MP3 HOWTO. Known to compile on many platforms such as Linux, Windows, FreeBSD, BeOS, OS/2. File sharing protocols such as Napster, Gnutella, Mojonation and Freenet, the Internet user can download nearly any mp3 he wants in a matter of no time.
Streamripper allows you to download an entire station of music. Many of these mp3 radio stations only play certain genres, so you can now download an entire collection of online radio stations, whatever you want.
.
A free software tool to validate and fix MPEG audio files. When you want to scan you MP3 collection for errors, the MP3val tool is great for that. It fixes most MP3 errors and at least show you MP3’s that are good and MP3’s that are bad in you collection. It is an older MP3 utility, but it is still recommended!
MP3val is a small high-speed free software tool for checking MPEG audio files integrity. It can be useful for finding corrupted files like incompletely downloaded, truncated, containing garbage. MP3val is also able to fix most of the problems. Being a multiplatform application, MP3val can be run both under Windows and under Linux or BSD. The most common MPEG audio file type is MPEG 1 Layer III mp3, but MP3val supports also other MPEG versions and layers. The tool is also aware of the most common types of tags (ID3v1, ID3v2, APEv2). The core component of MP3val is an application with command-line interface. There are also two graphical frontends for it. MP3val-frontend is a native Windows application.
.
This is a very handy MP3 tool that gains all you MP3 collection towards a normal volume setting. Basiclally i use a setting of 93,8 dB standard is 89 db. While 89 dB is too soft, 93,8 dB seems quit OK. It scans all MP3 files and suggests a gain value that is been written into the TAG of the MP3, most players use the TAG info and use the advised Gain. So you MP3 collections plays without differences in volume or loudness.
Tired of reaching for your volume knob every time your mp3 player changes to a new song? MP3Gain analyzes and adjusts mp3 files so that they have the same volume. MP3Gain does not just do peak normalization, as many normalizers do. Instead, it does some statistical analysis to determine how loud the file actually sounds to the human ear. Also, the changes MP3Gain makes are completely lossless. There is no quality lost in the change because the program adjusts the mp3 file directly, without decoding and re-encoding.
.
Allright for all MP3 collections to rename fast and group them Artist - Trackname and set them a Genre. To add album covers, just to enhance fast your MP3 collection. It is free and is ver very handy. It allmost work like Total Commander in some ways. Mp3tag is a powerful and yet easy-to-use tool to edit tags of several supported audio formats. It can rename files based on the tag information, replace characters or words from tags and filenames, import/export tag information, create playlists and more. The program supports online free db database lookups for selected files, allowing you to automatically gather proper tag information for selected files or CDs.
The MPC Beats software is free to download, that is a very good thing. Though i worked only for a short time, this has got a lot to offer for free. I was able to play from my USB midi to the MPC Beats software and there was a very good piano keys inside. The software looks good and works good. So absolutely when you are an Akia fan or MPC fan download it. If you want to try MPC Beats surely it is free and it is very good, works well and you get a lot of sounds also with it. Though not yet fully tested it, i can recommend it, because it is free and it seems to be good.
Presenting MPC Beats, the fully featured, beat-making software based on the legendary MPC workflow to quickly make great sounding beats. From the moment you install MPC Beats, you're ready to start creating. Remix one of the included songs, or start off with a genre template like Trap, Dance, Pop and more. Start fresh and select from 2GB worth of content, including samples, loops, and built-in virtual instrument plugins to craft your sound. With MPC Beats, you're in full control of your sound. Experience plug and play compatibility with all class-compliant USB controllers. From MPK Mini to M-Audio Oxygen, Alesis V-Mini and more, get connected with a large list of pre-mapped controllers to get completely hands-on with your beat making. MPC Beats has plenty of power for ambitious creators. Over 80 audio FX plugins to warp, manipulate and transform audio into whatever you can think of. Plus VST and AU compatibility means there's room to expand your sonic palette with compatible third-party virtual instrument plugins and audio processing plugins. You can even record instruments or vocals with 2 stereo audio tracks to add live elements to your music.
AAMS Auto Audio Mastering System V4
AAMS V4.x is freeware to Download, with high encouragement to Register AAMS V4 Professional Version.
Buy AAMS V4 Professional Version!
AAMS V4 Professional Version direct pay and download!
AAMS V4 Professional Version direct pay and download!
![]()
Registration ensures users to have all functions and options opened, having full control!
The price of AAMS V4 Registered (Pro) is 65 Euro or about 75 Dollars.
![]() Pay with a Bank or Credit Card with PayPal
Pay with a Bank or Credit Card with PayPal
![]() Pay with a Bank or Credit Card with PayPro
Pay with a Bank or Credit Card with PayPro
Fill in our Contact form for Registrations or Questions. Or go to our Shop!
AAMS Auto Audio Mastering System
The license and keycode are for all versions of AAMS V4 and upcoming V4.x versions.
User Registration is needed for administration purposes only and offcourse to open all professional features of AAMS Software.
We do not use your user information for other purposes but to keep track of the license system, read our license agreement.
A single registration license grants you acces to all professional functions with a single AAMS V4.x version installed on one single computer you retrieved the installcode from.
So be sure you have AAMS software installed on the computer you need the License for, wise the given Keycode will only work for that computer.
Just understand when you buy for the first time a registration license and pay 65 Euro's for a AAMS V4 single computer licence, you are a registred and licensed user.
And when you send in the installcode, you will get an email with the corresponding keycode.
With this AAMS V4 registration as a user, you can register each extra copy on another computer of AAMS V4 software later on at a half price discount.
For AAMS V1 or AAMS V2 users there is a special Upgrade half price discount available towards all AAMS V4.x versions.
Please allow a maximum of 48 hours for us do our adminstration and send you the correct Keycode back.
To get send a invoice or have any questions, you can send an email or use the AAMS Contact Form below this website.
If you want to install AAMS V4.x version to another computer, you will get a different installcode.
Therefore the combination of installcode and keycodes given, are unique!
Each computer you install AAMS needs a seperate Full Registration License applied.
Therefore you can register a license for AAMS V4.x version for each single computer and it's installcode / keycode.
Every other computer (you have 2 or more computers) as a registered user there is a half price discount.
Because as a registred user can have one or more licenses at cheaper rates, but not the first license.
For AAMS V1 or AAMS V2 users there is a special Upgrade half price discount available towards all AAMS V4.x versions.
Use our contact form for any keycode or license questions.
With PayPal, you’re protected from checkout to delivery.
You can pay with your Credit card or with your Paypal account.
We spot problems before they happen with the latest anti-fraud technology.
Your financial info is never given away to sellers.
And if something goes wrong with your order, the order will be cancelled right away. 
Safe and easy online payment
With PayPro you can easily pay your customers. Furthermore, we would like to make it even easier with extra modules, links and plugins.
Guaranteed safe
The security of your money and the data of your customer are central to PayPro. We do not have a license from De Nederlandsche Bank and Currence for nothing. Moreover, our requirements go beyond all standard standards.
That is why you use PayPro
Your payments at PayPro go quickly, easily and safely.
Fraud prevention
We keep an eye on everything and constantly check what happens. Suspicious customers, IBANs and IP addresses are tracked to exclude risks.
Buy AAMS V4 Professional Version!
AAMS V4 - Registration Buy Now! then use our Contact Form for a Keycode!
Information Pages
 AAMS Auto Audio Mastering System - www.curioza.com
  AAMS Auto Audio Mastering System - www.curioza.com
  AAMS Auto Audio Mastering System - www.curioza.com
  AAMS Auto Audio Mastering System - www.curioza.com
  AAMS Auto Audio Mastering System - www.curioza.com
  AAMS Auto Audio Mastering System - www.curioza.com
  AAMS Auto Audio Mastering System - www.curioza.com
  AAMS Auto Audio Mastering System - www.curioza.com
  AAMS Auto Audio Mastering System - www.curioza.com
  AAMS Auto Audio Mastering System - www.curioza.com
  AAMS Auto Audio Mastering System - www.curioza.com
  AAMS Auto Audio Mastering System - www.curioza.com
  AAMS Auto Audio Mastering System - www.curioza.com
  AAMS Auto Audio Mastering System - www.curioza.com
  AAMS Auto Audio Mastering System - www.curioza.com
  AAMS Auto Audio Mastering System - www.curioza.com

